Codex: Ninjutsu spec

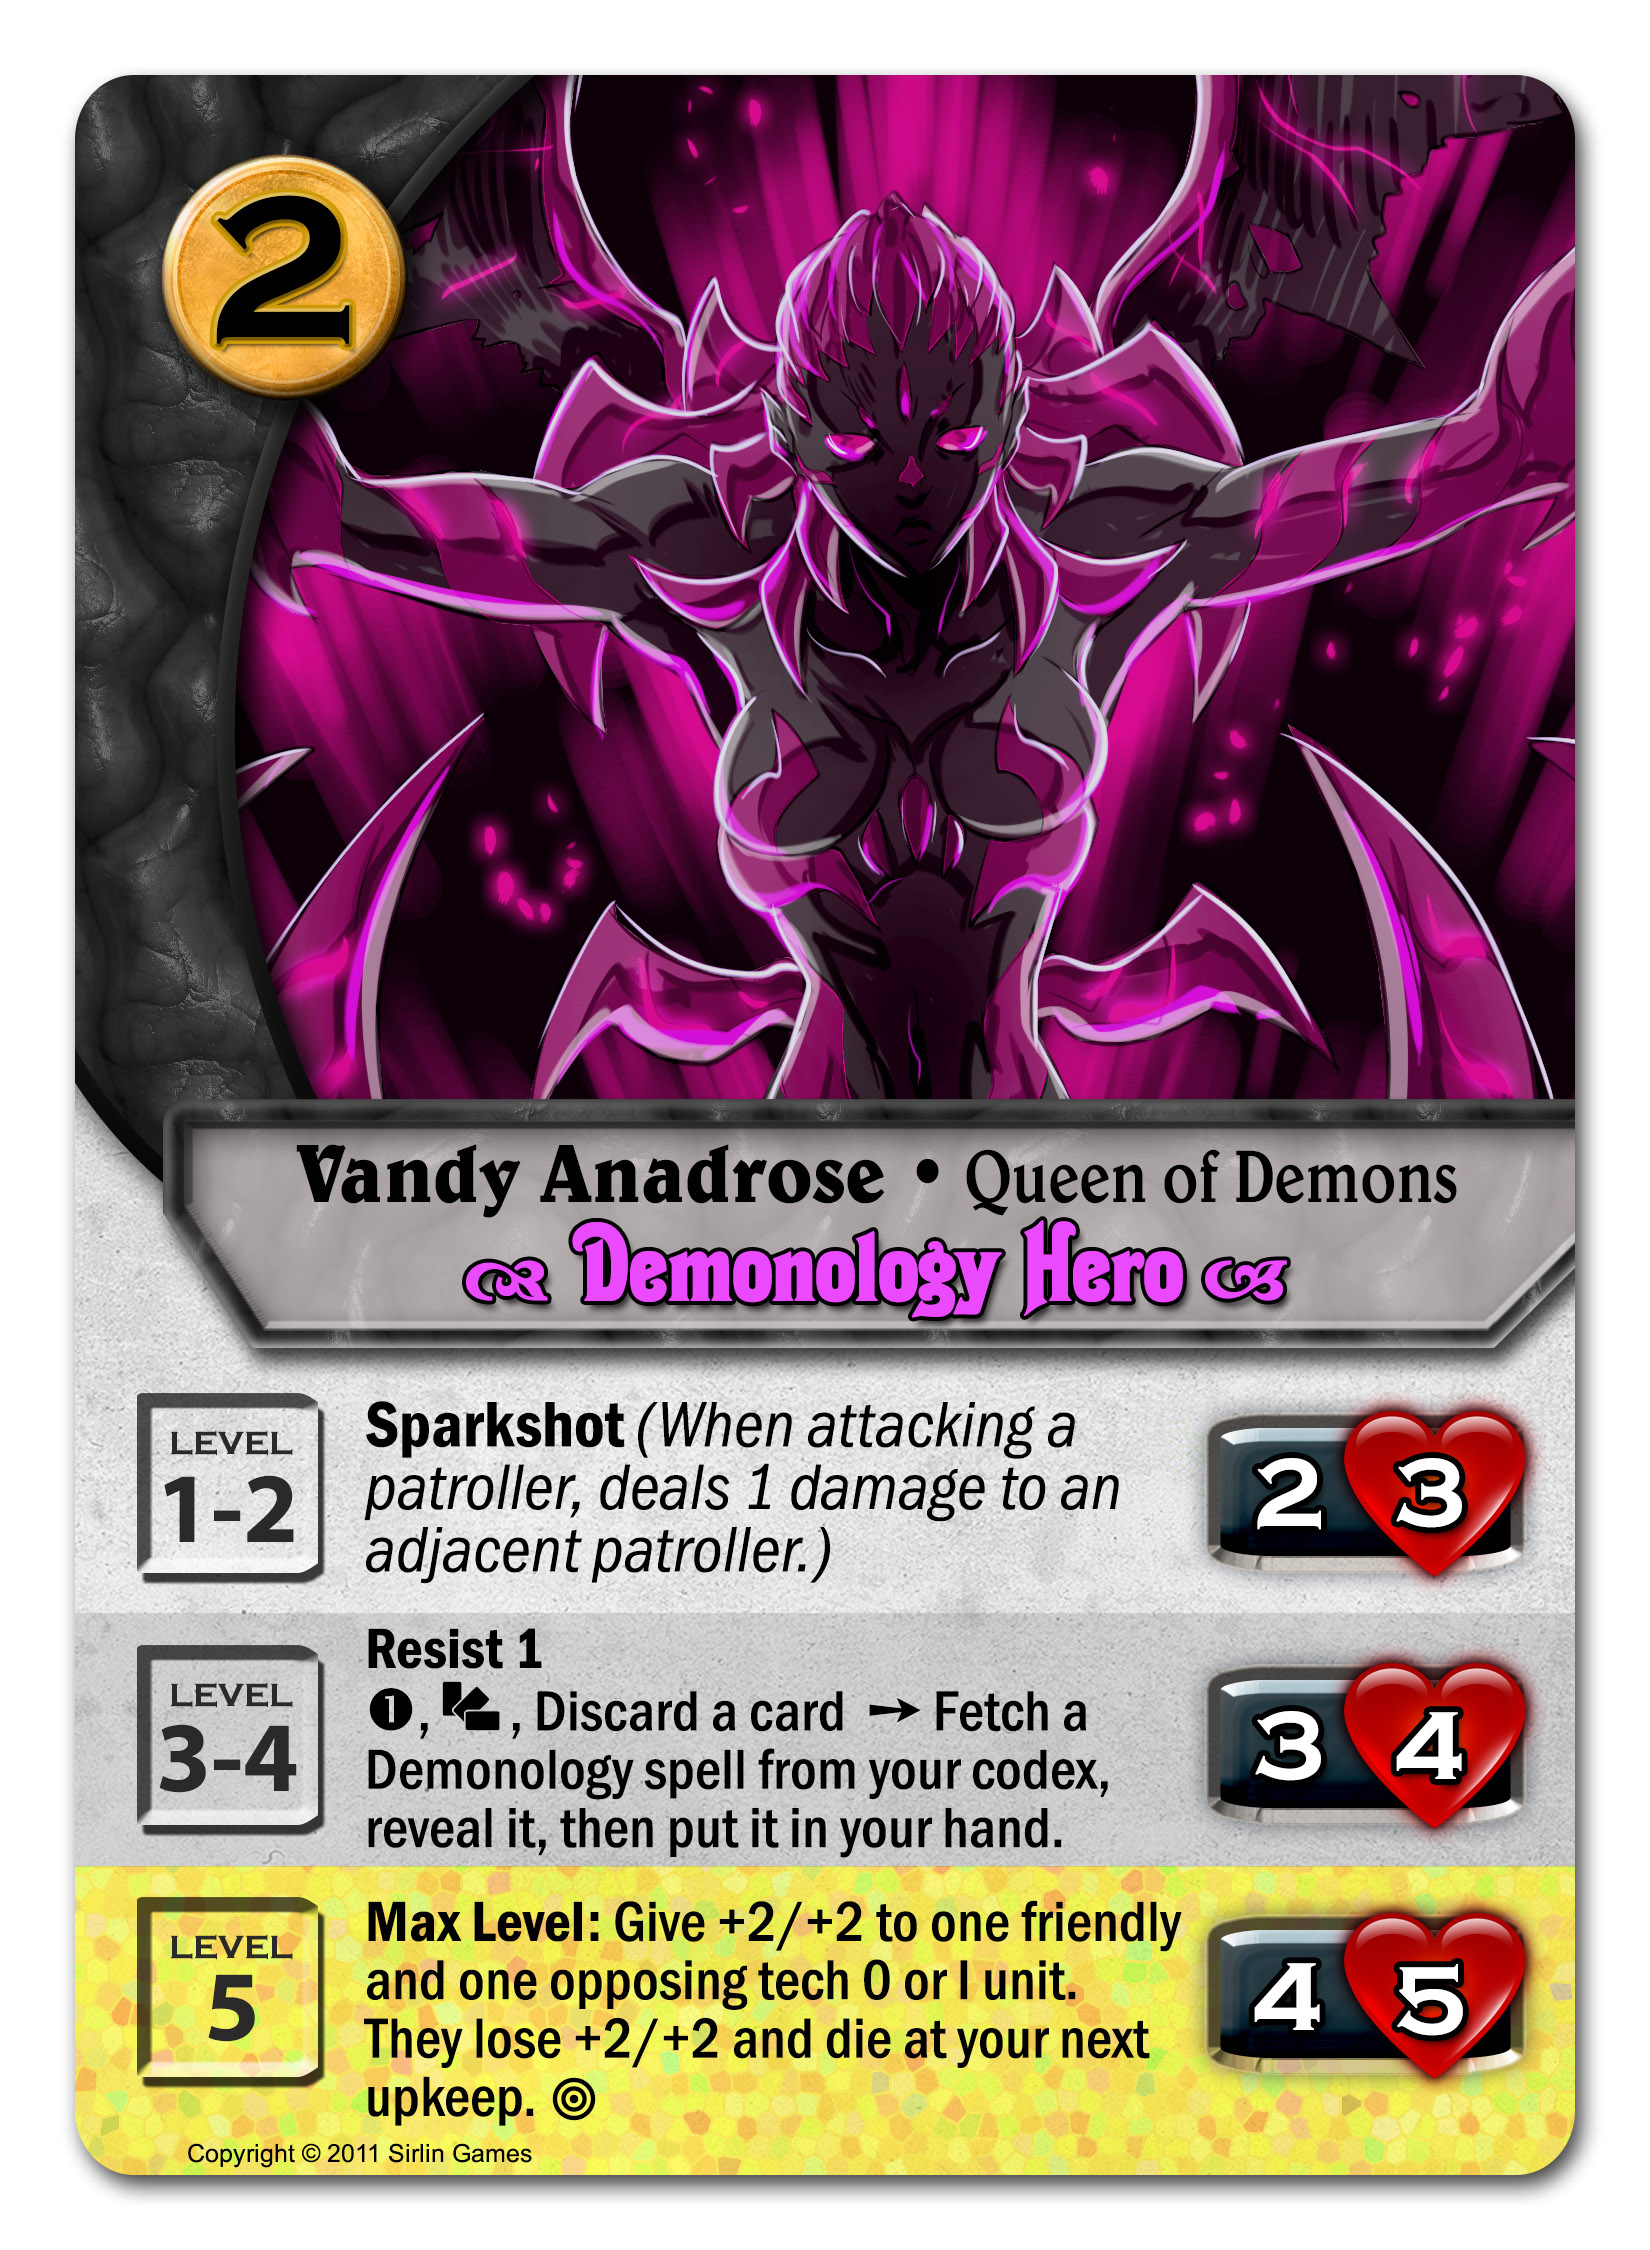
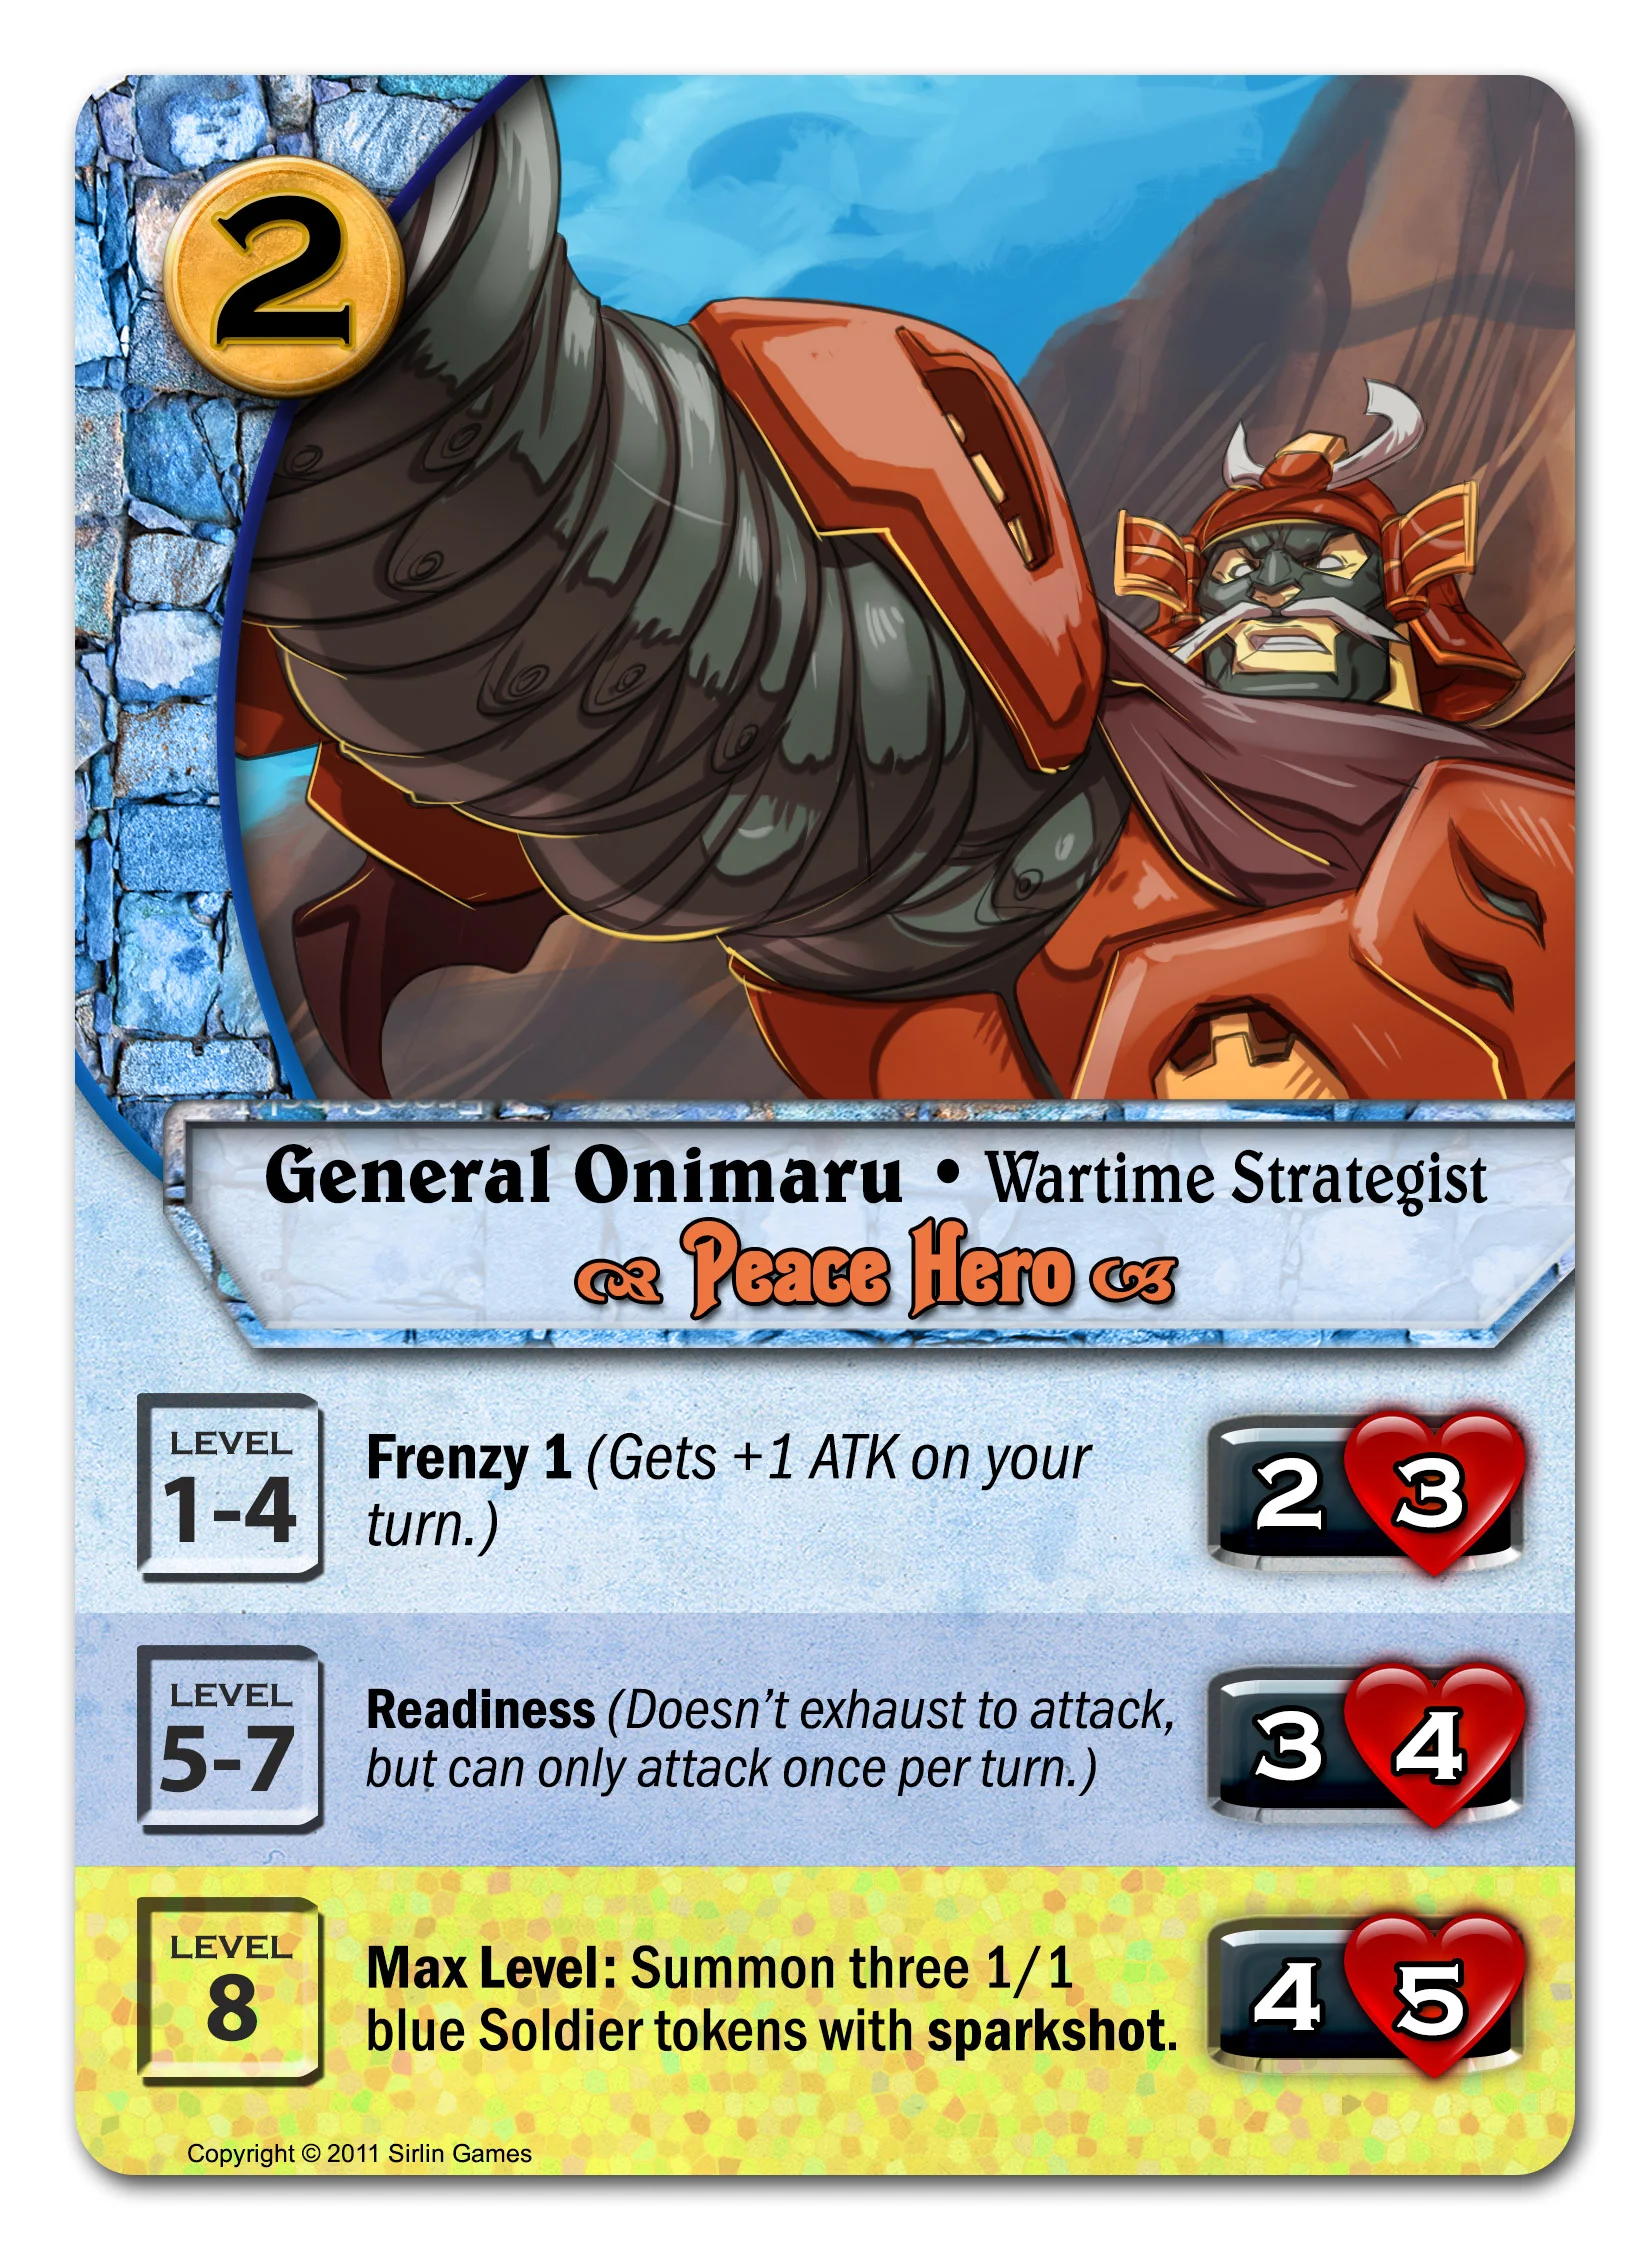
Setsuki is a fast learner and she’s fast in general. She’s the hero of the Whitestar Order’s Ninjutsu spec:


Her first ability reflects how nimble she is. She can jump out of the way of an attack unless the attacker is extra careful. Her middle ability can make up for her low stats. She’s fast enough to strike an enemy before it strikes her, letting her avoid taking damage. But it’s her max level ability that is truly powerful: drawing 2 extra cards per turn is A LOT.

You’ll normally play 1 worker per turn and 1 other card if you want to maintain your handsize of 5 cards. With a max level setsuki, you can play 1 worker and 3 other things without going down in hand size, so you’ll want a lot of really low-cost cards. That’s similar to how she works in Yomi too: you get to play a lot of cards, though each one is probably not that strong on its own. That said, killing a max level Setsuki should be a top priority for your opponents. They might get buried under all that card advantage if you keep it up.


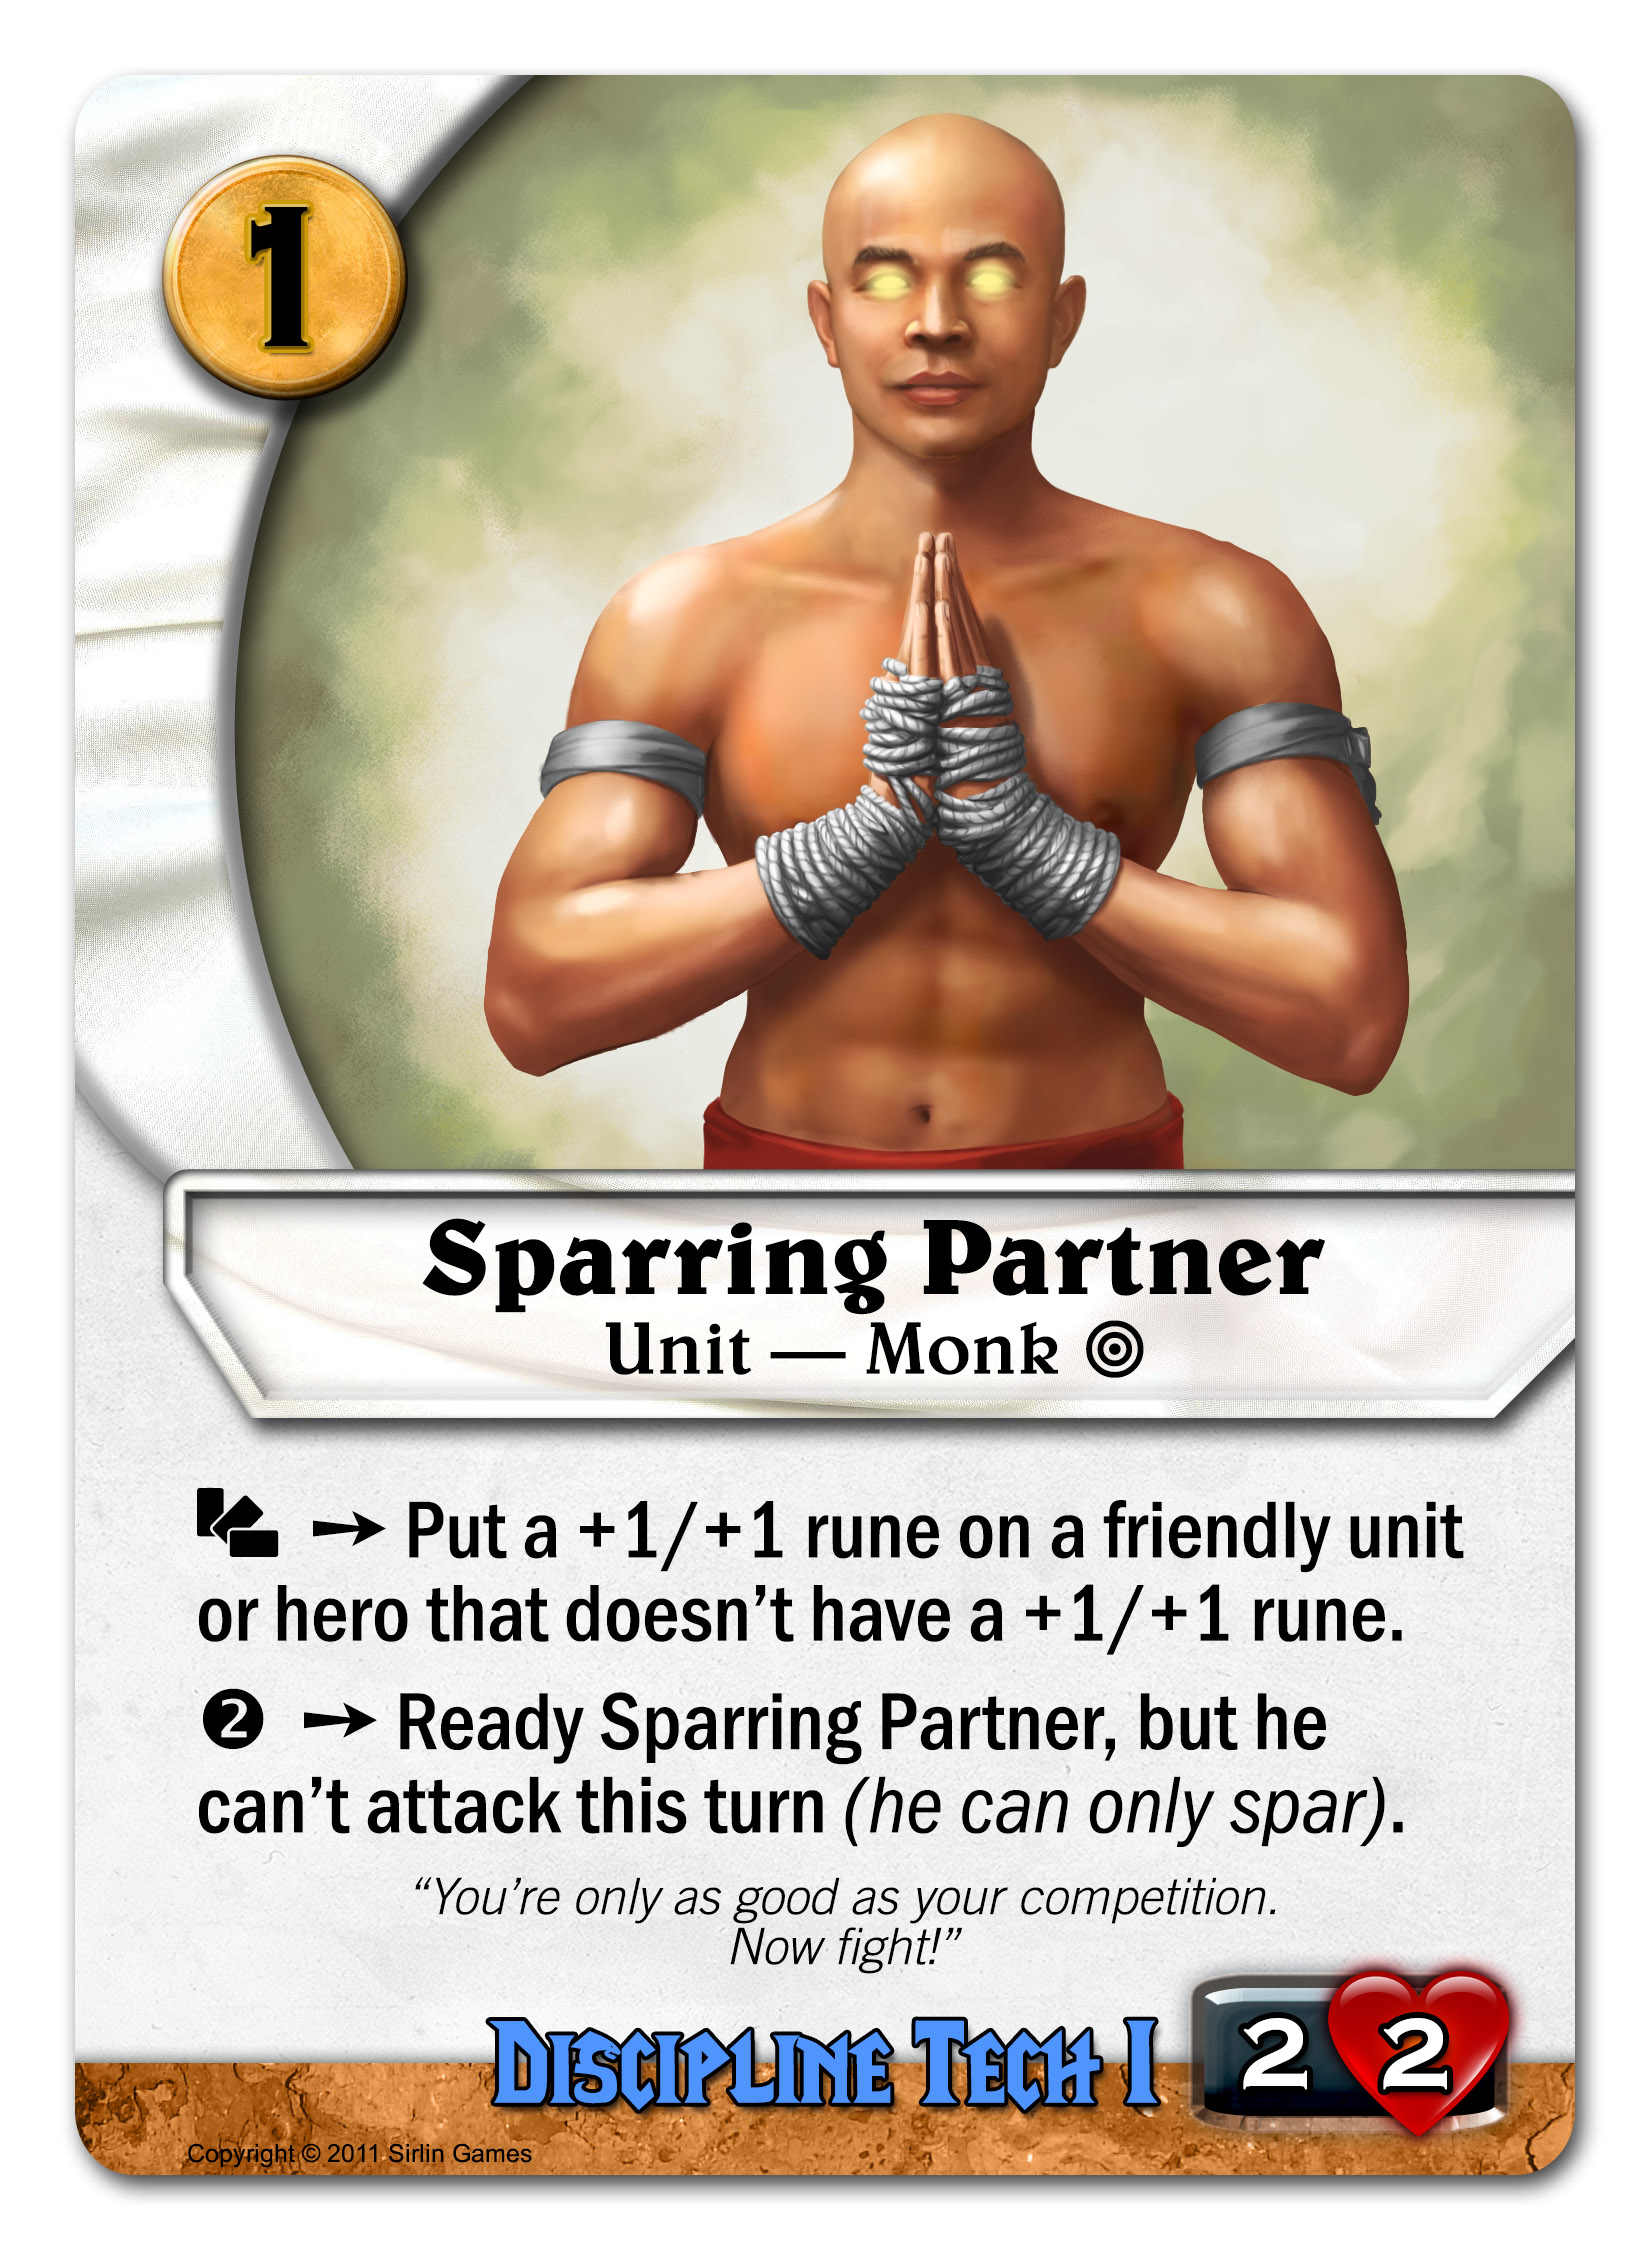
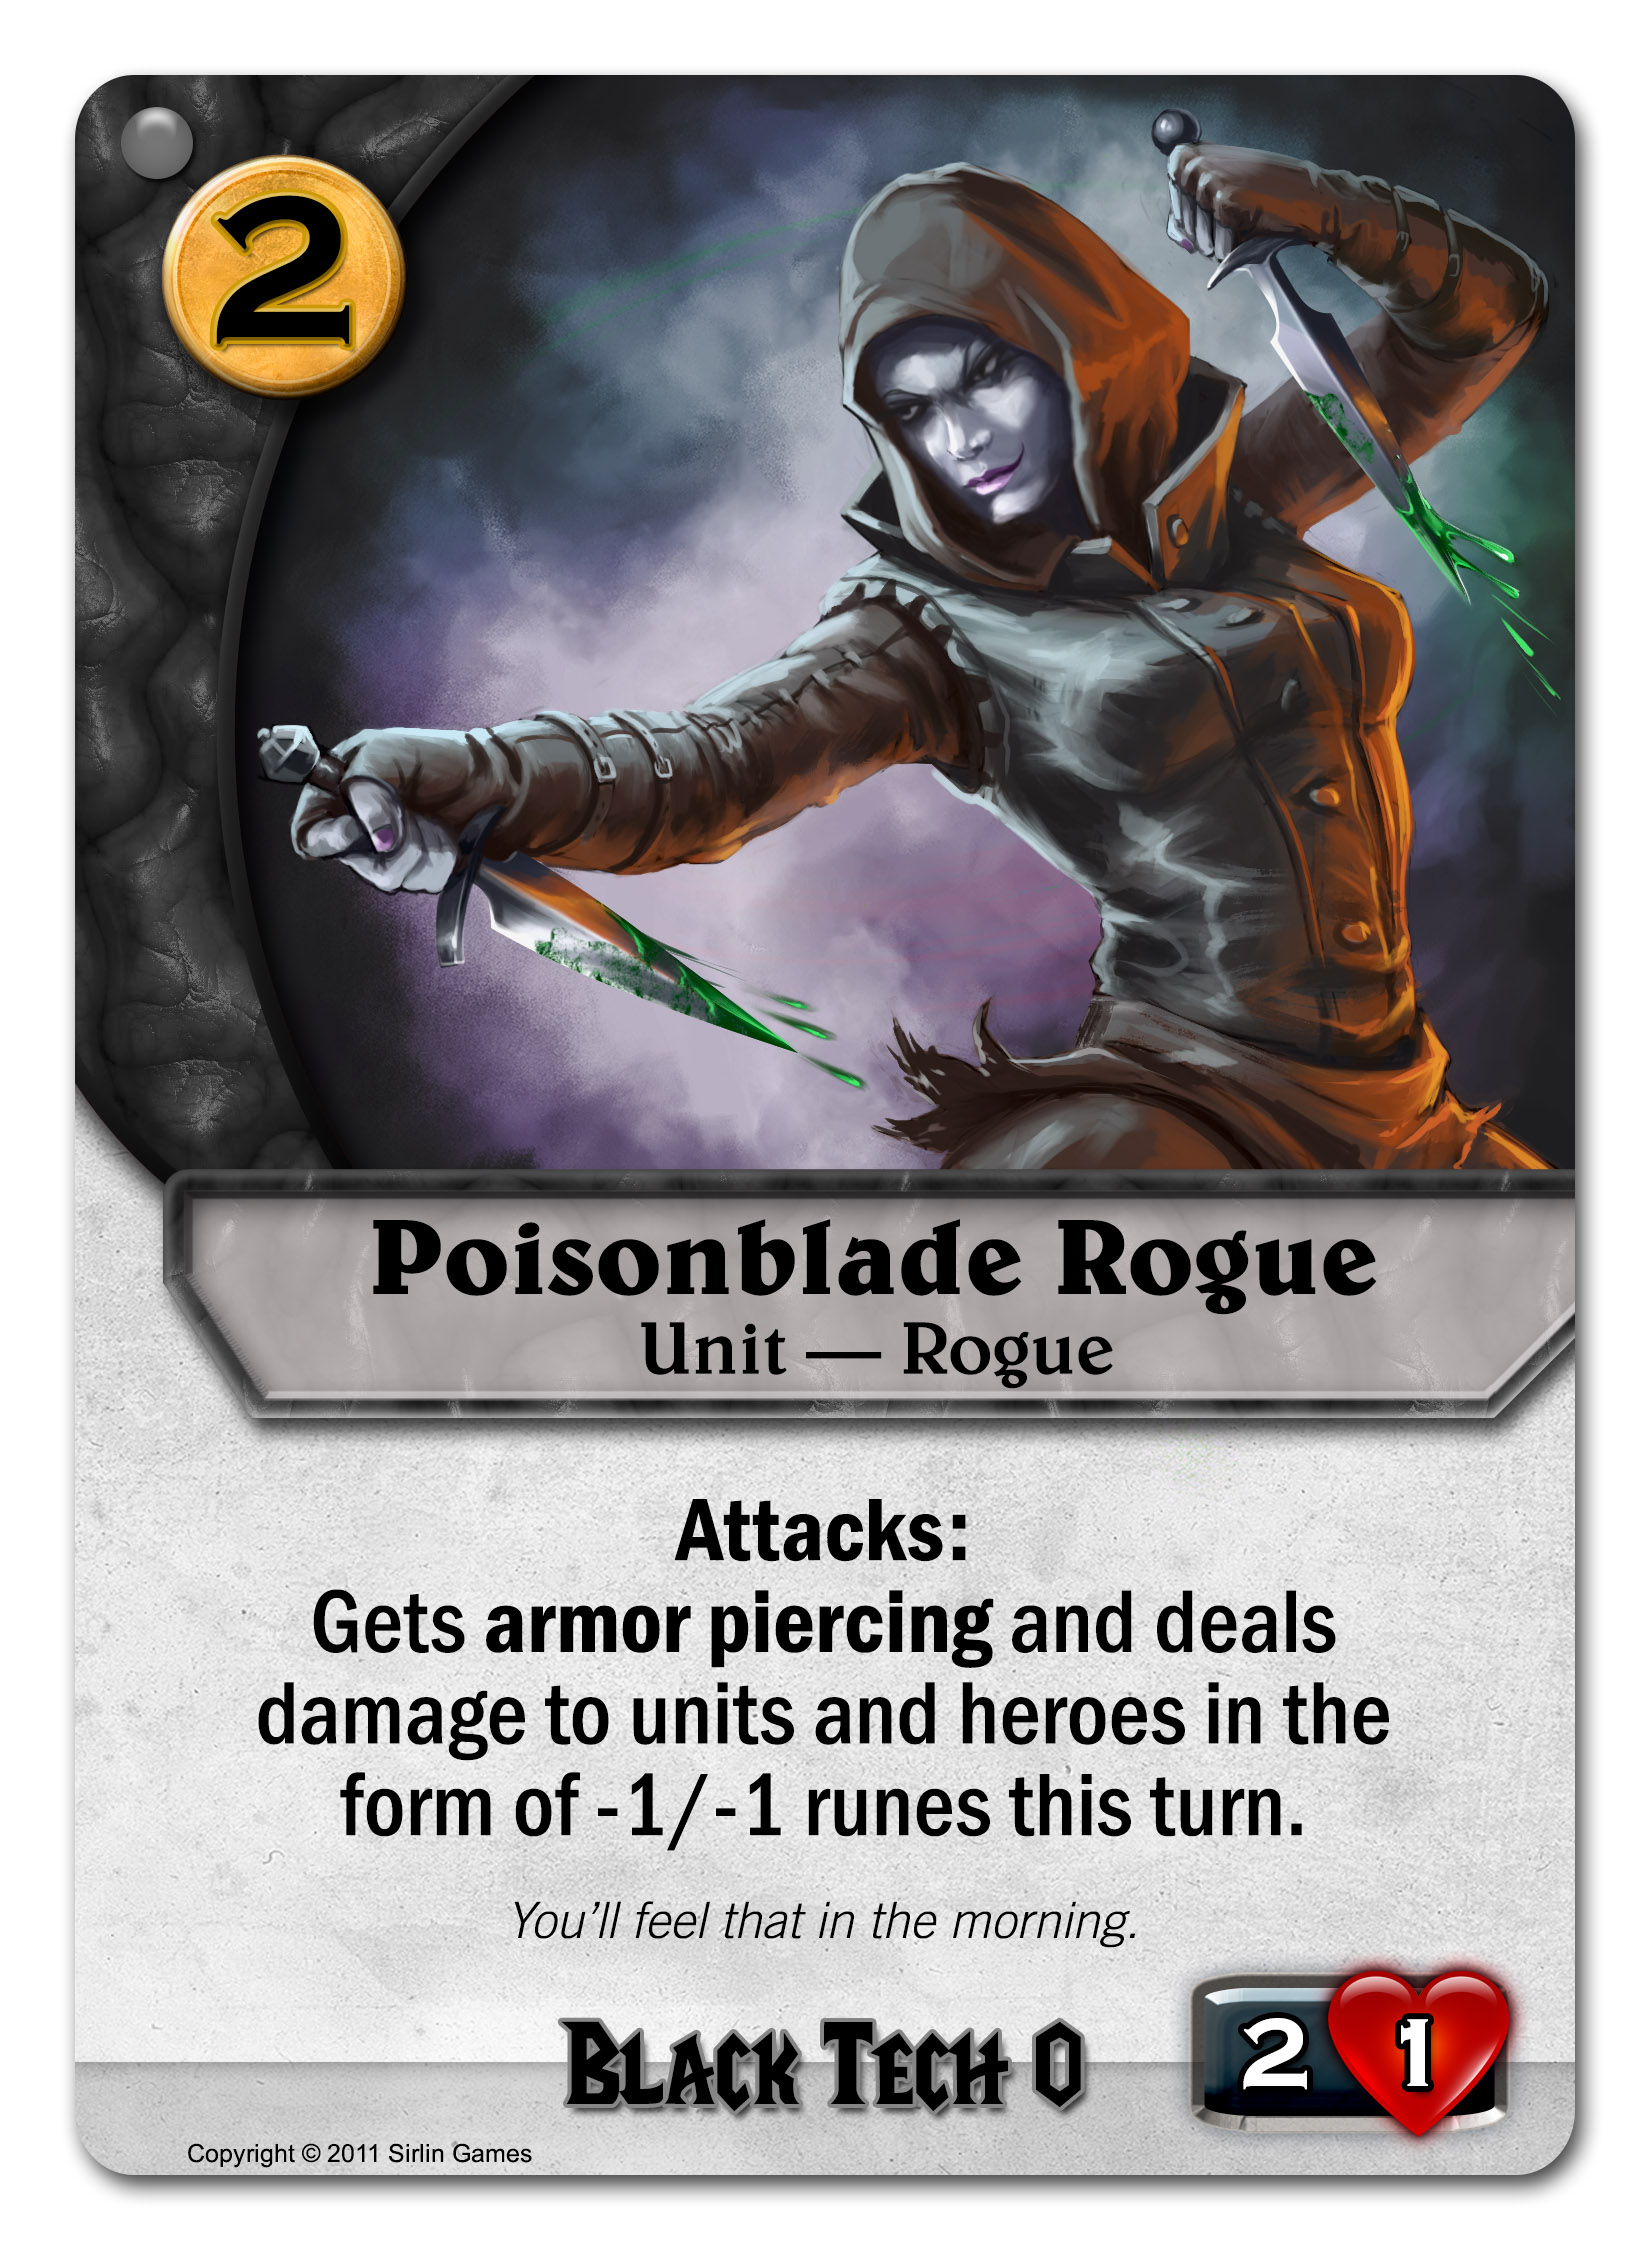
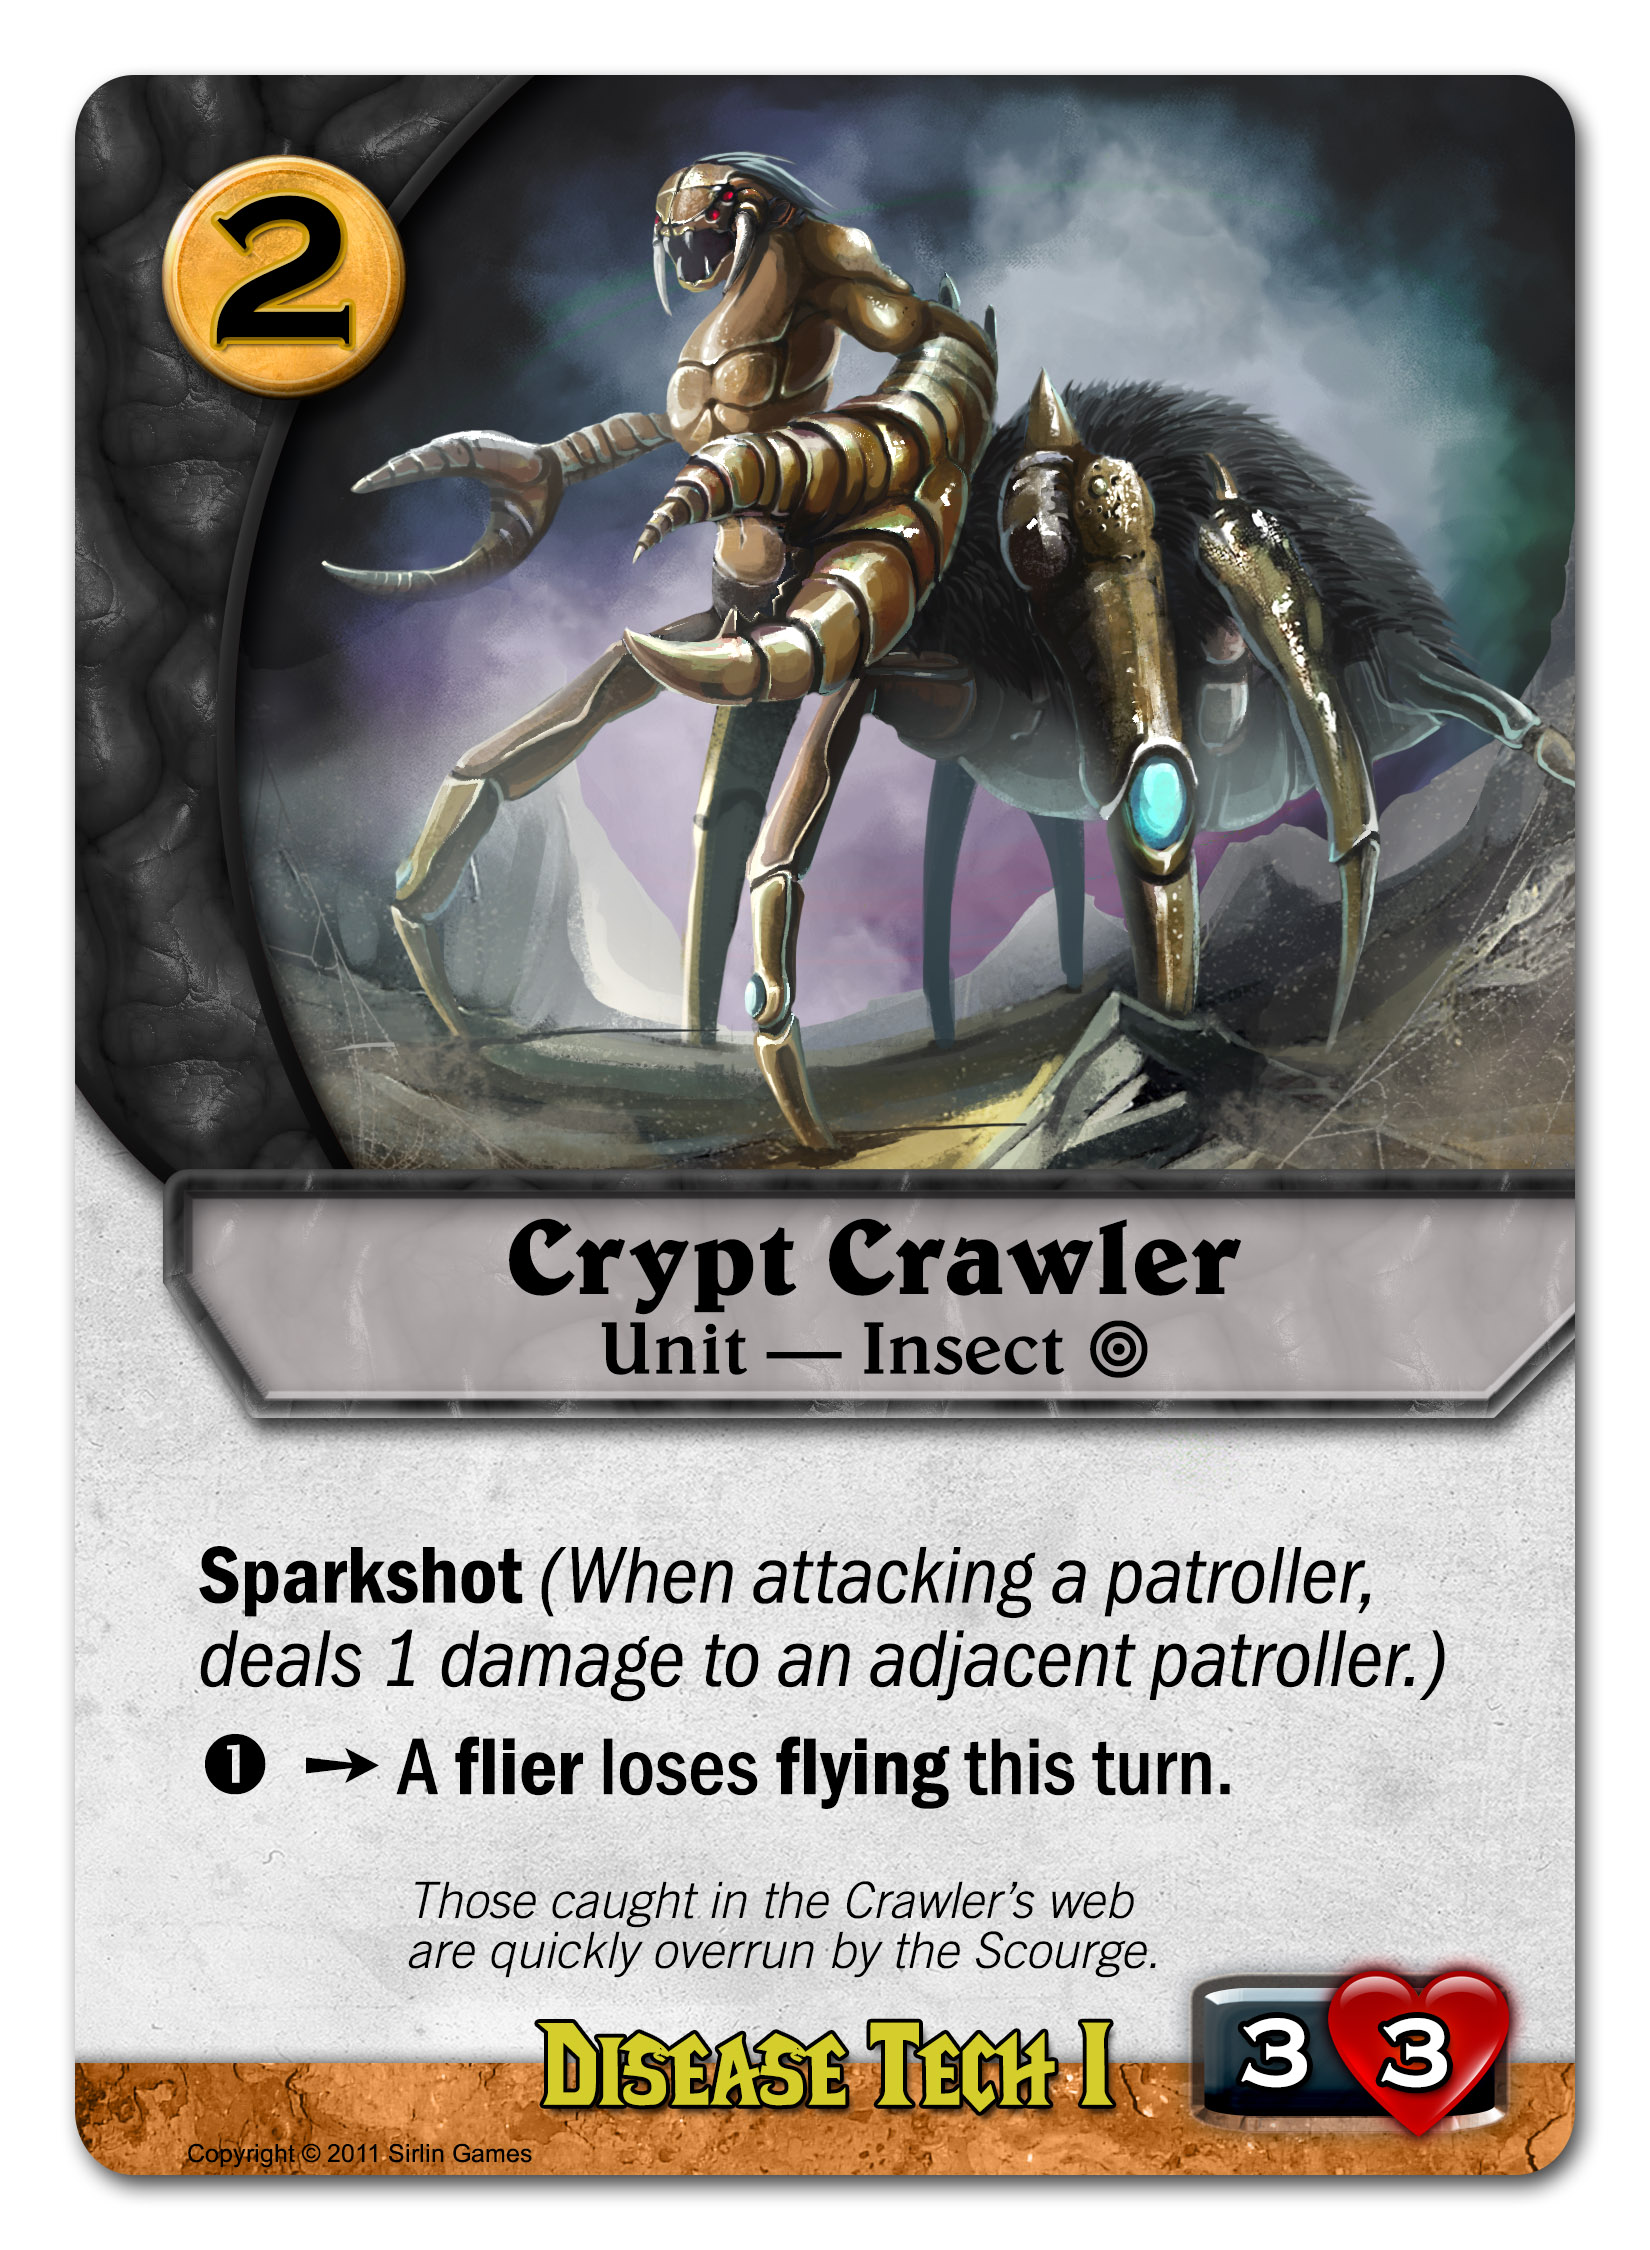
Setsuki has some early game Ninjas she can fight alongside. Here’s a simple one from the white starting deck:


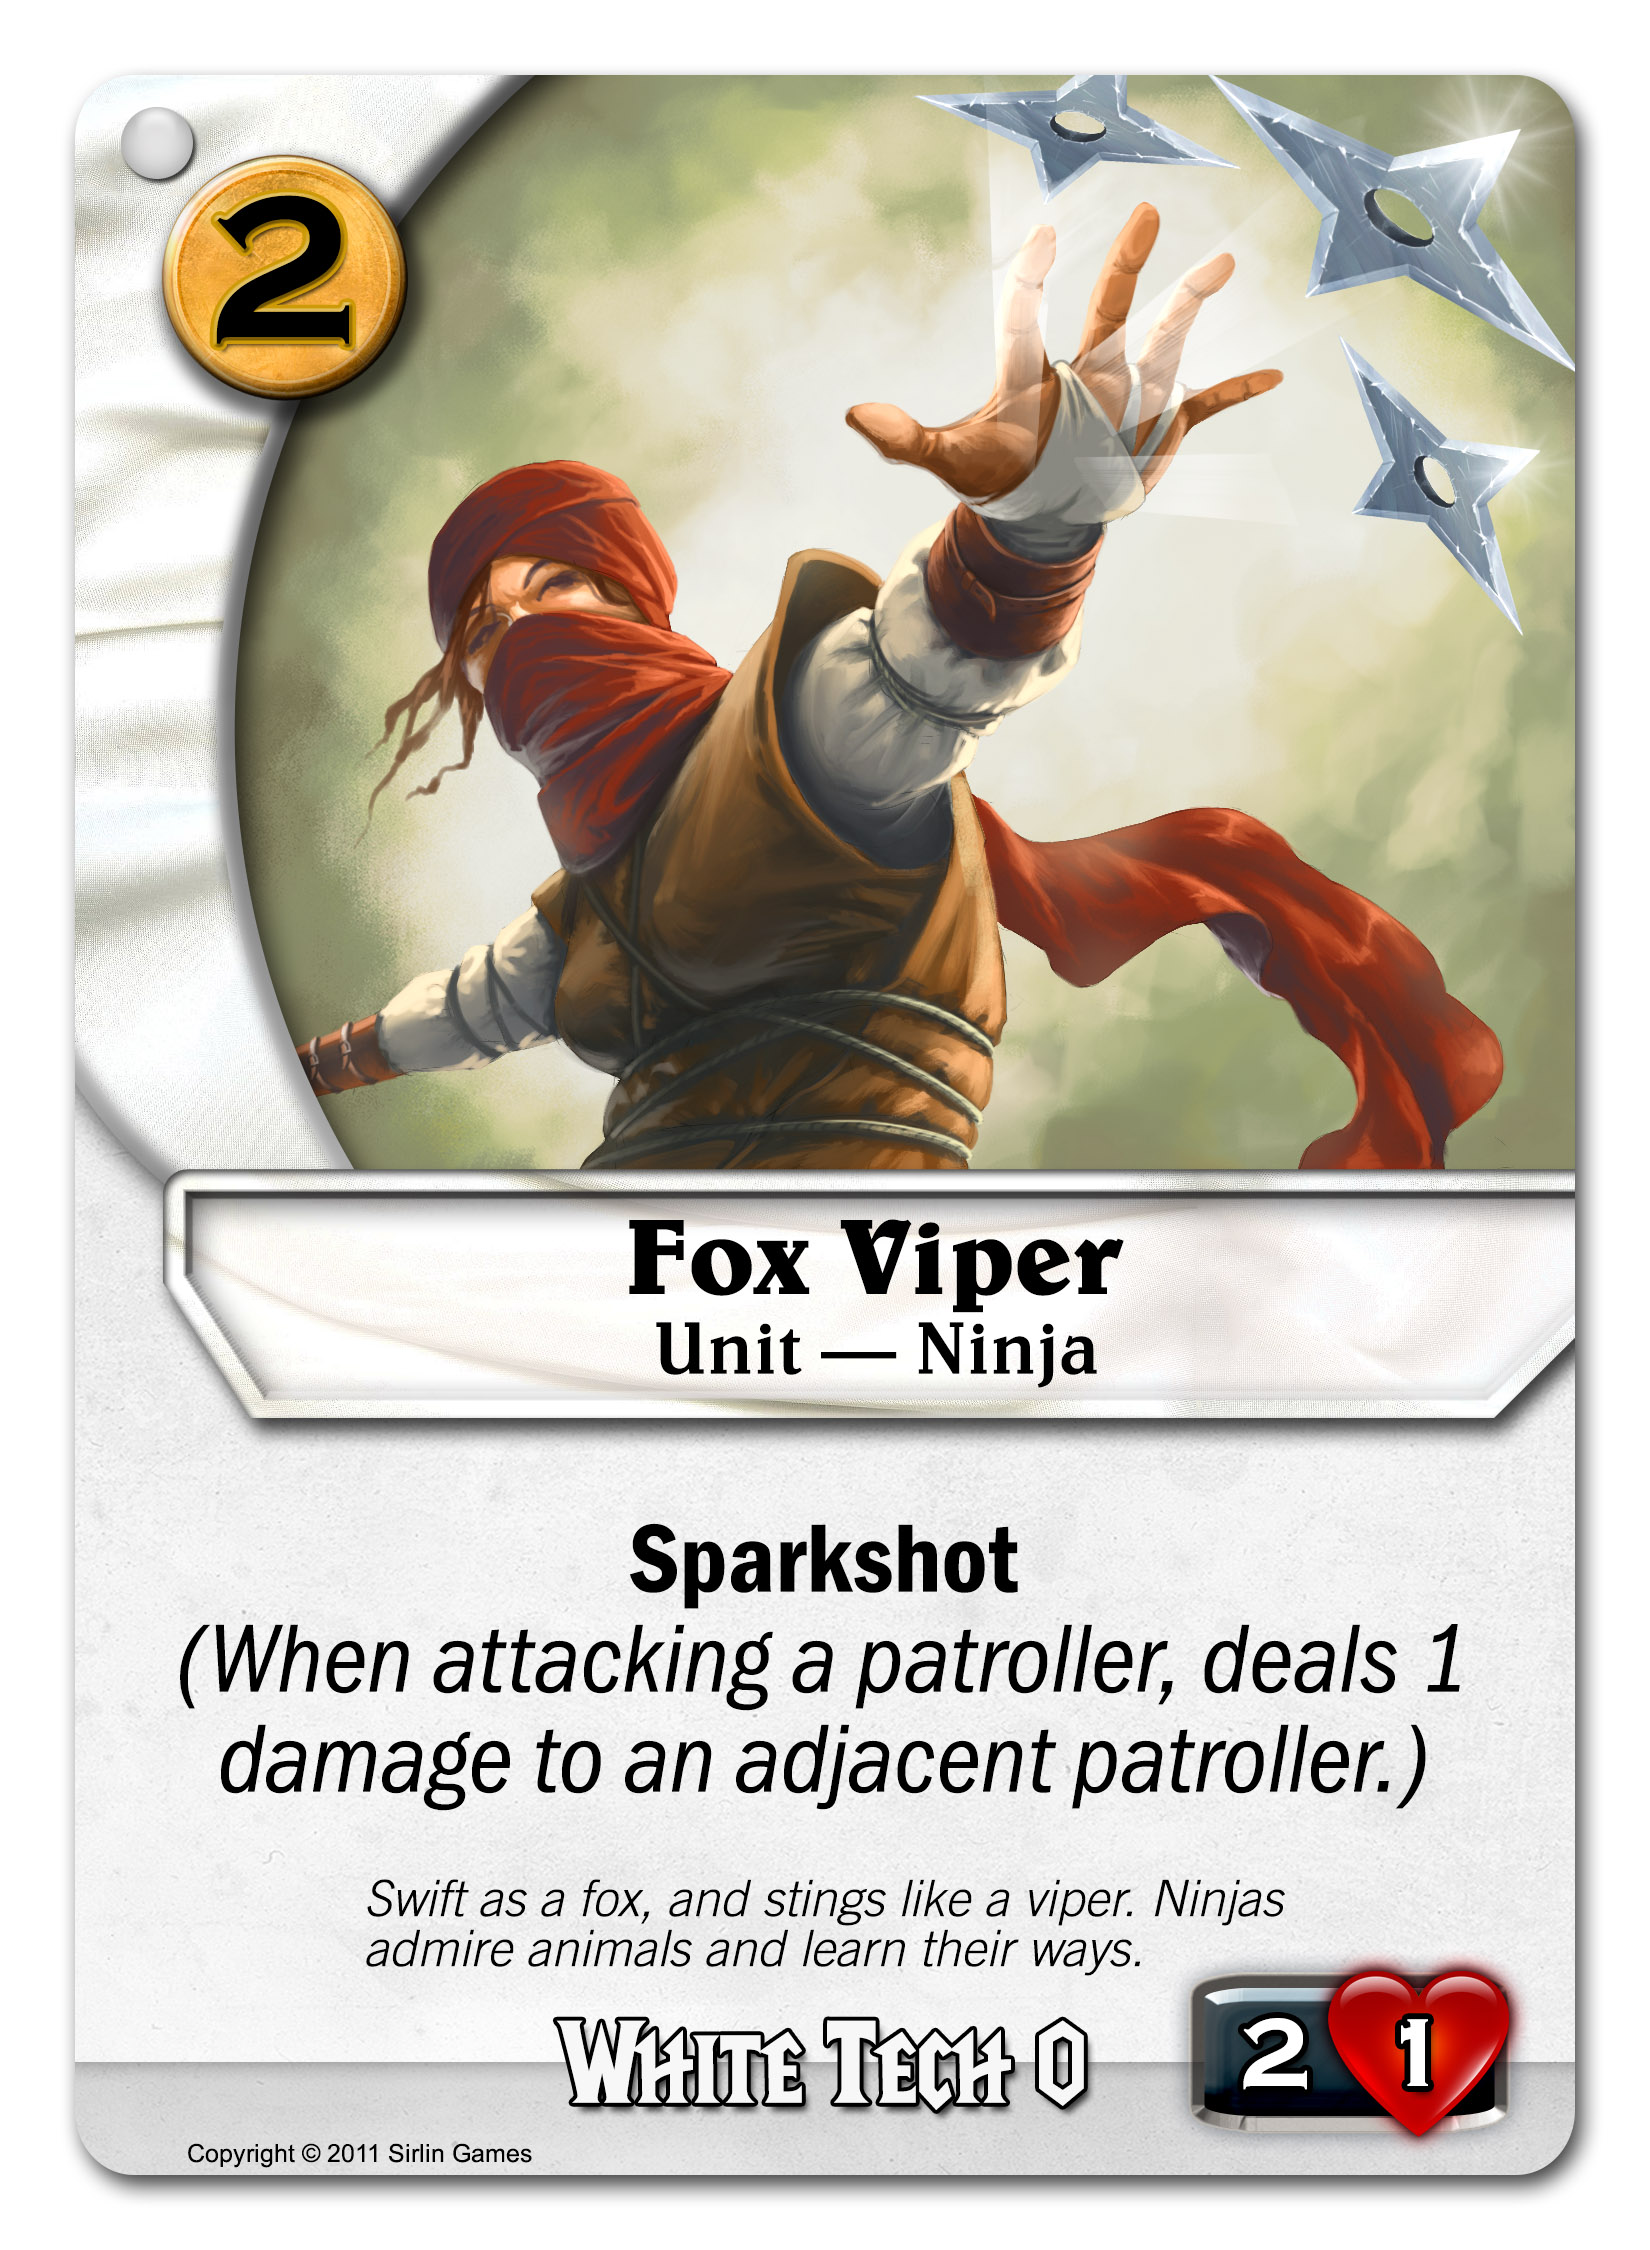
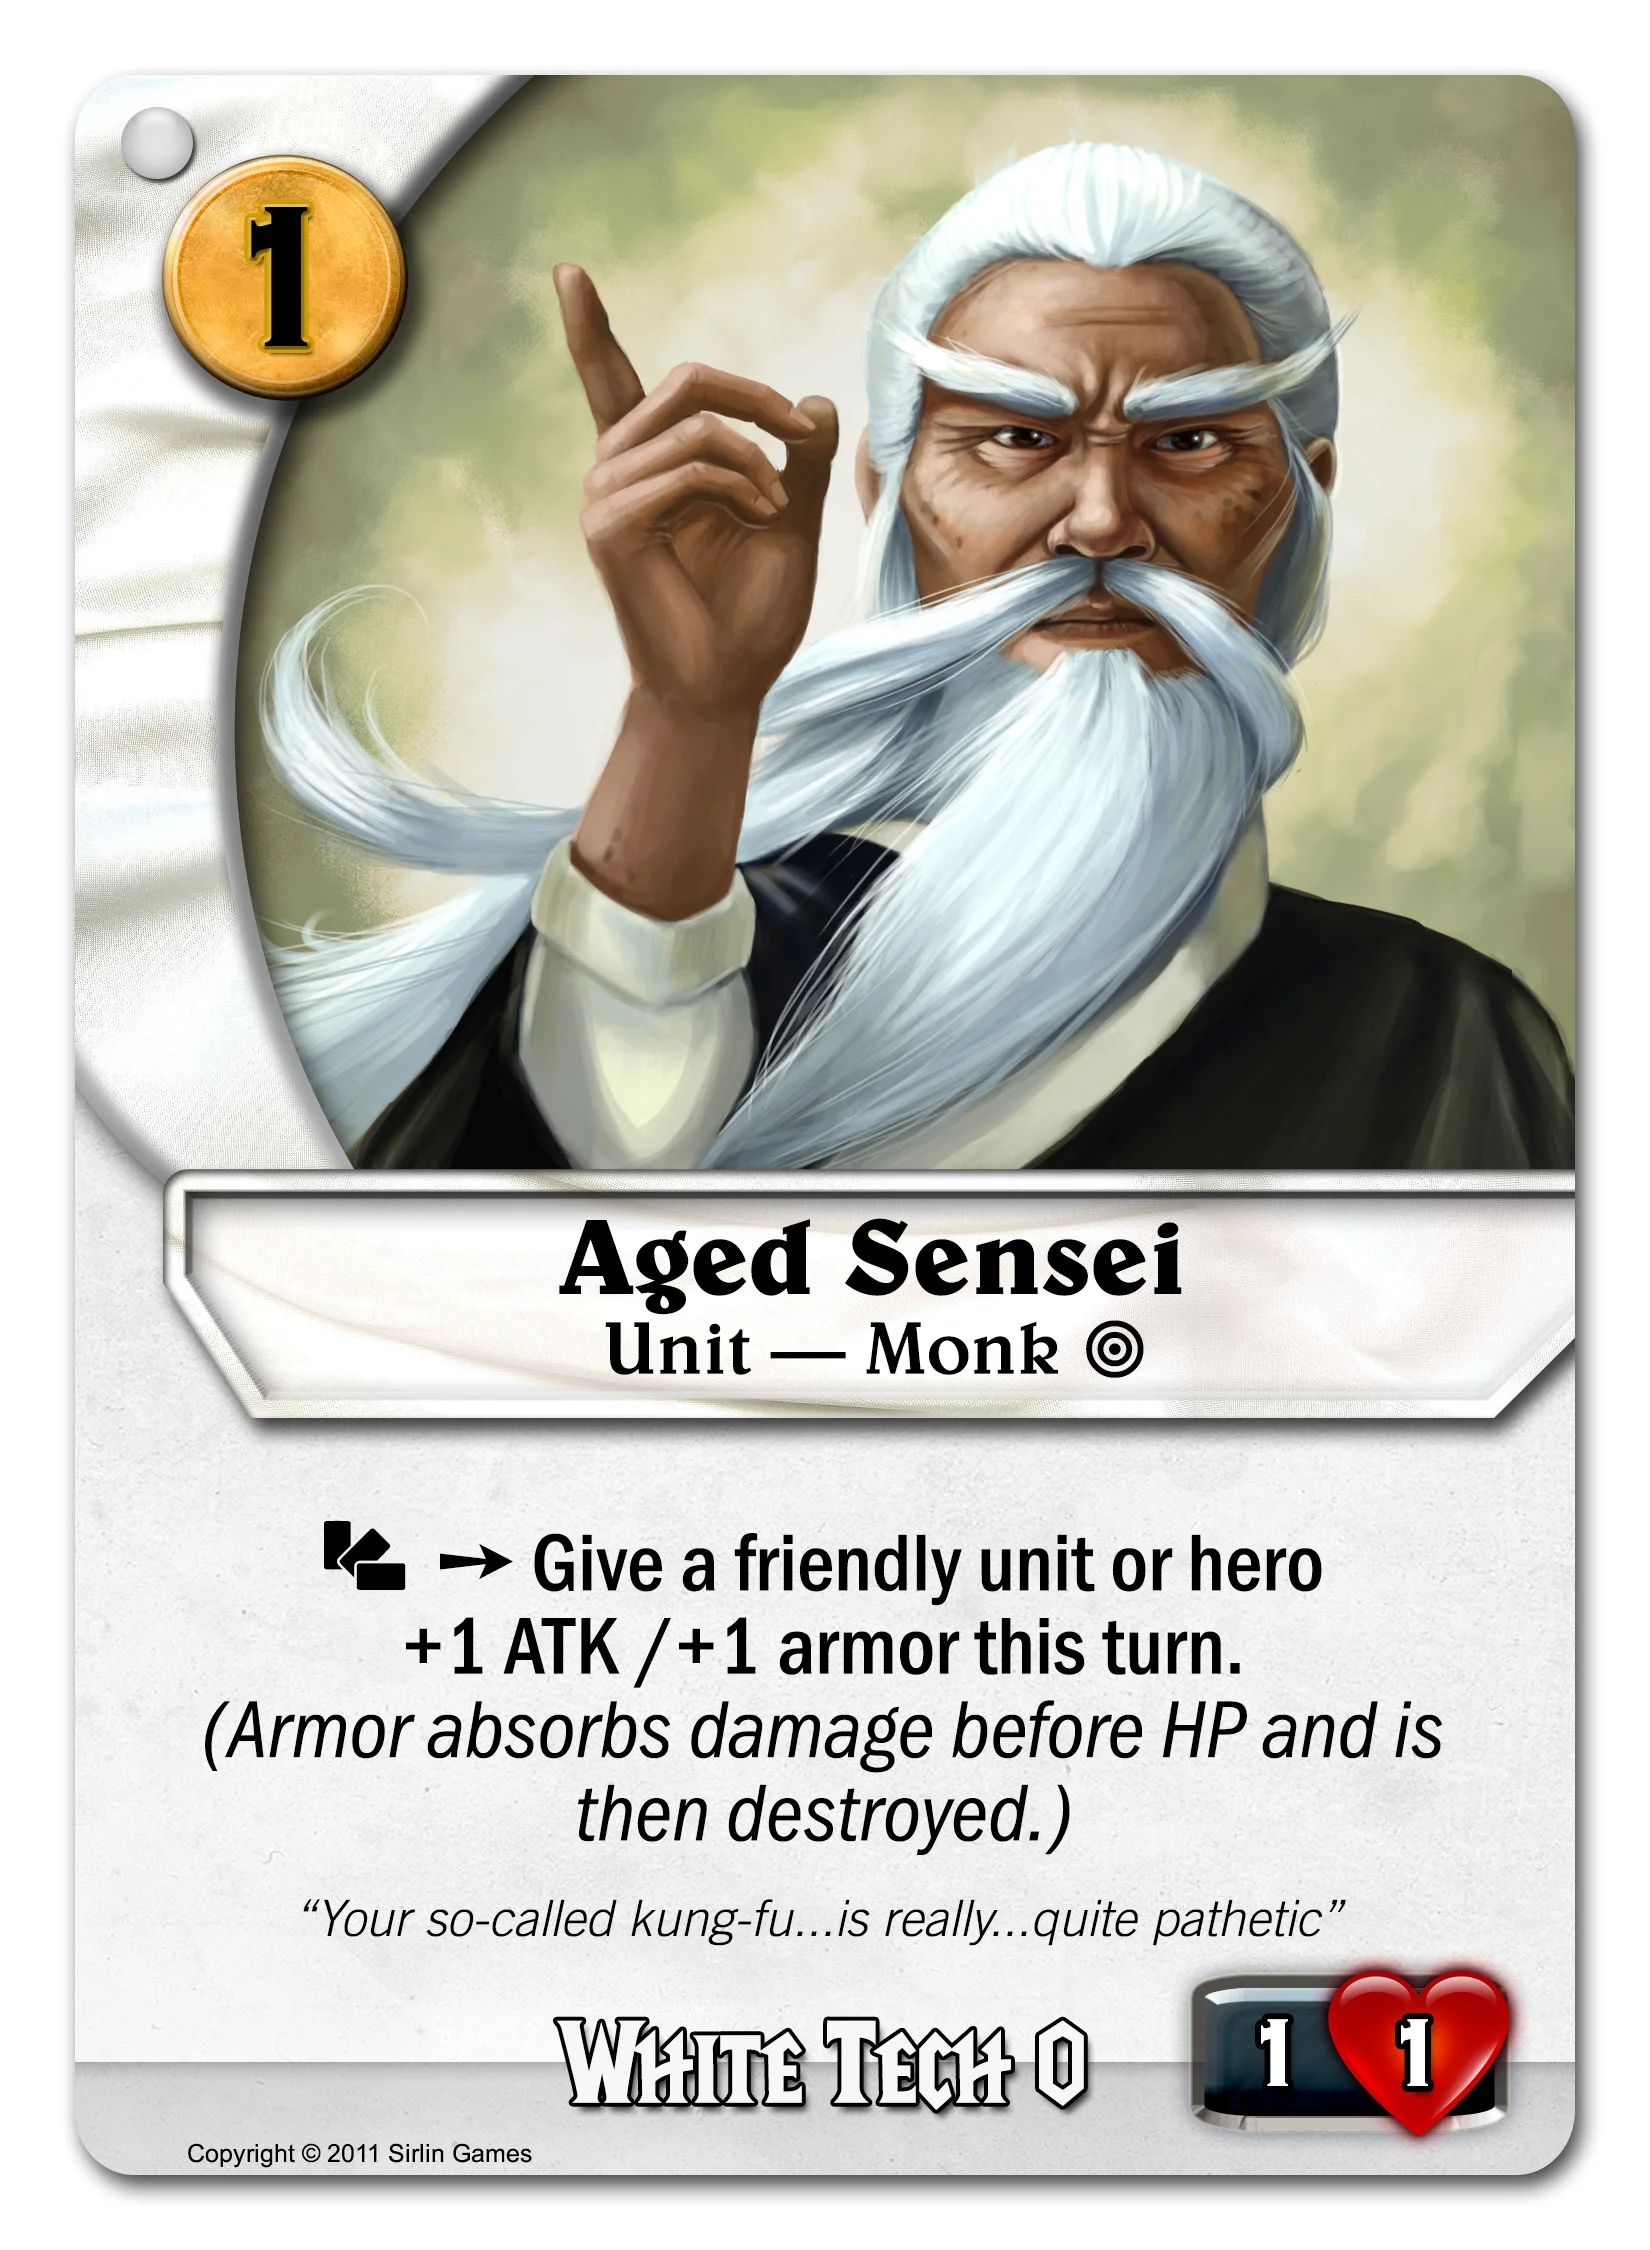
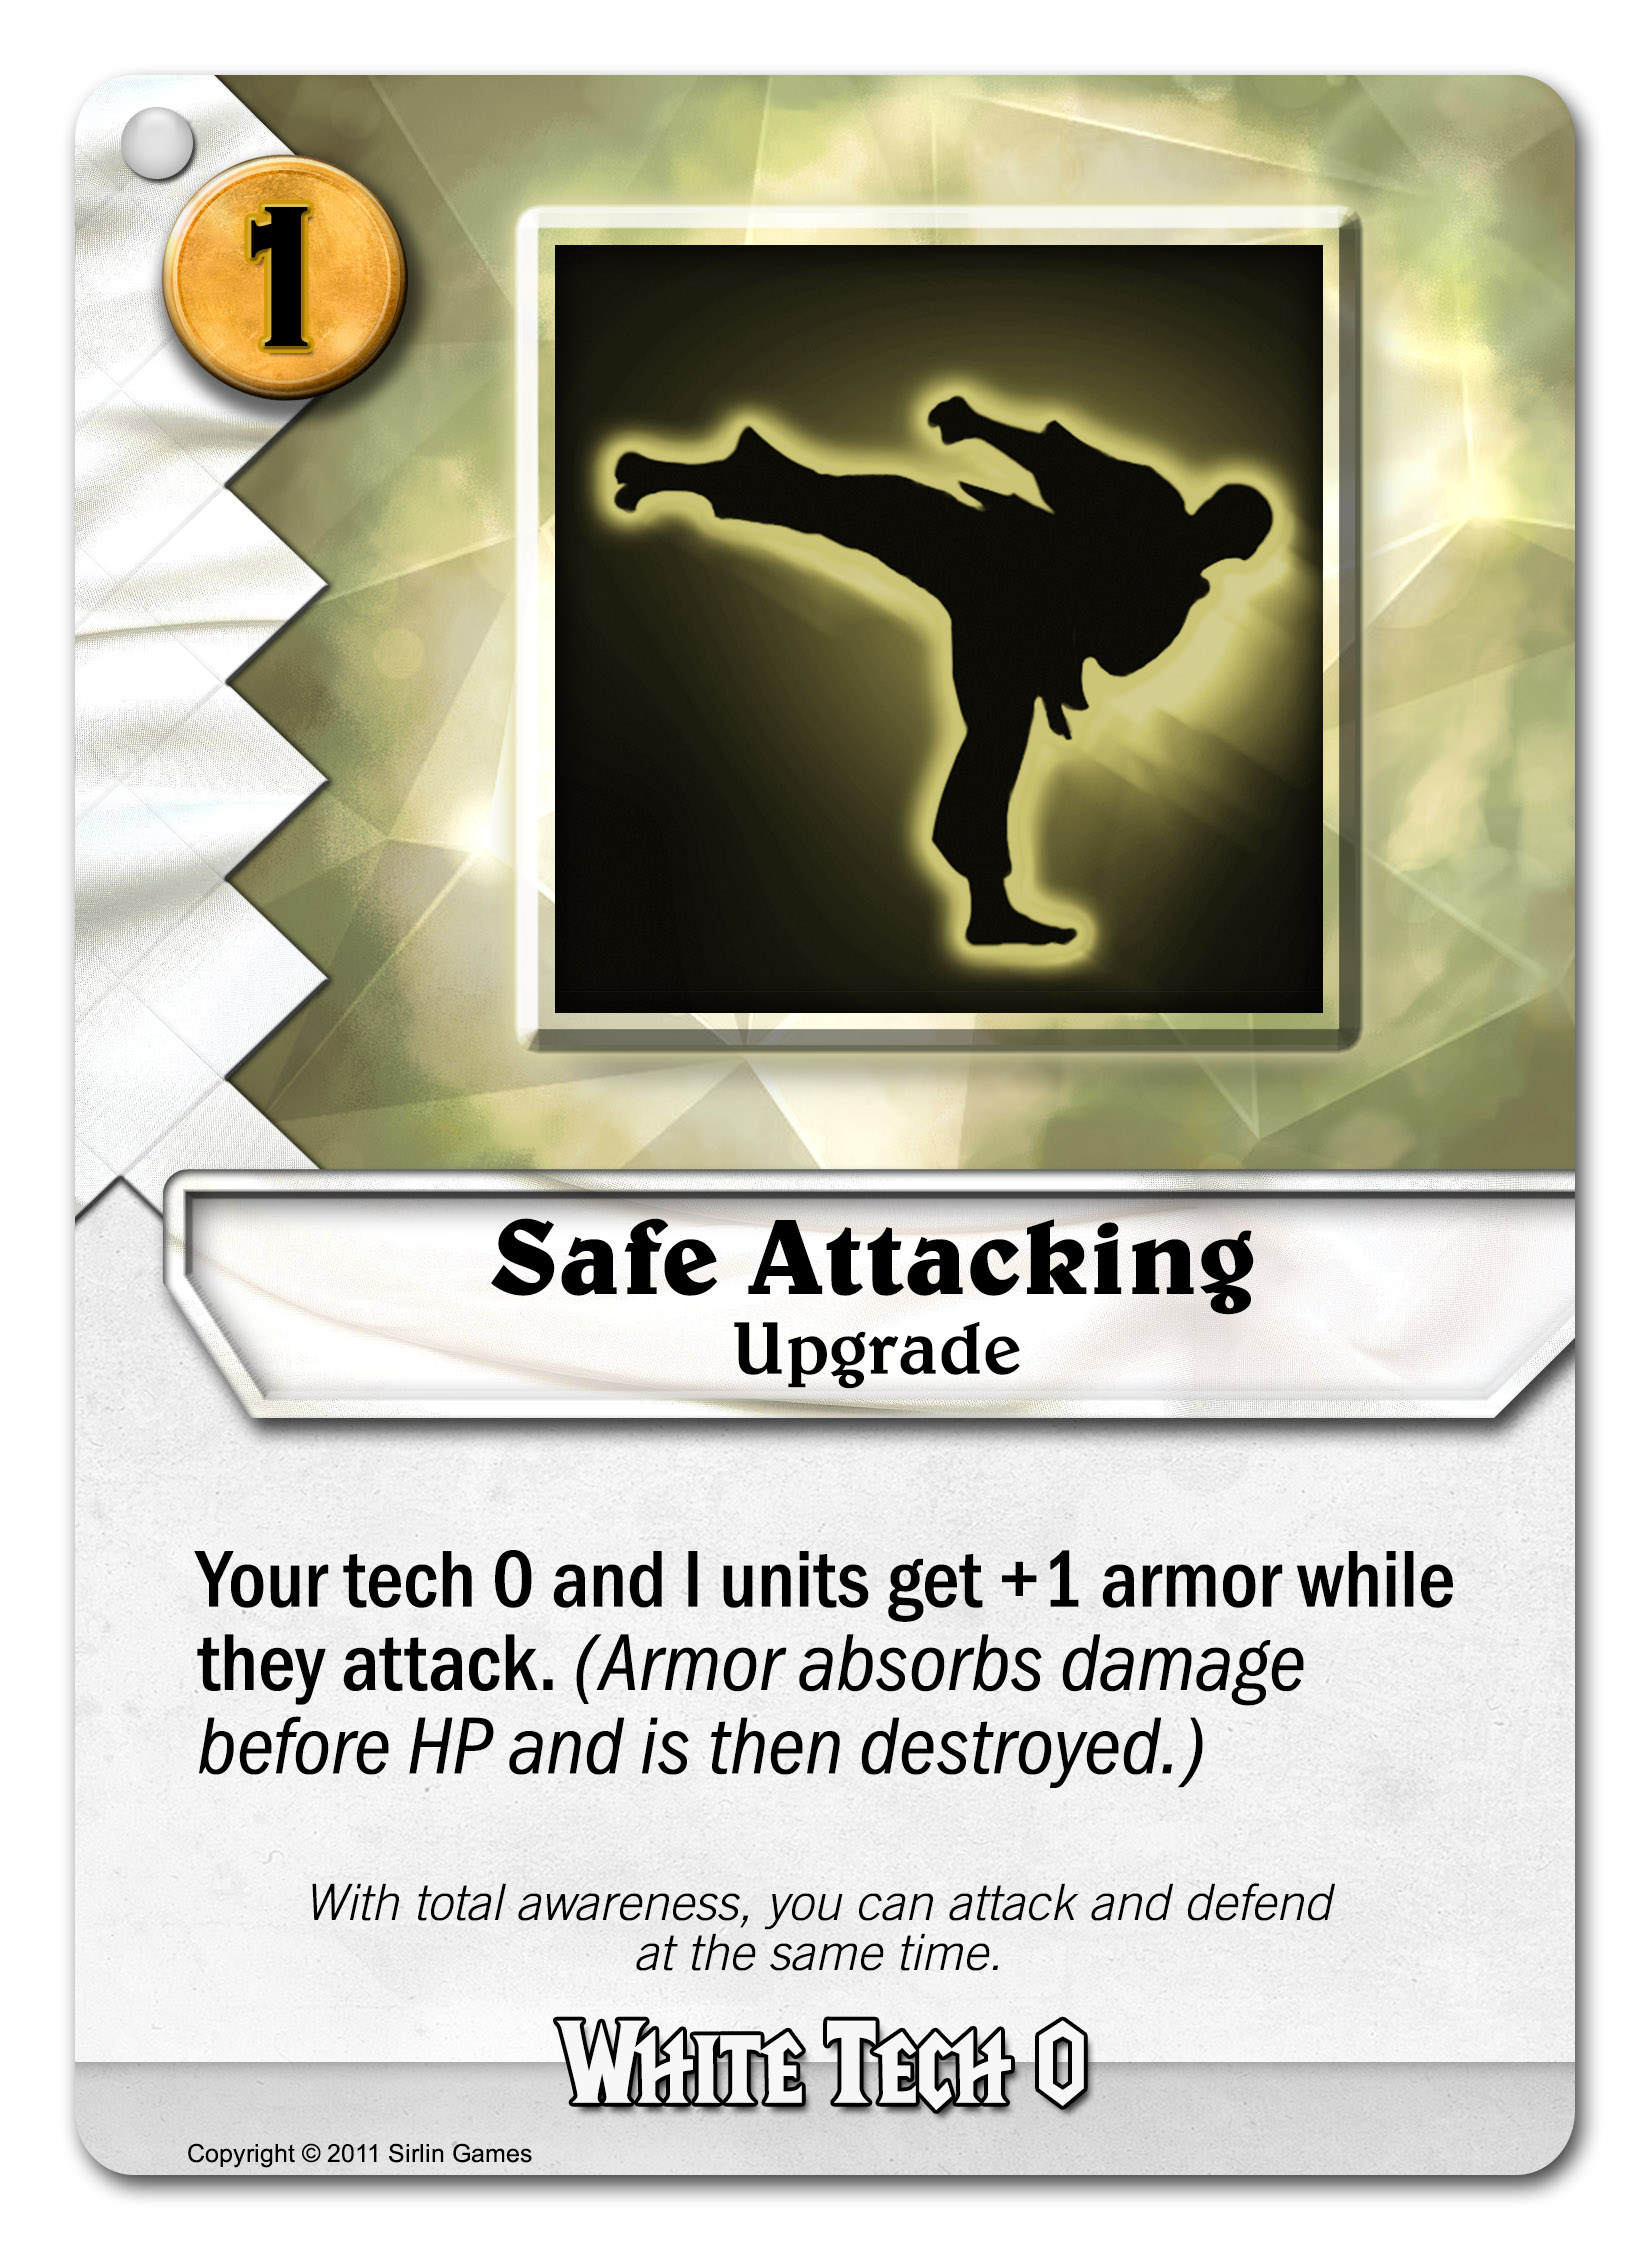
A 2/1 for 2 isn’t bad, and the sparkshot can sometimes deal an extra 1, or at the very least it can make your opponent not patrol in the slots they really want to in order to avoid your sparkshot. More relevant than that, you can buff your white units so this 2/1 becomes a 3/2 with Aged Sensei’s help (I showed him in the Discipline spec article). Or use Sensei’s Advice:


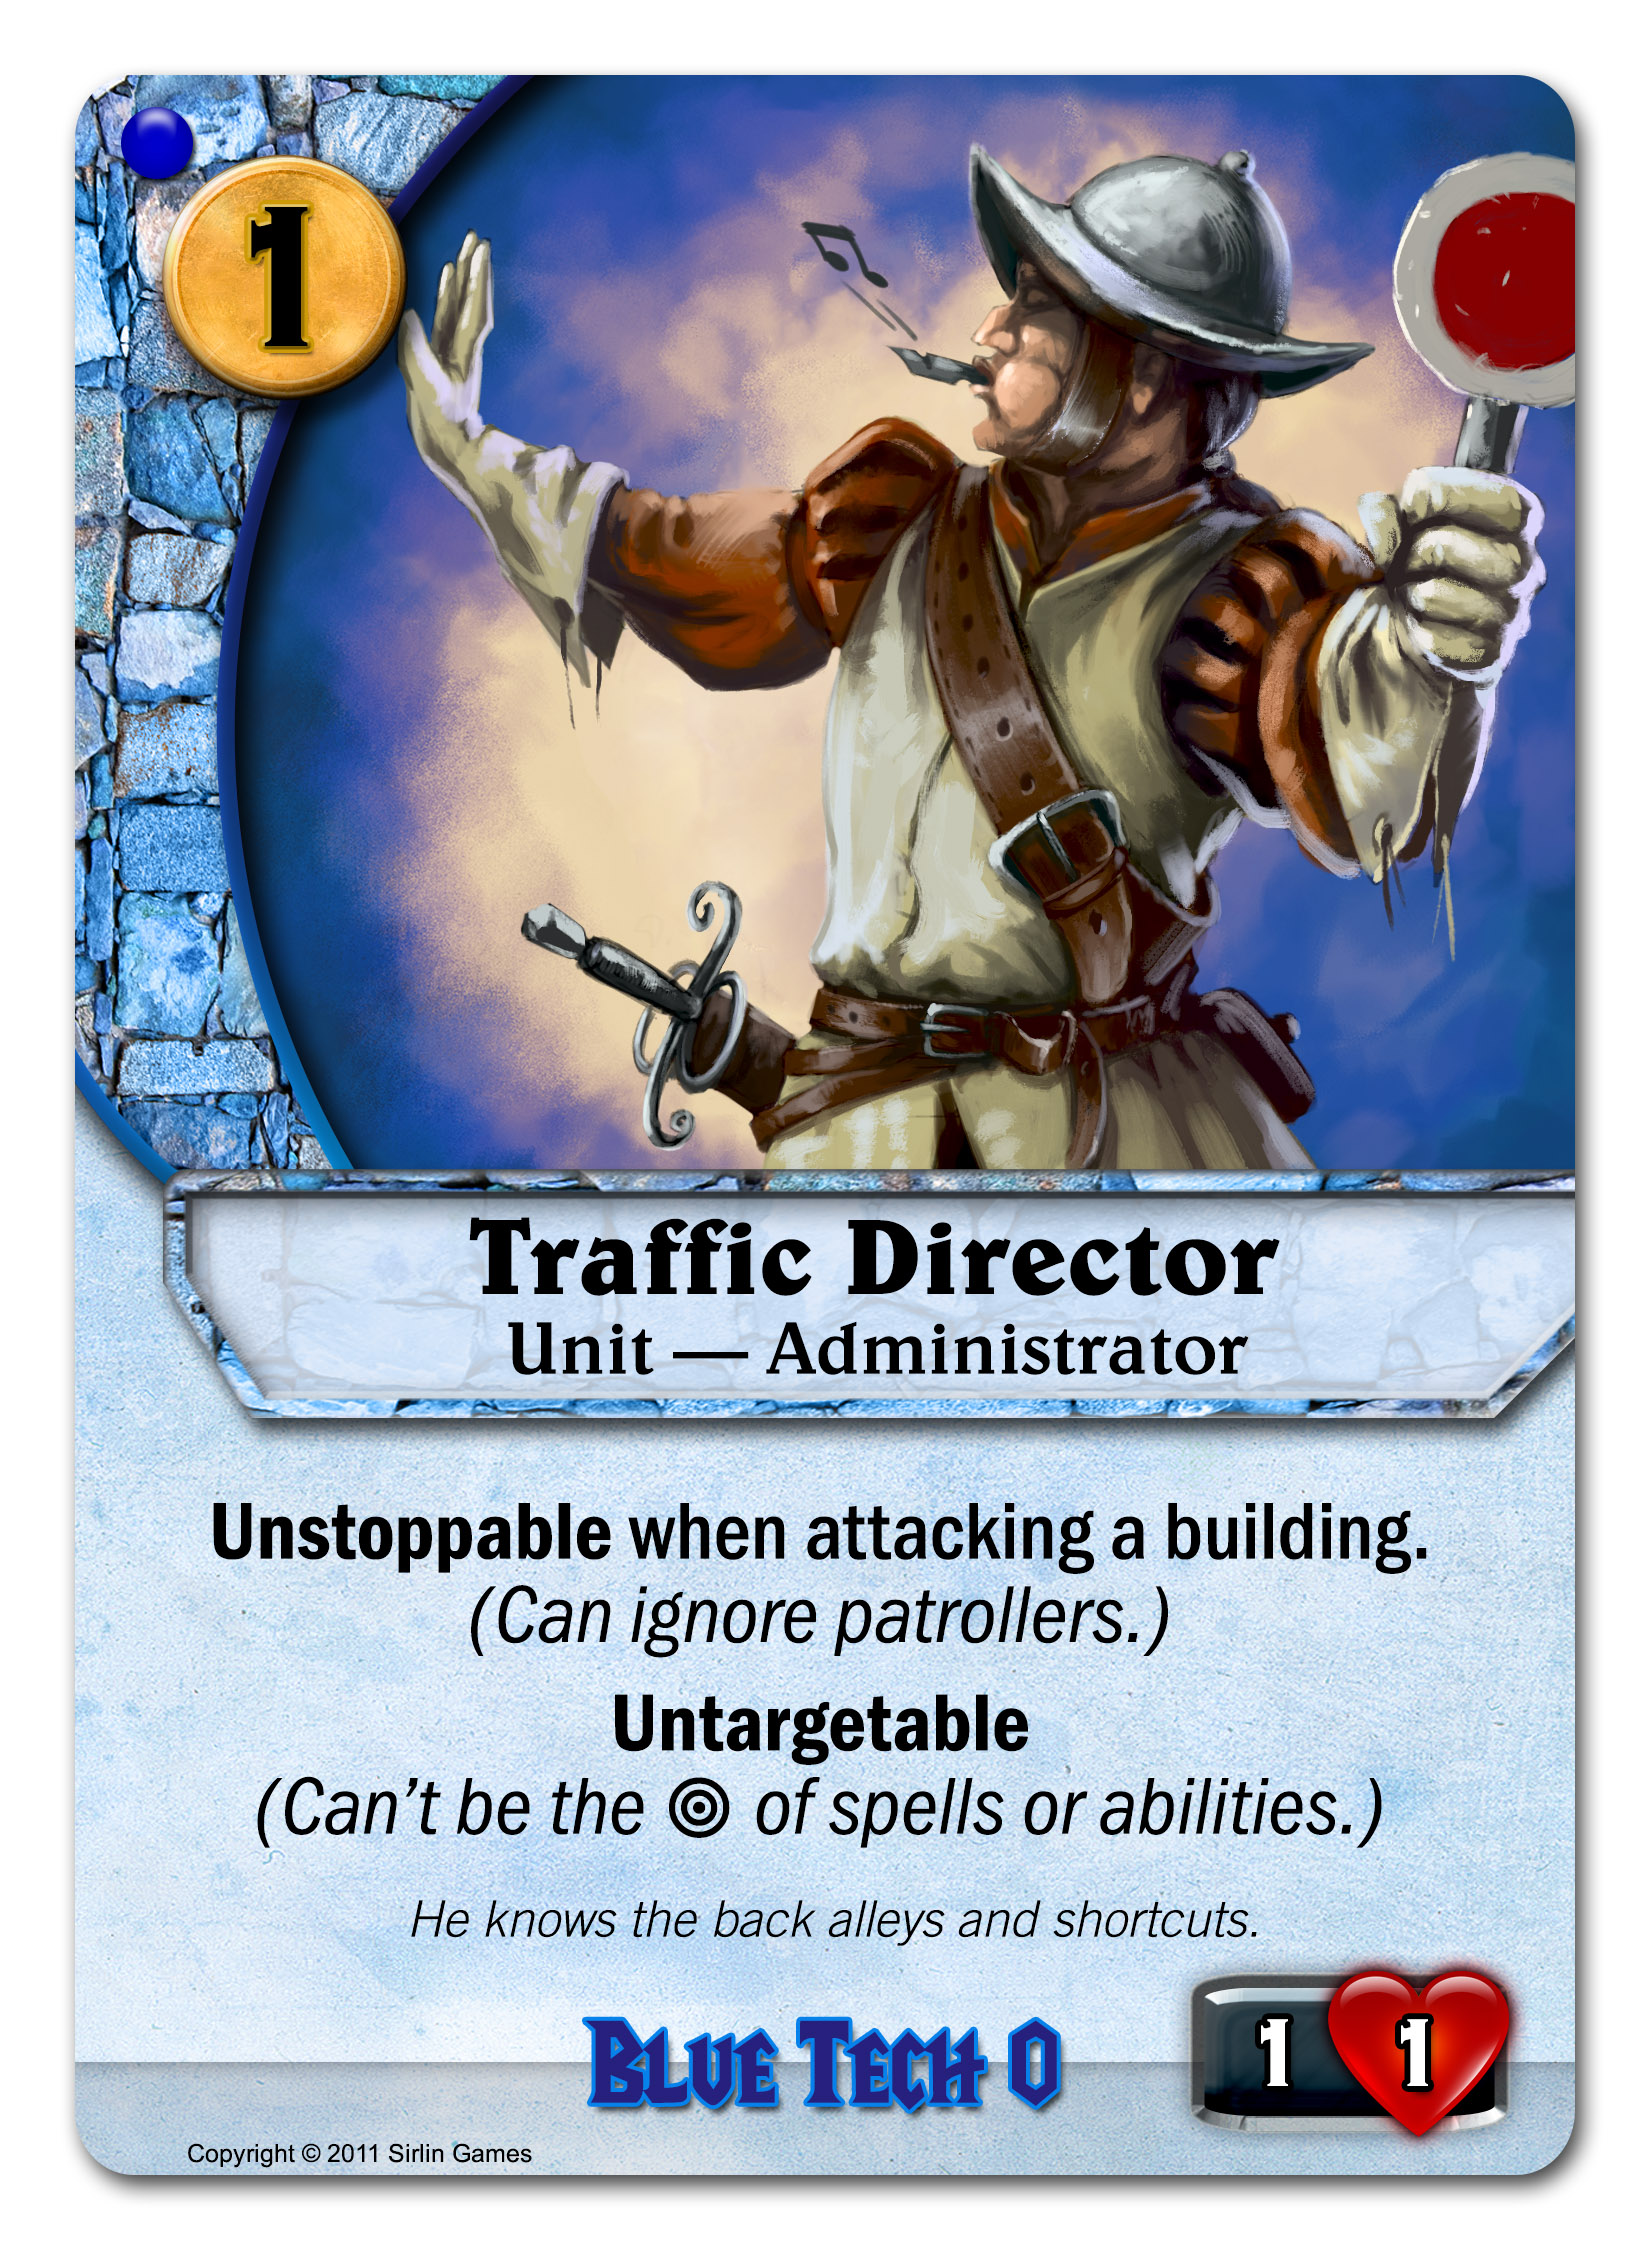
There is one Ninja who you won’t want to buff though:


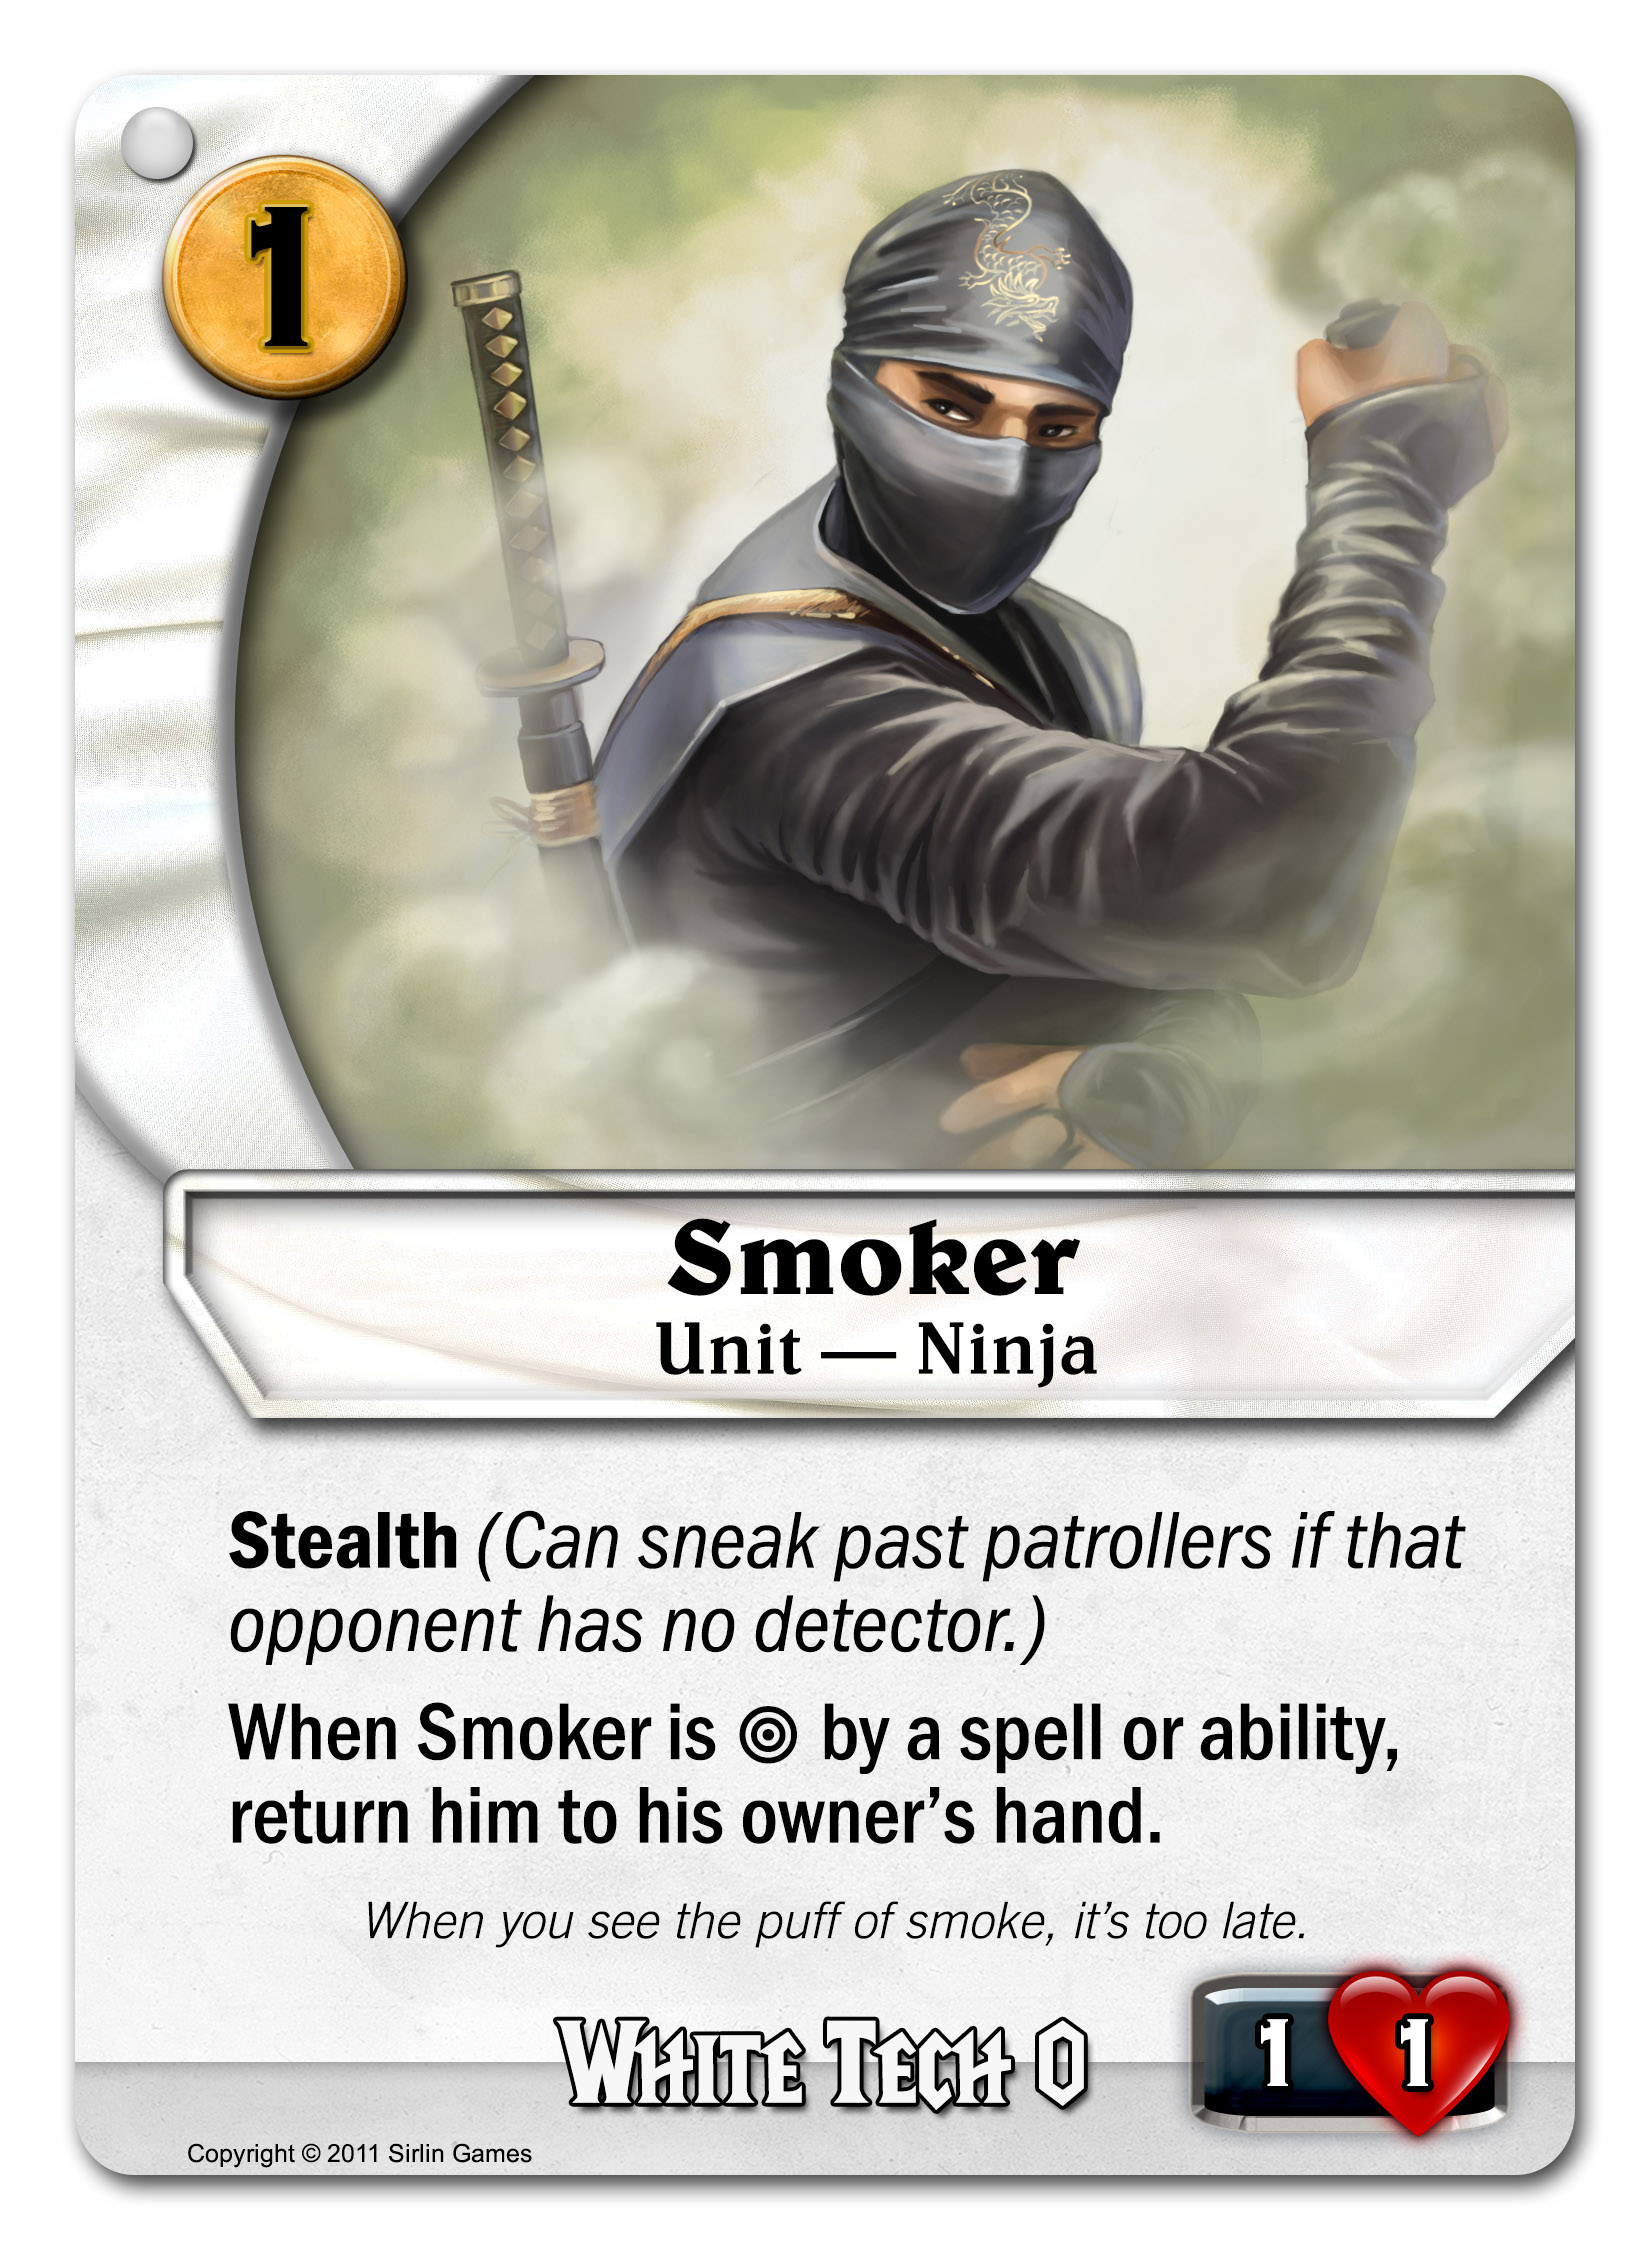
If you try to target him, he’ll disappear in a puff of smoke. He can be really annoying because he slips past patrollers. Opponents often don’t want to even bother killing him, but if they don’t he can get away with doing 5 damage over 5 turns or something. 

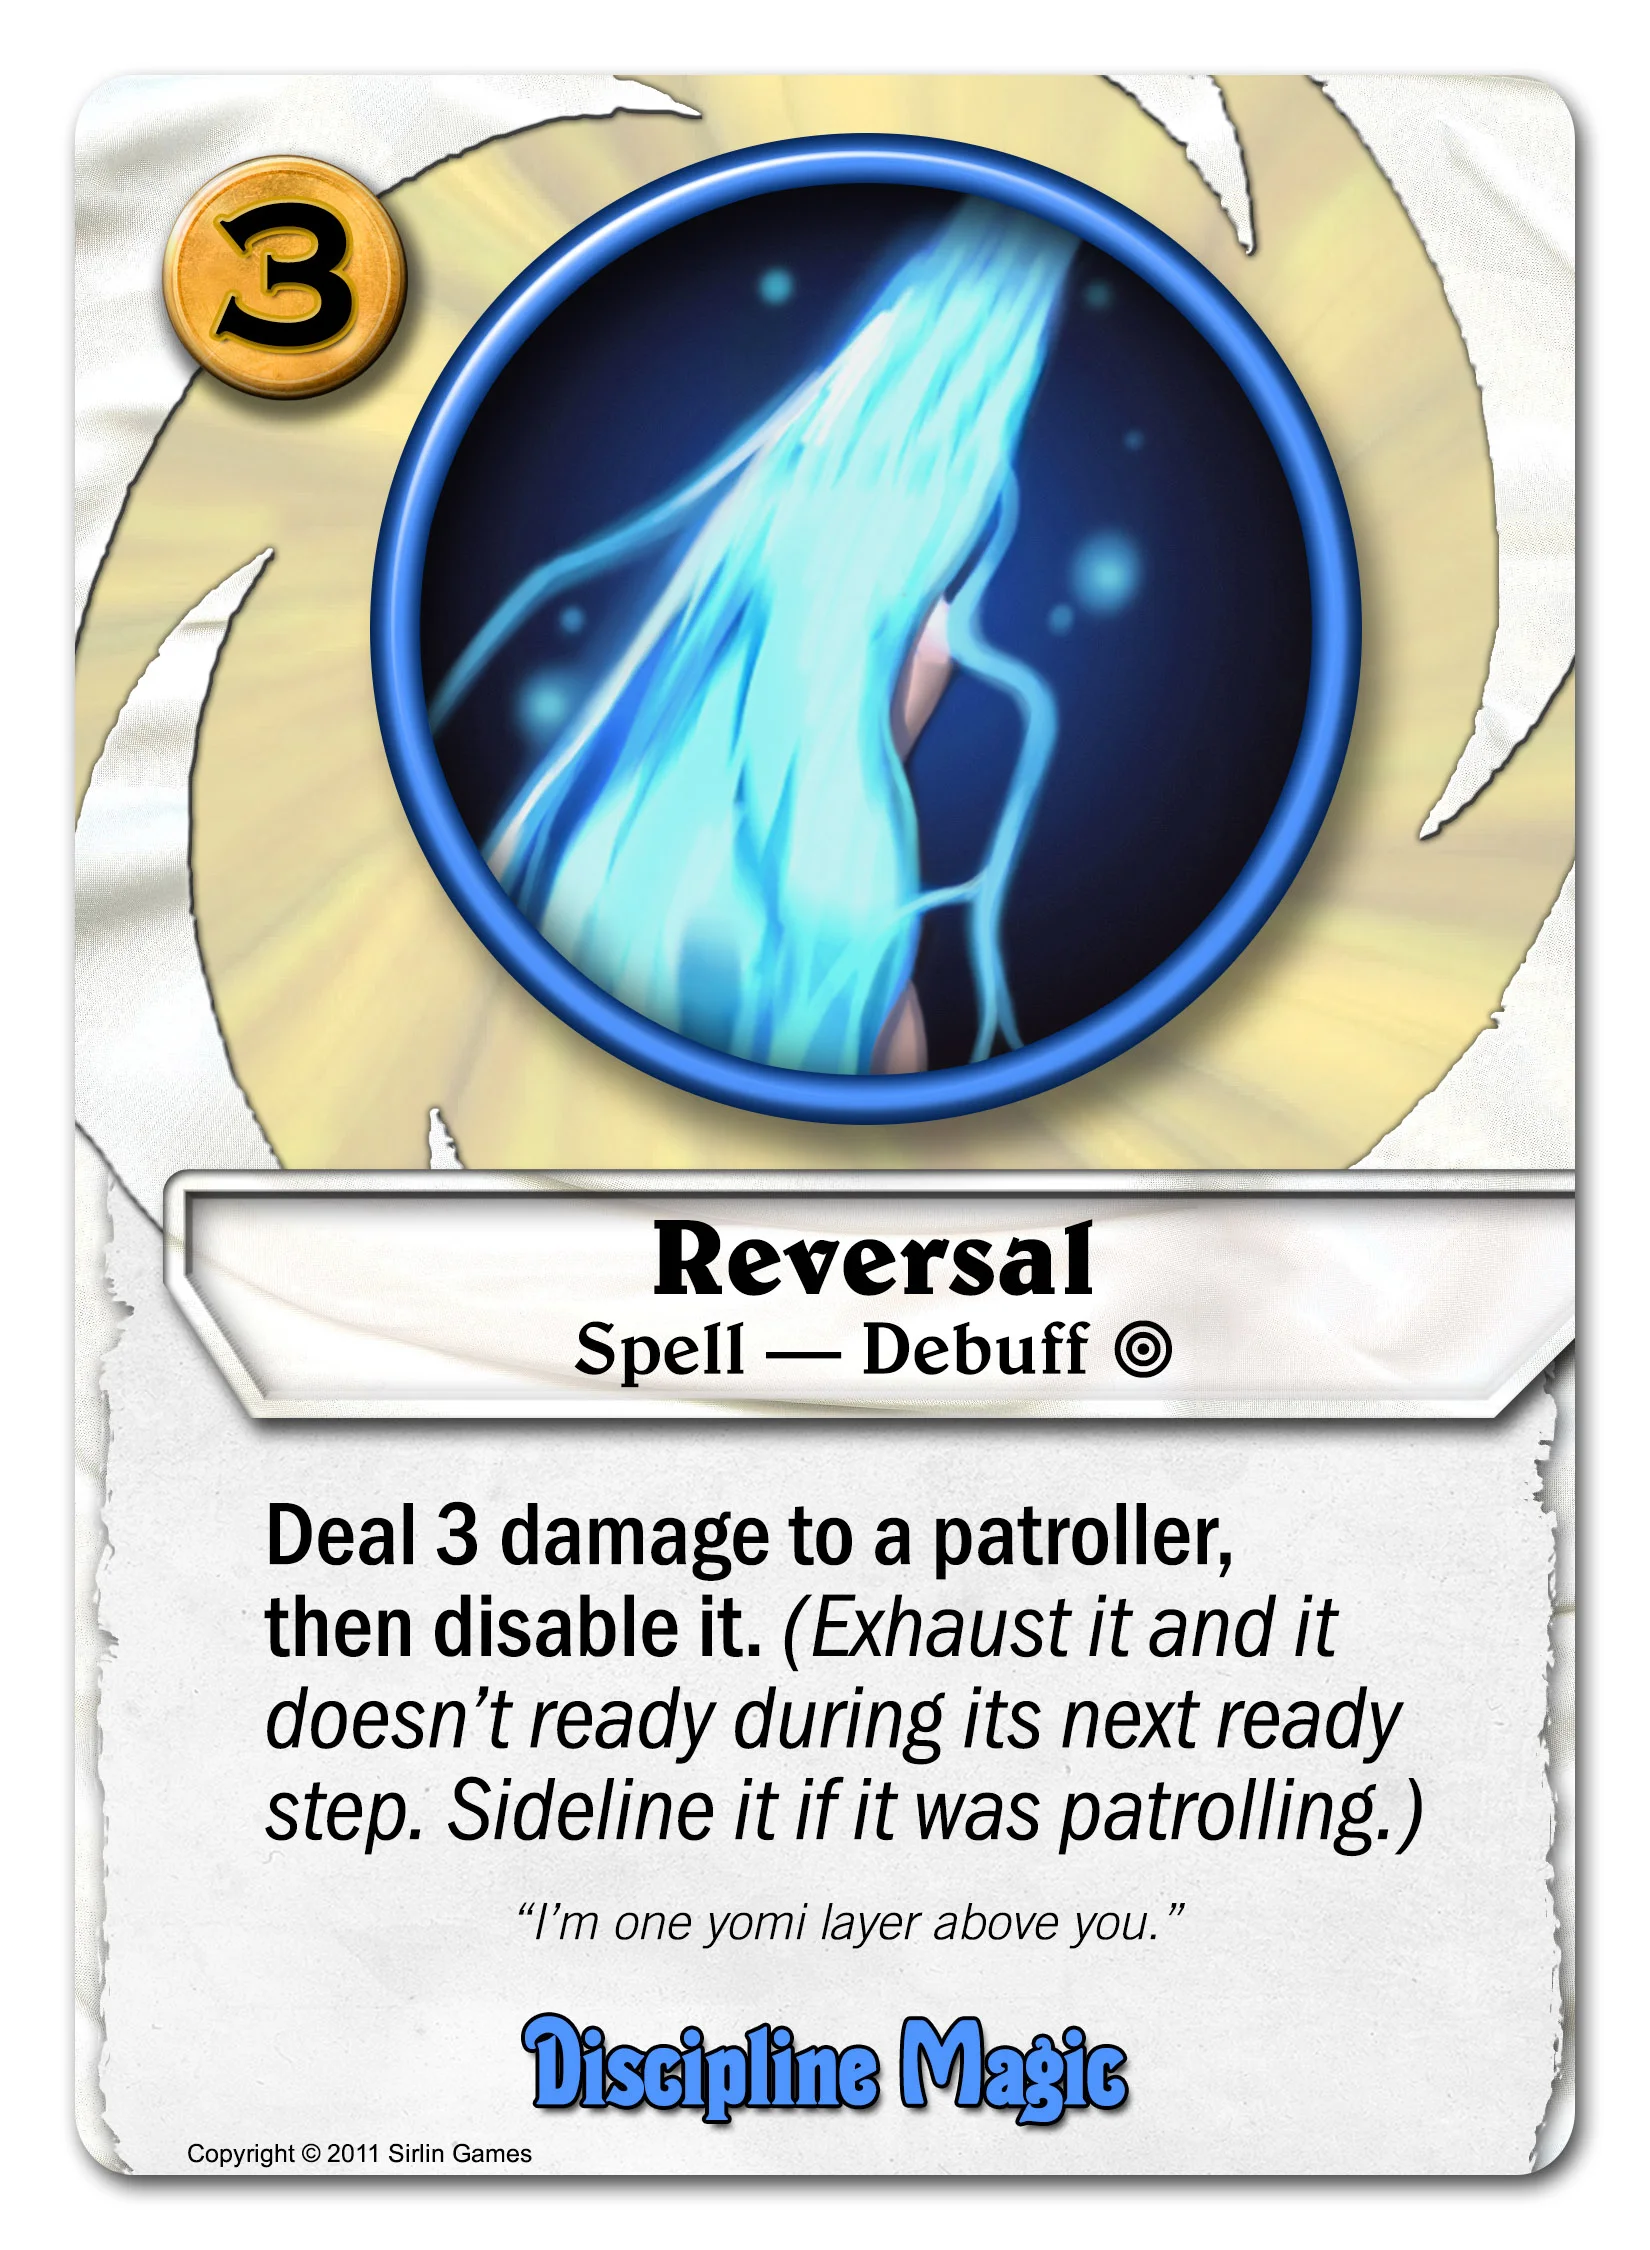
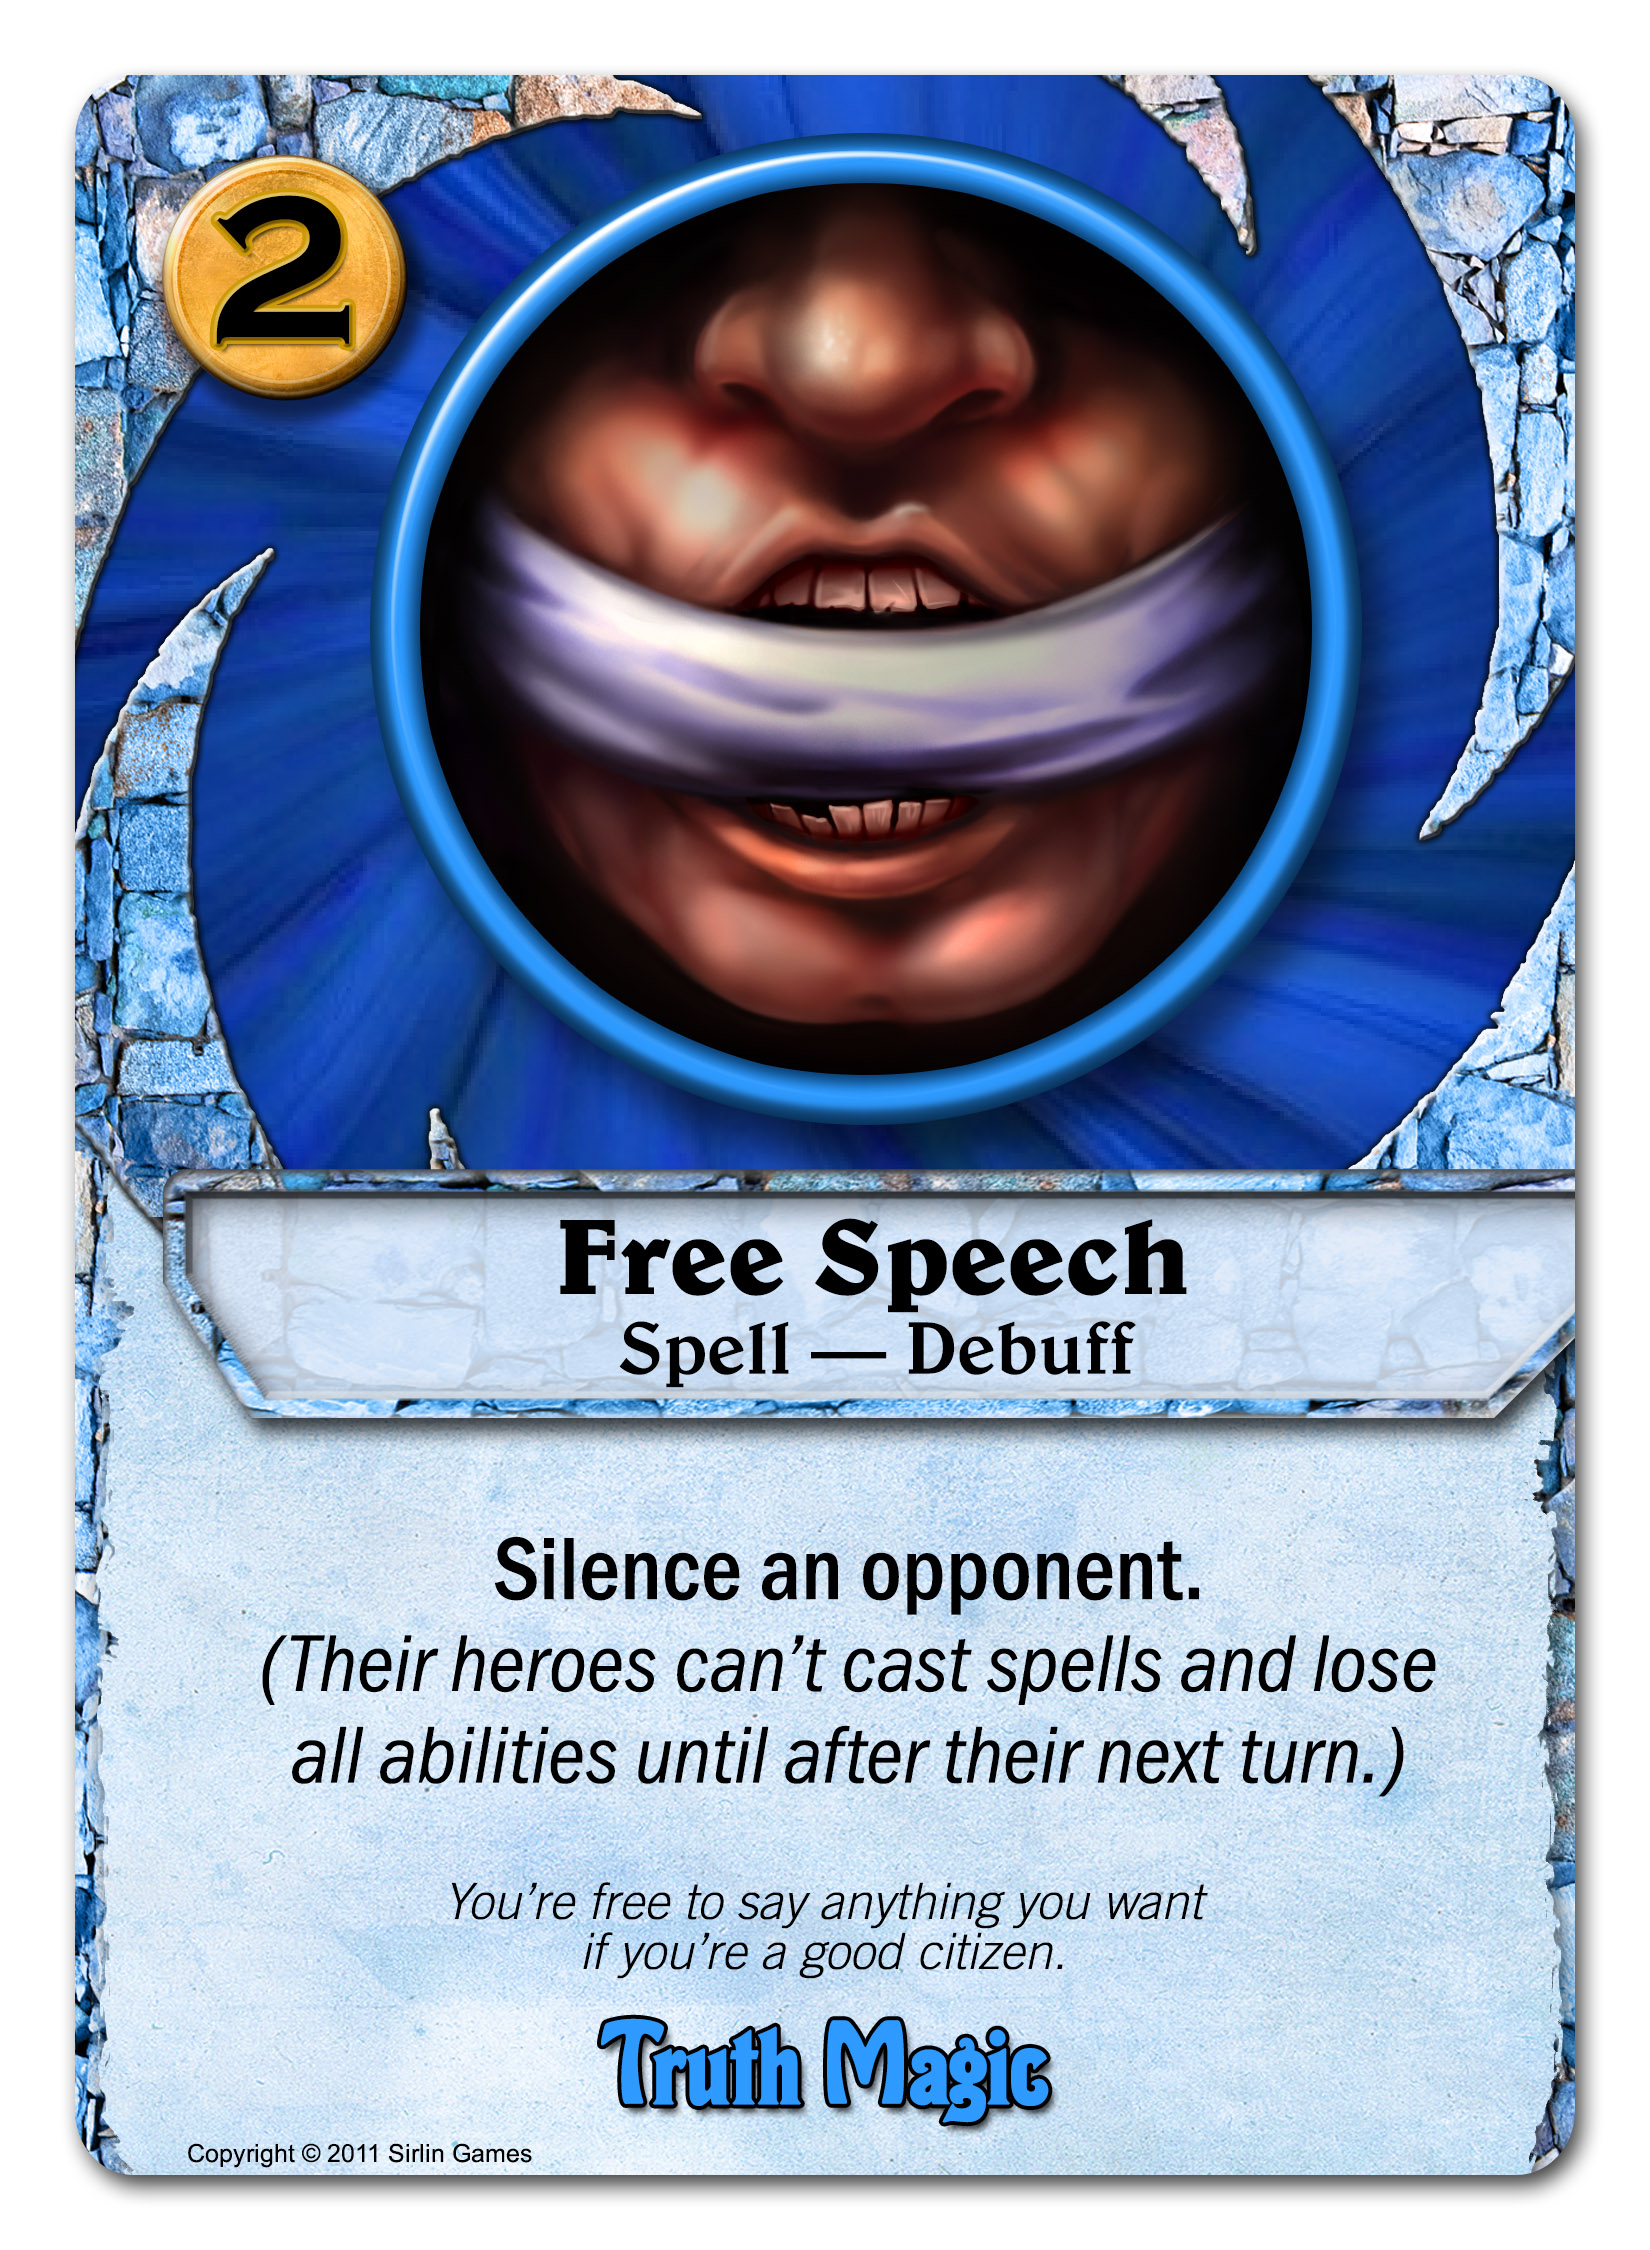
Here’s another Ninja-like trick for you:


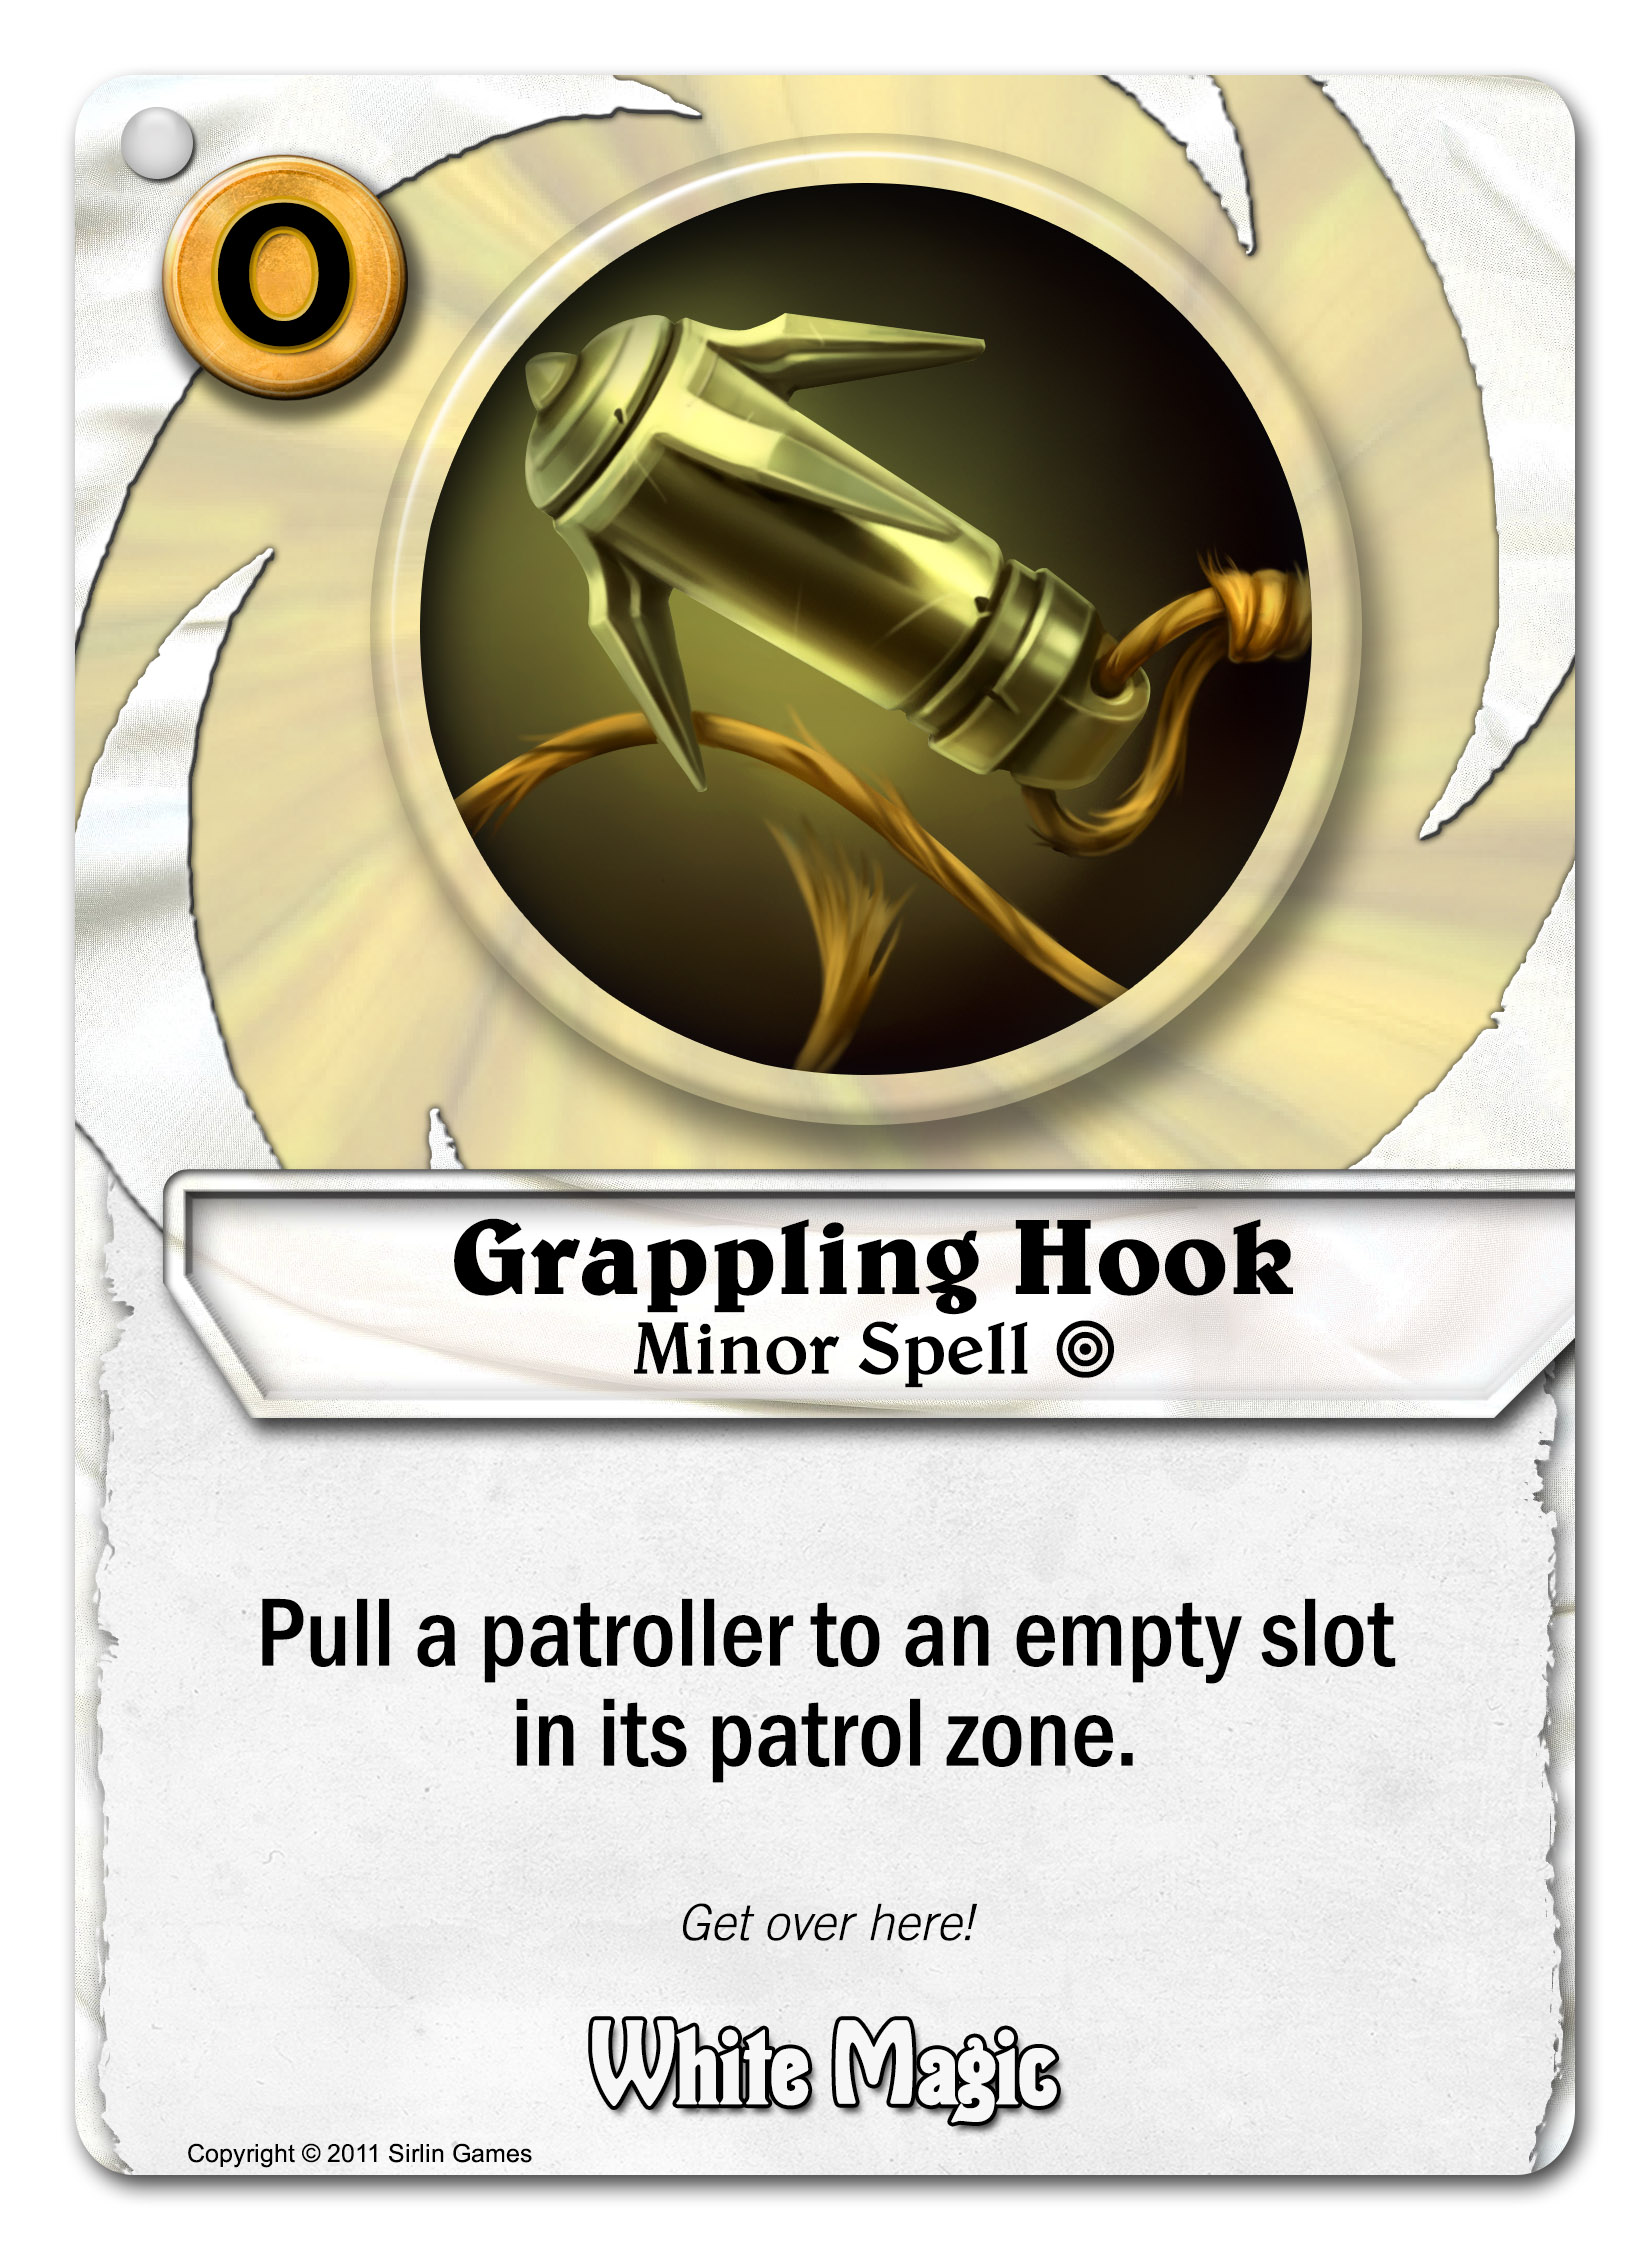
Don’t like an opposing Squad Leader? No problem, drag it somewhere else so you can attack a different thing. You might also pull their Technician patroller to a different slot, then kill it, so that it won’t give your opponent a card when it dies. That cost you a card, yes, but Setsuki hardly cares about that if you’re max level and drawing 2 cards per turn. 0 is the right price!

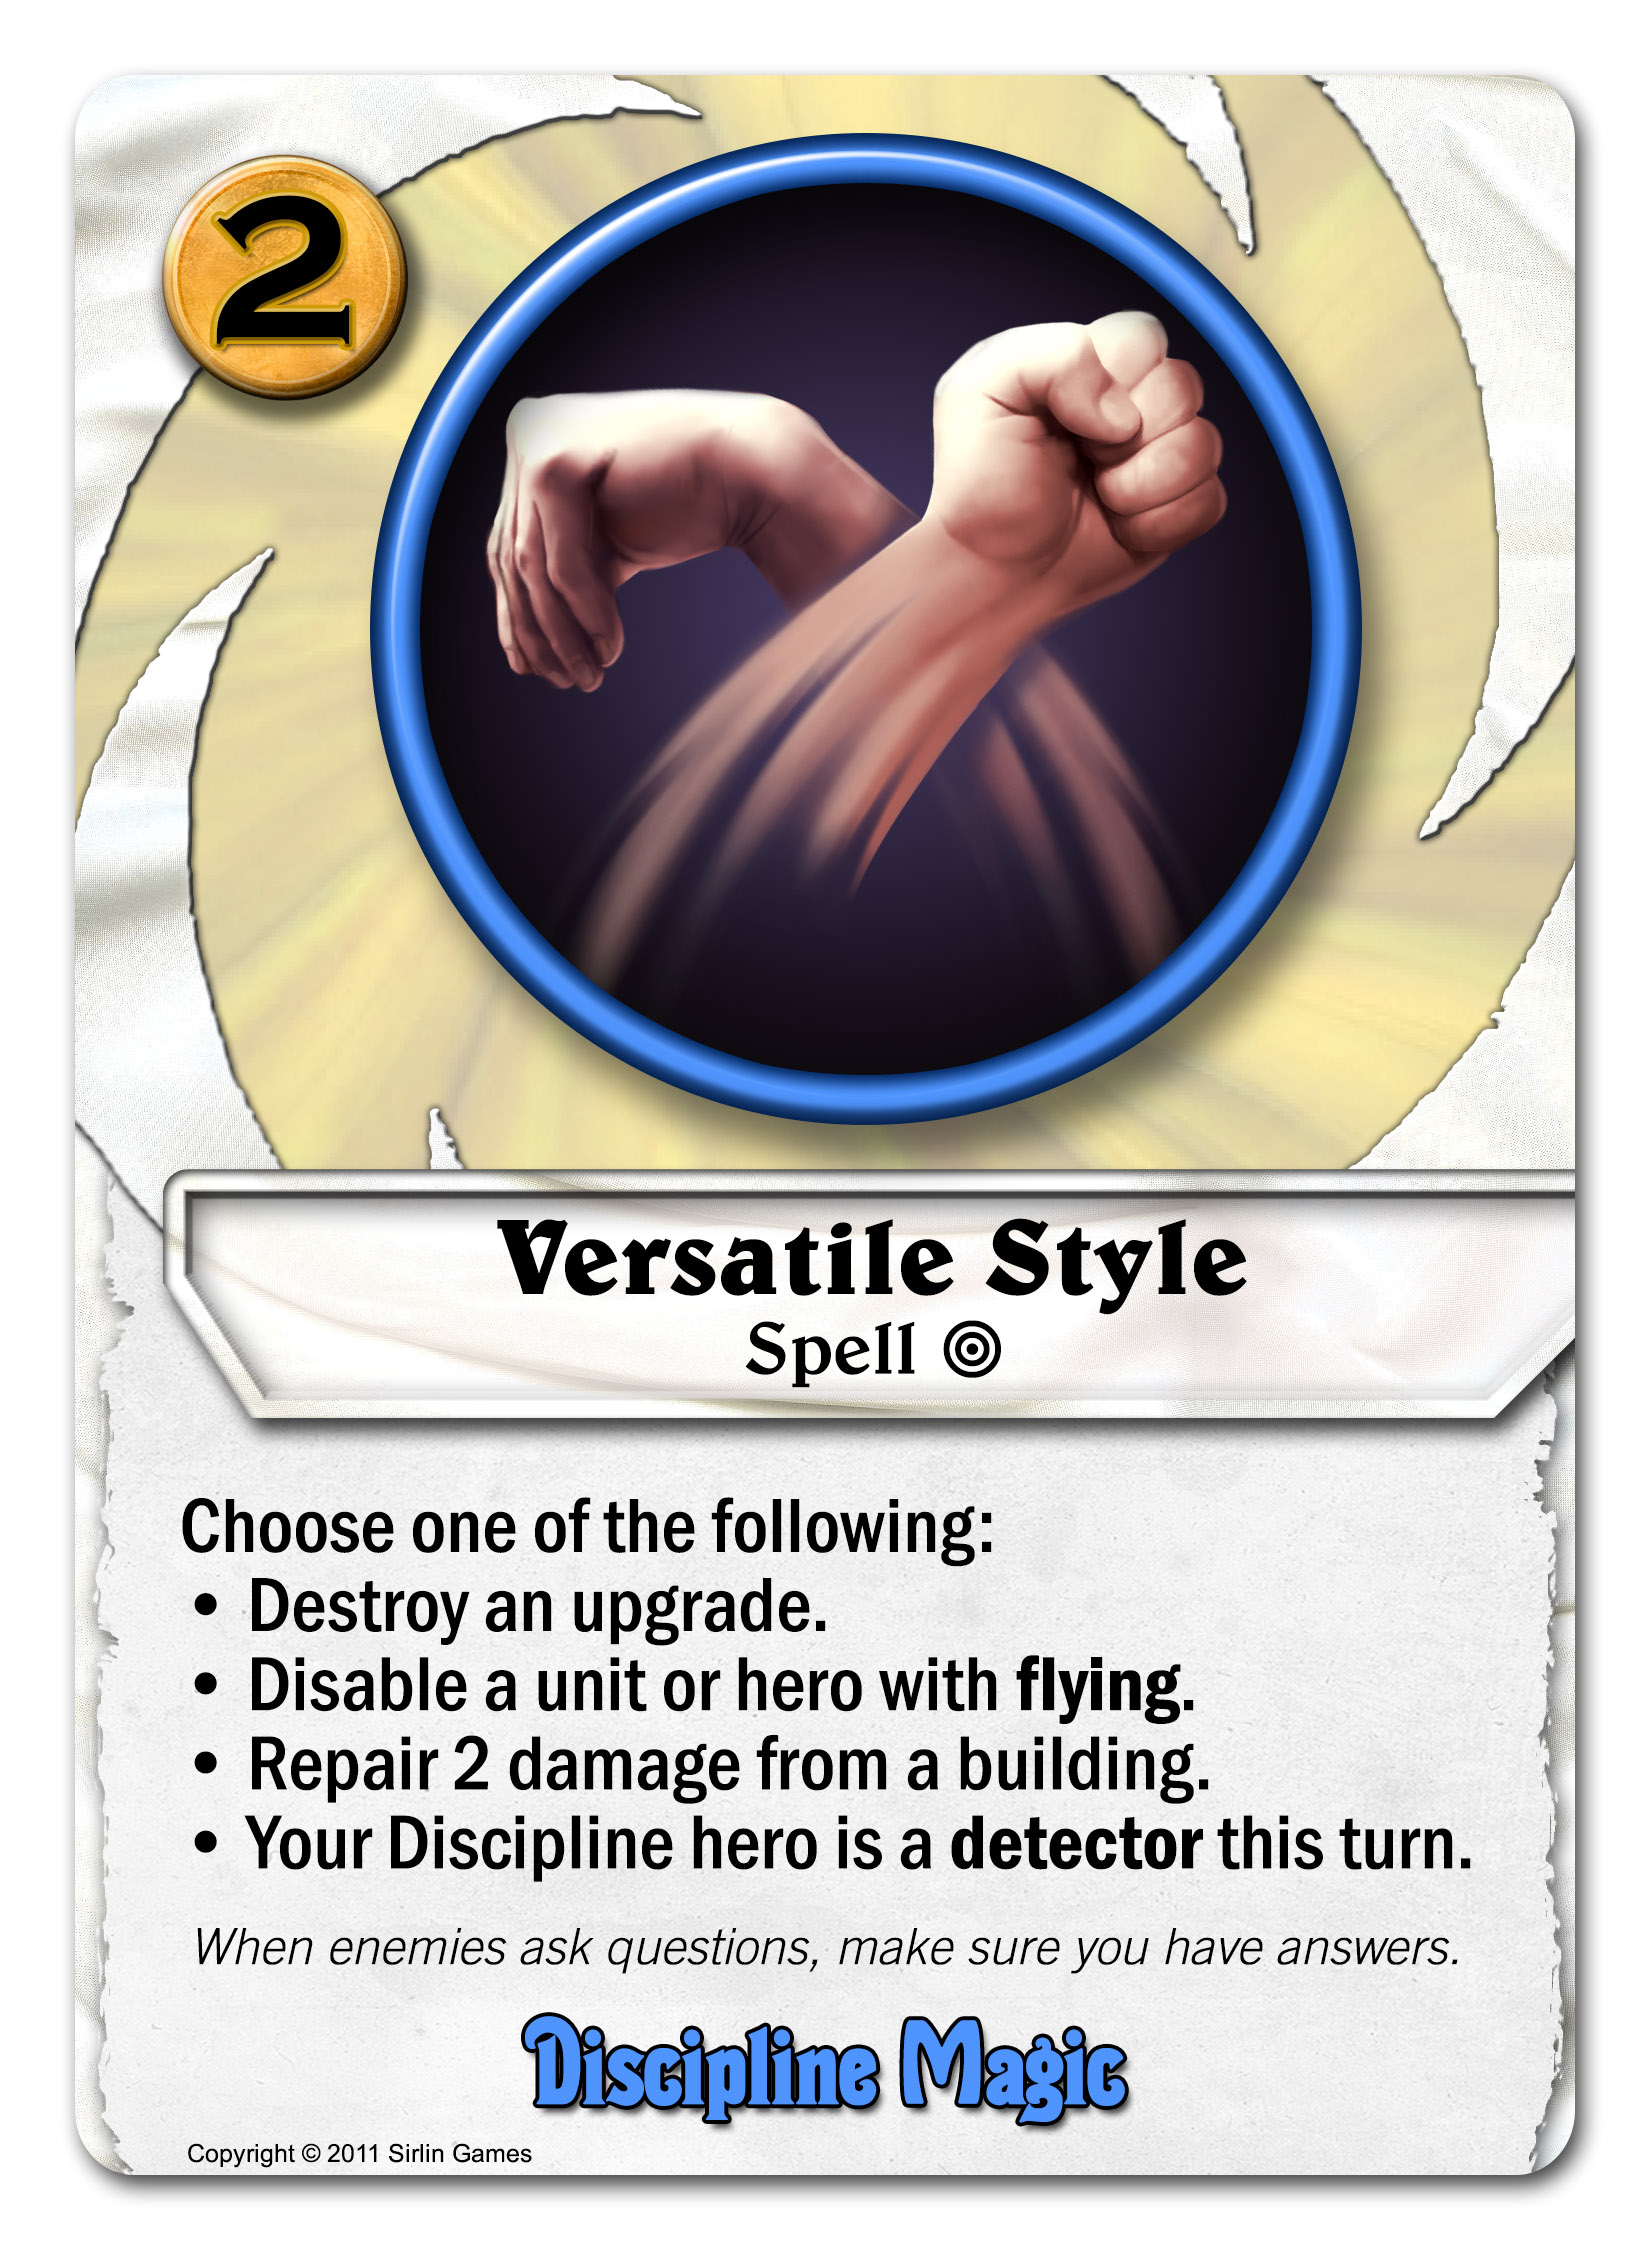
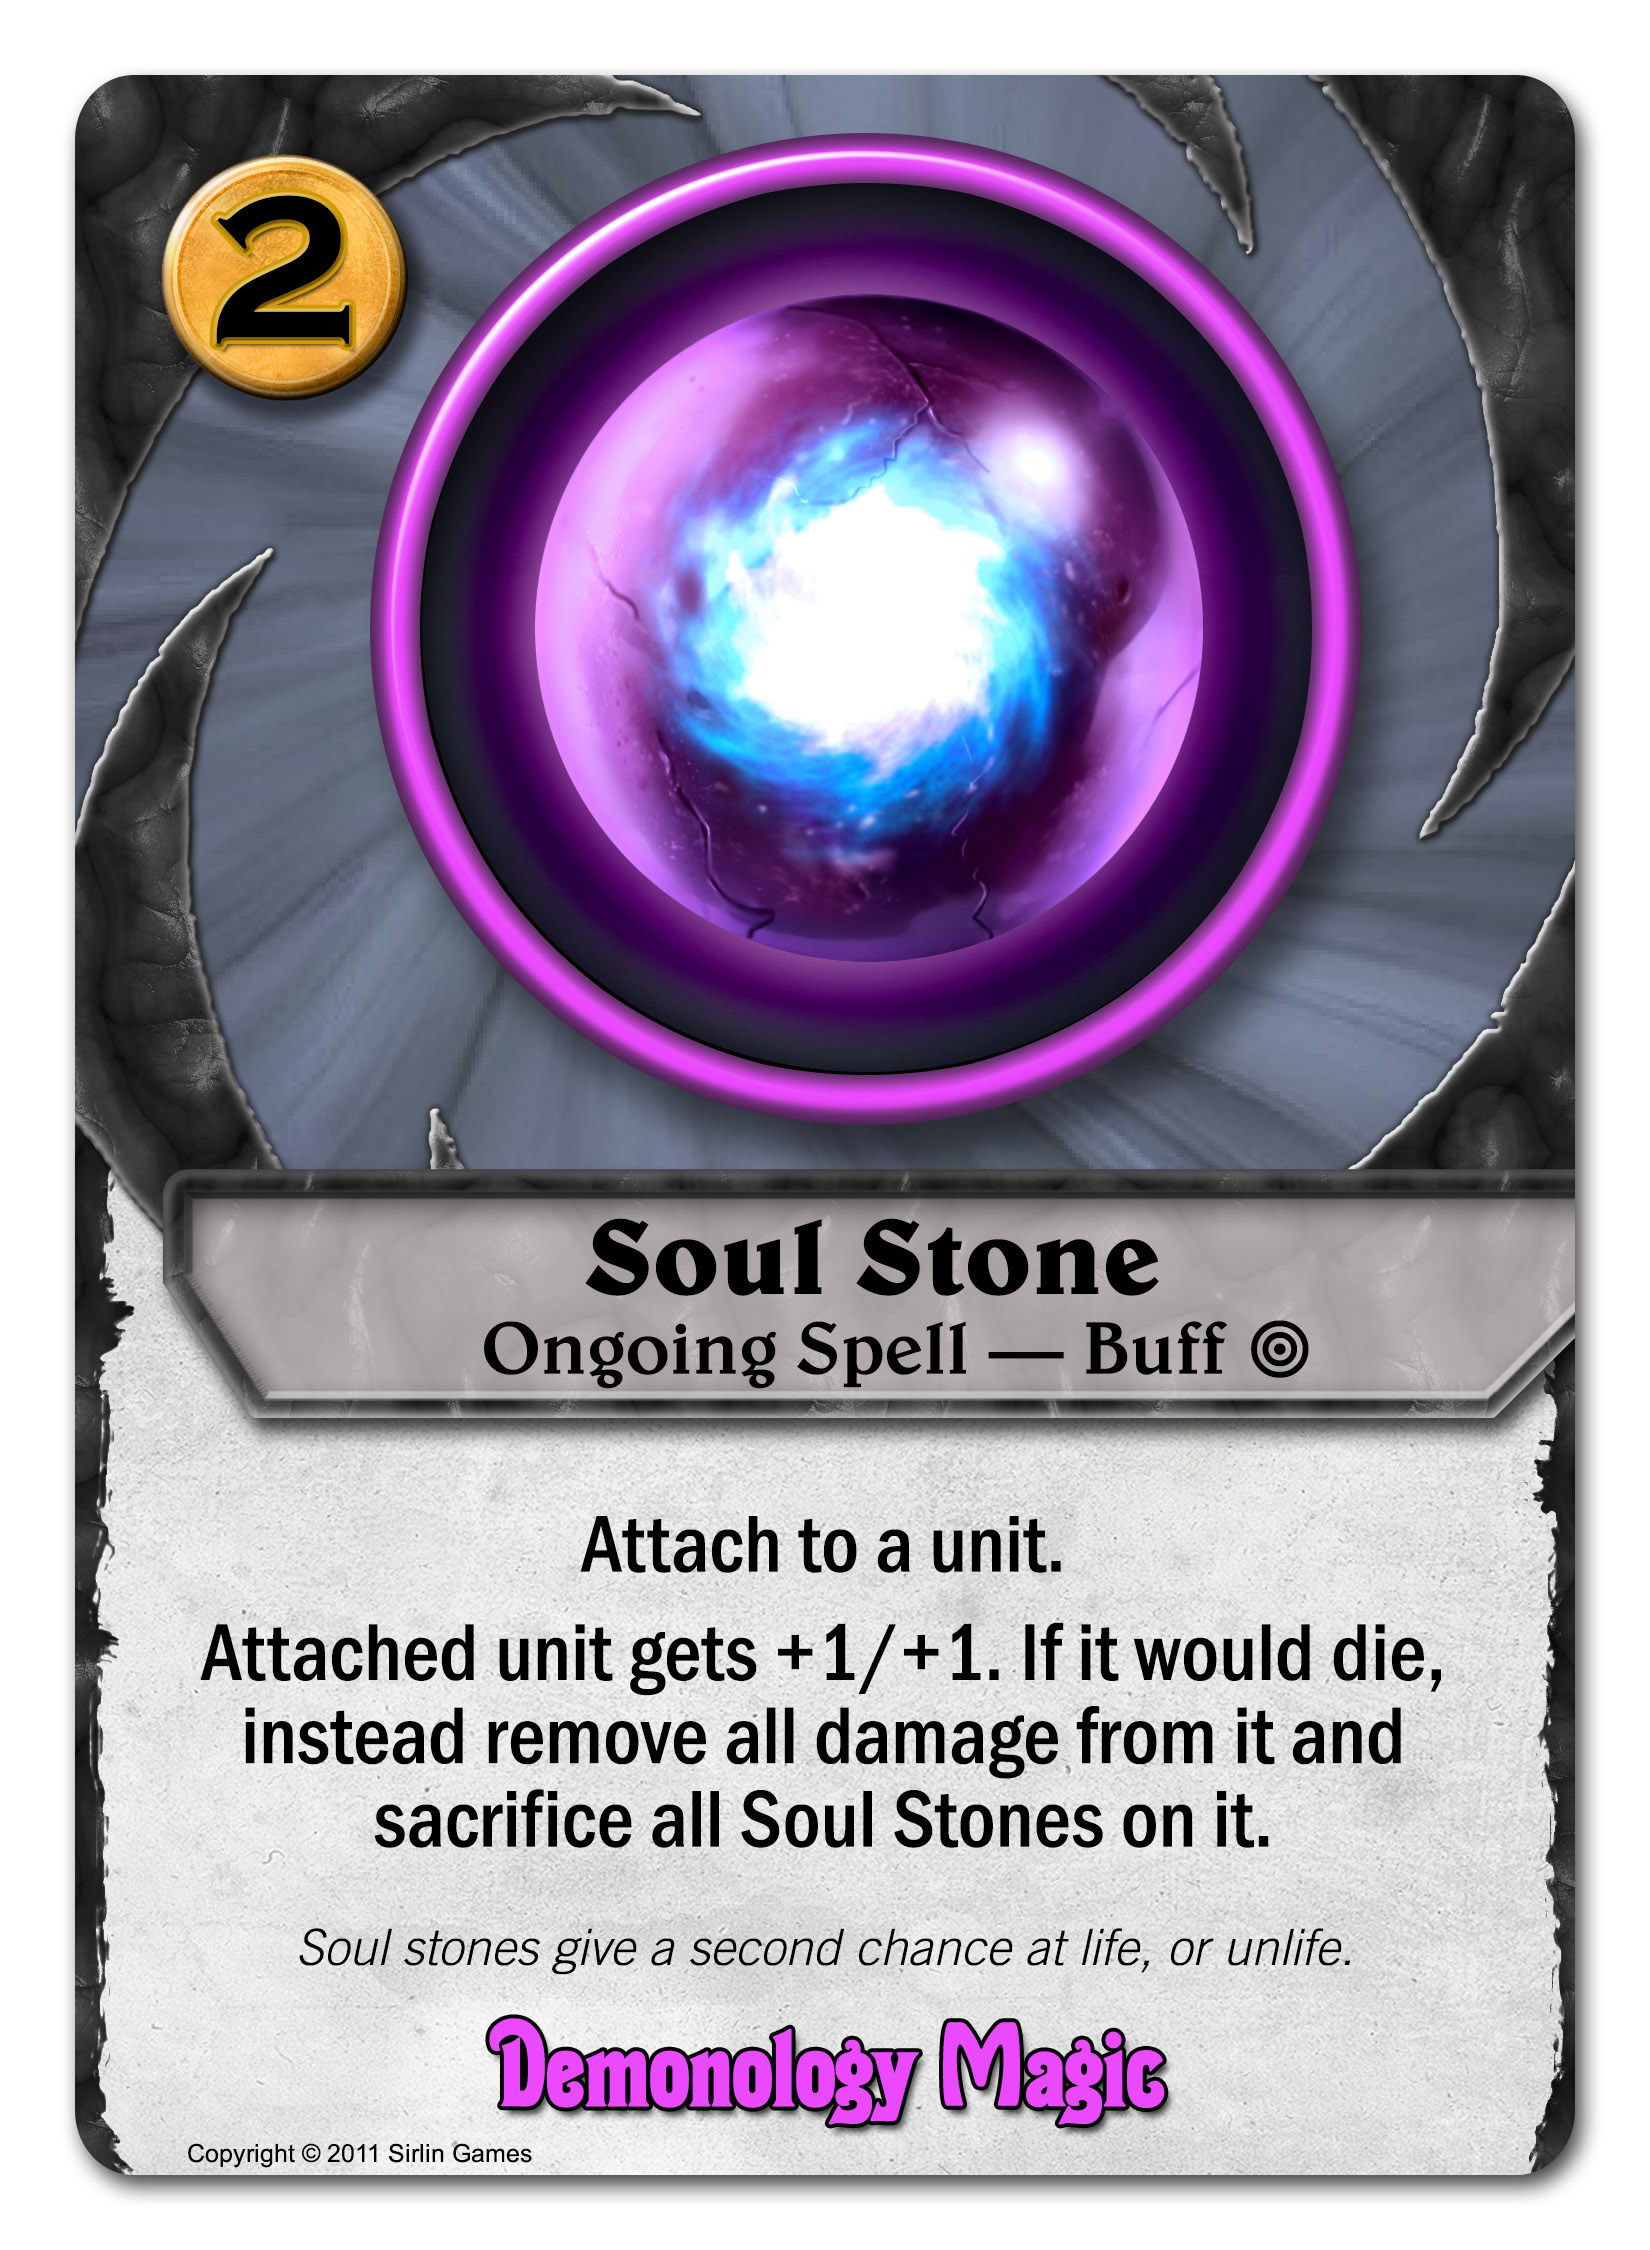
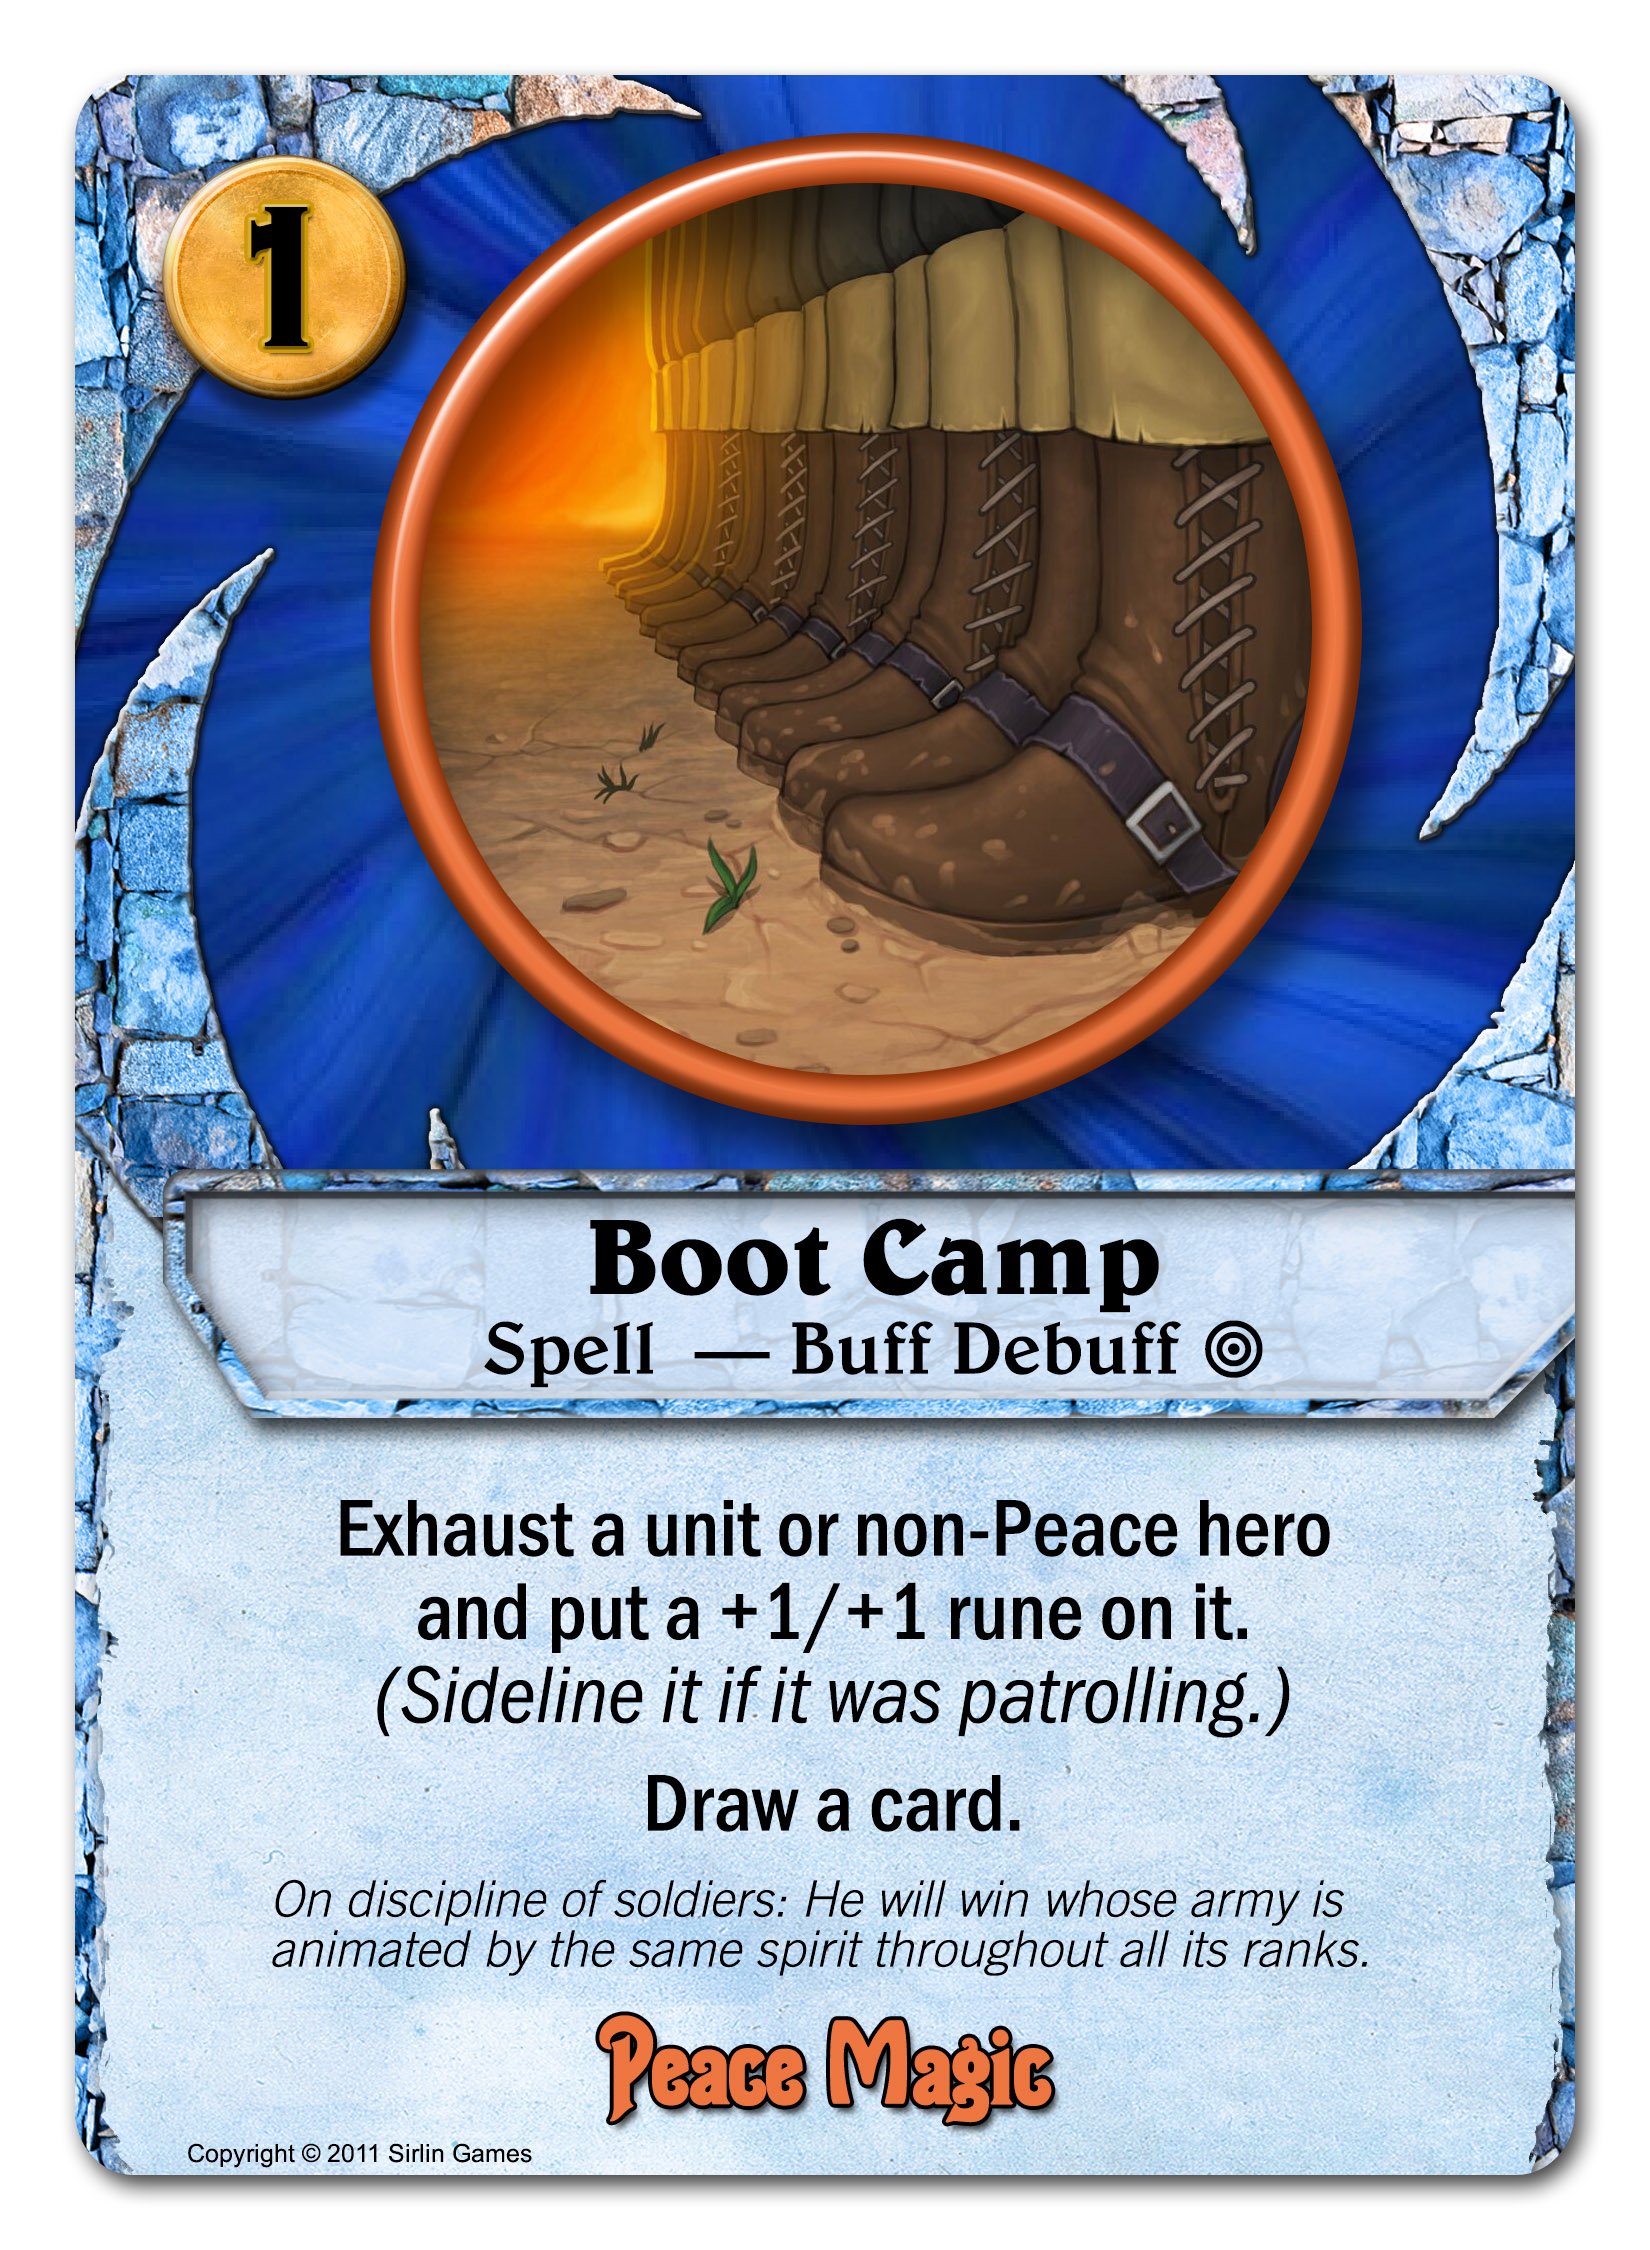
Moving on to Setsuki’s spells, one can power her up:


She already gets swift strike at level 4, and this spell gives her a slew of other combat-related buffs. You can use this to play a control style where you threaten to dominate the board and kill anything your opponent plays.


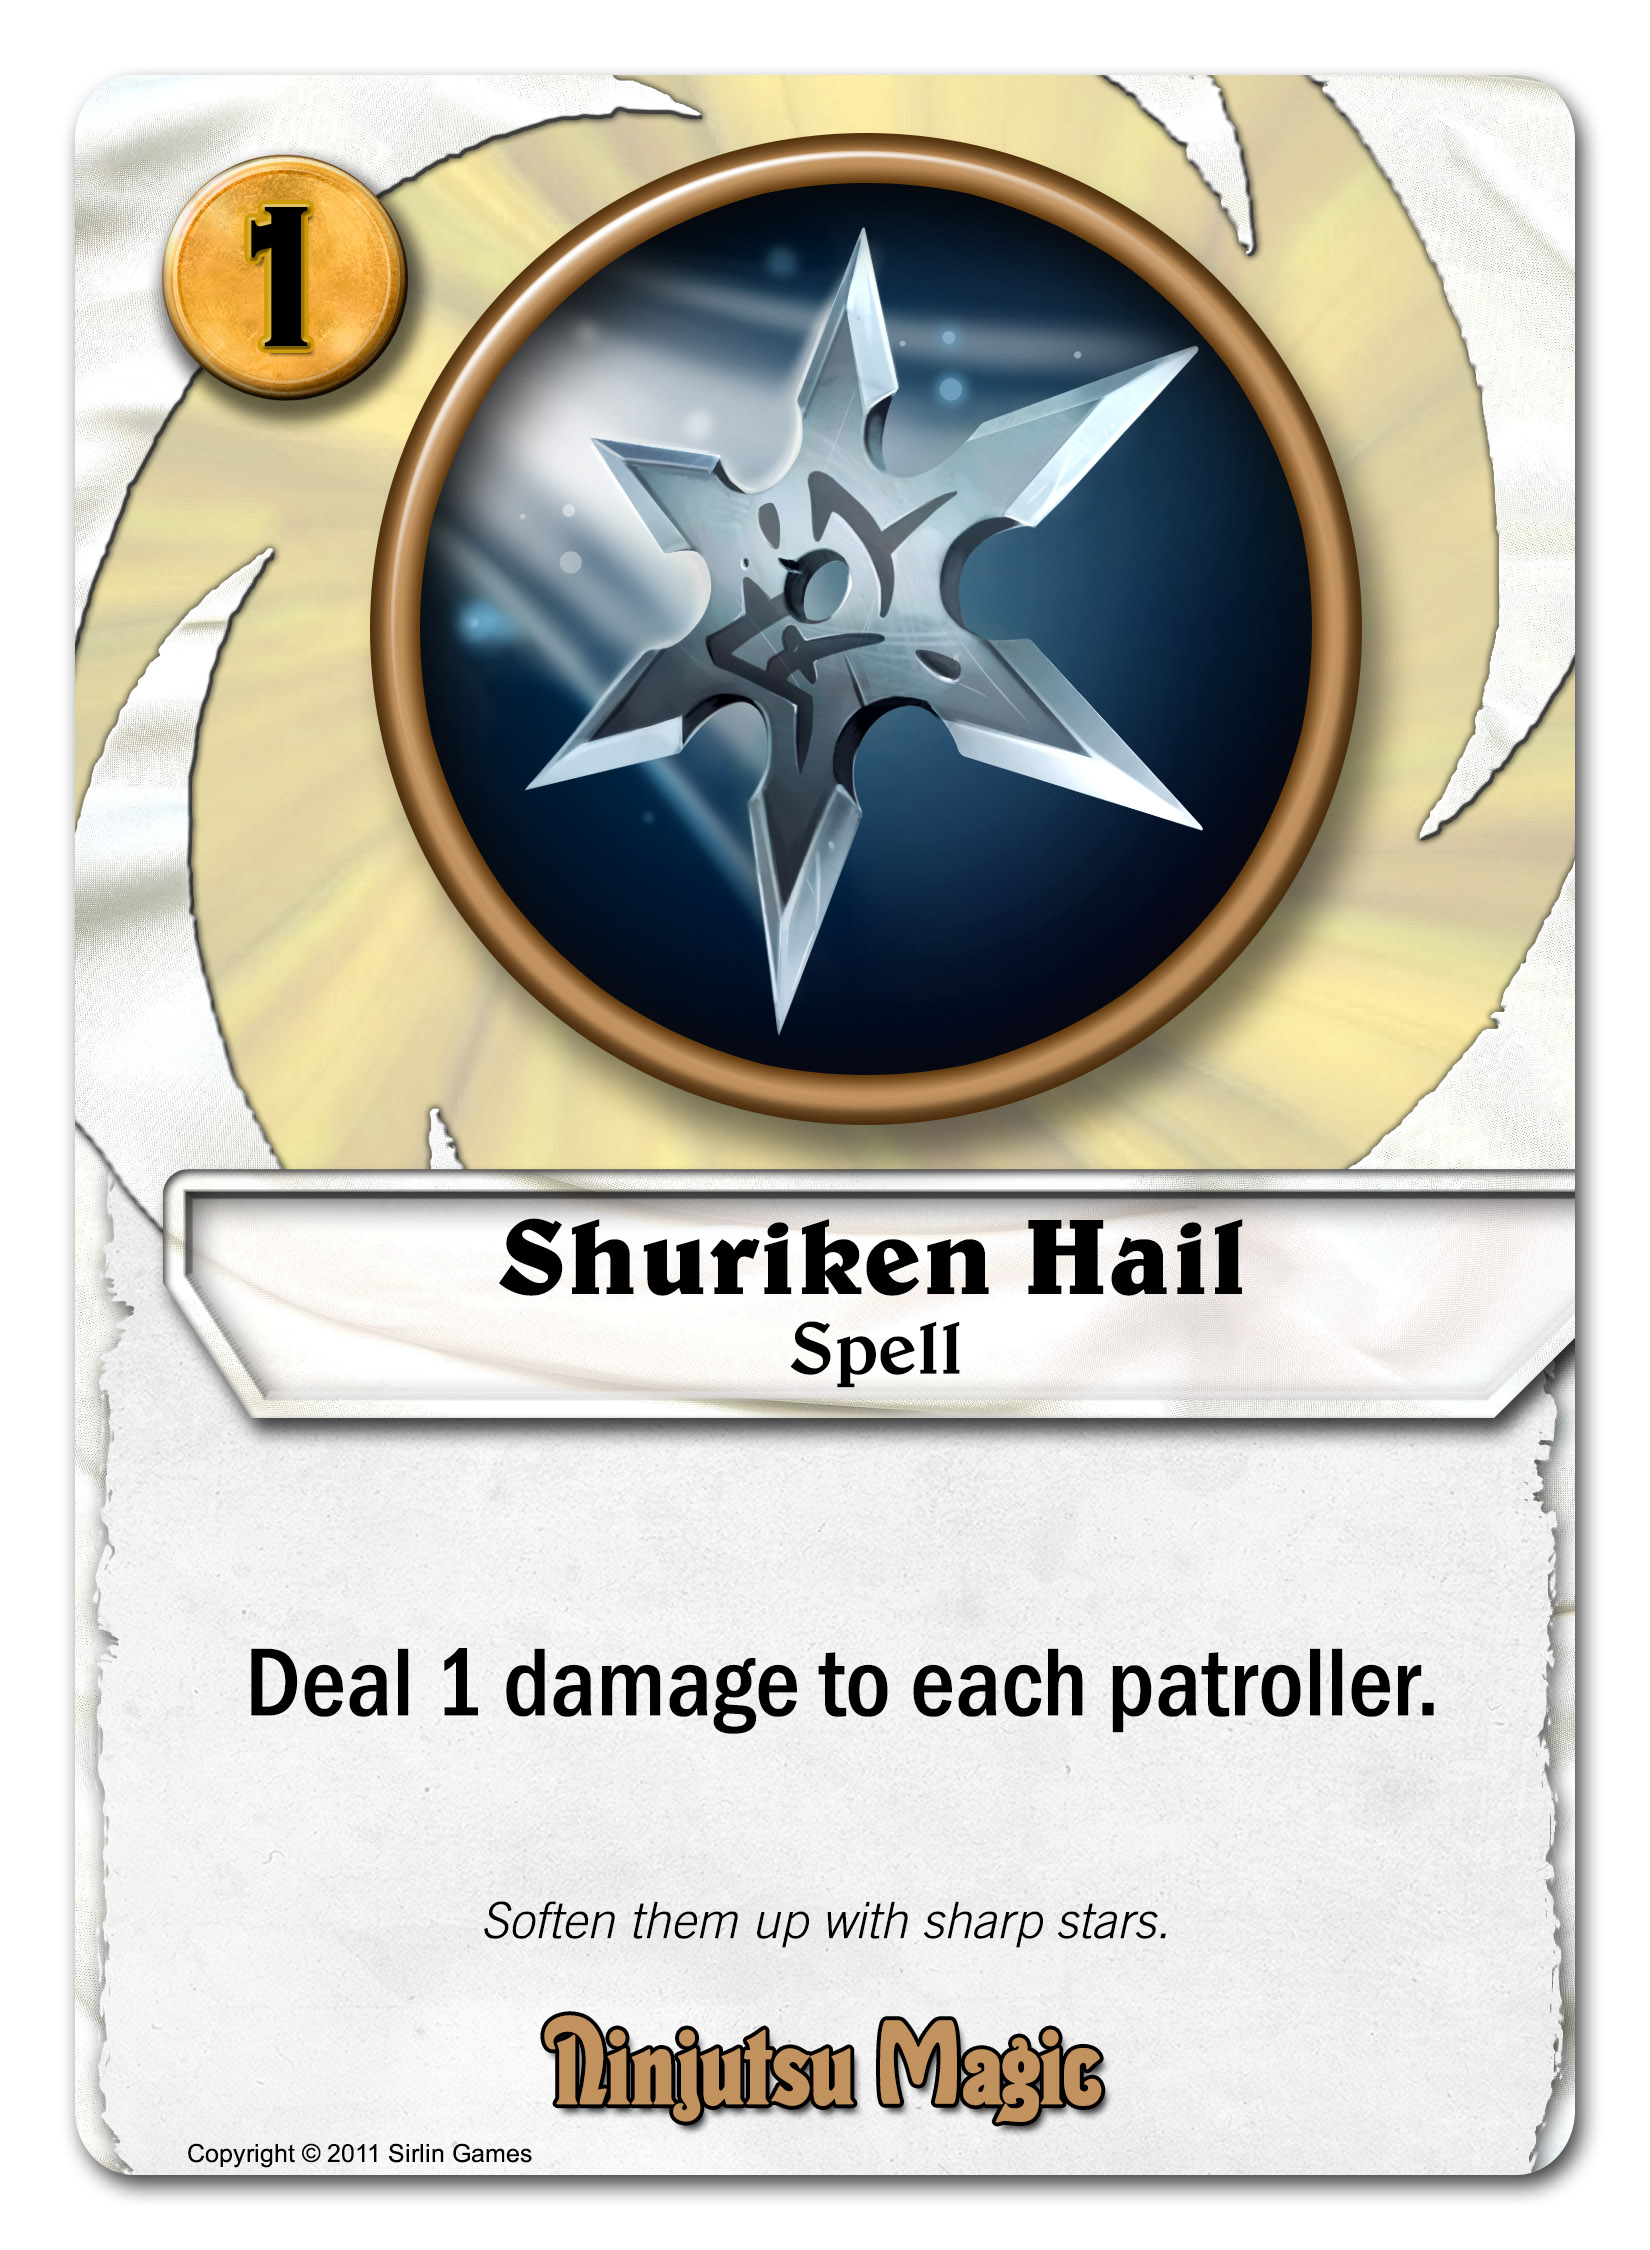
Throw down a rain of shurikens, dealing 1 damage to each patroller. Some strategies involve a bunch of 1/1 tokens, so Shuriken Hail can threaten to kill several of those at once, or to soften up some bigger patrollers so that the rest of your forces can do cleanup.

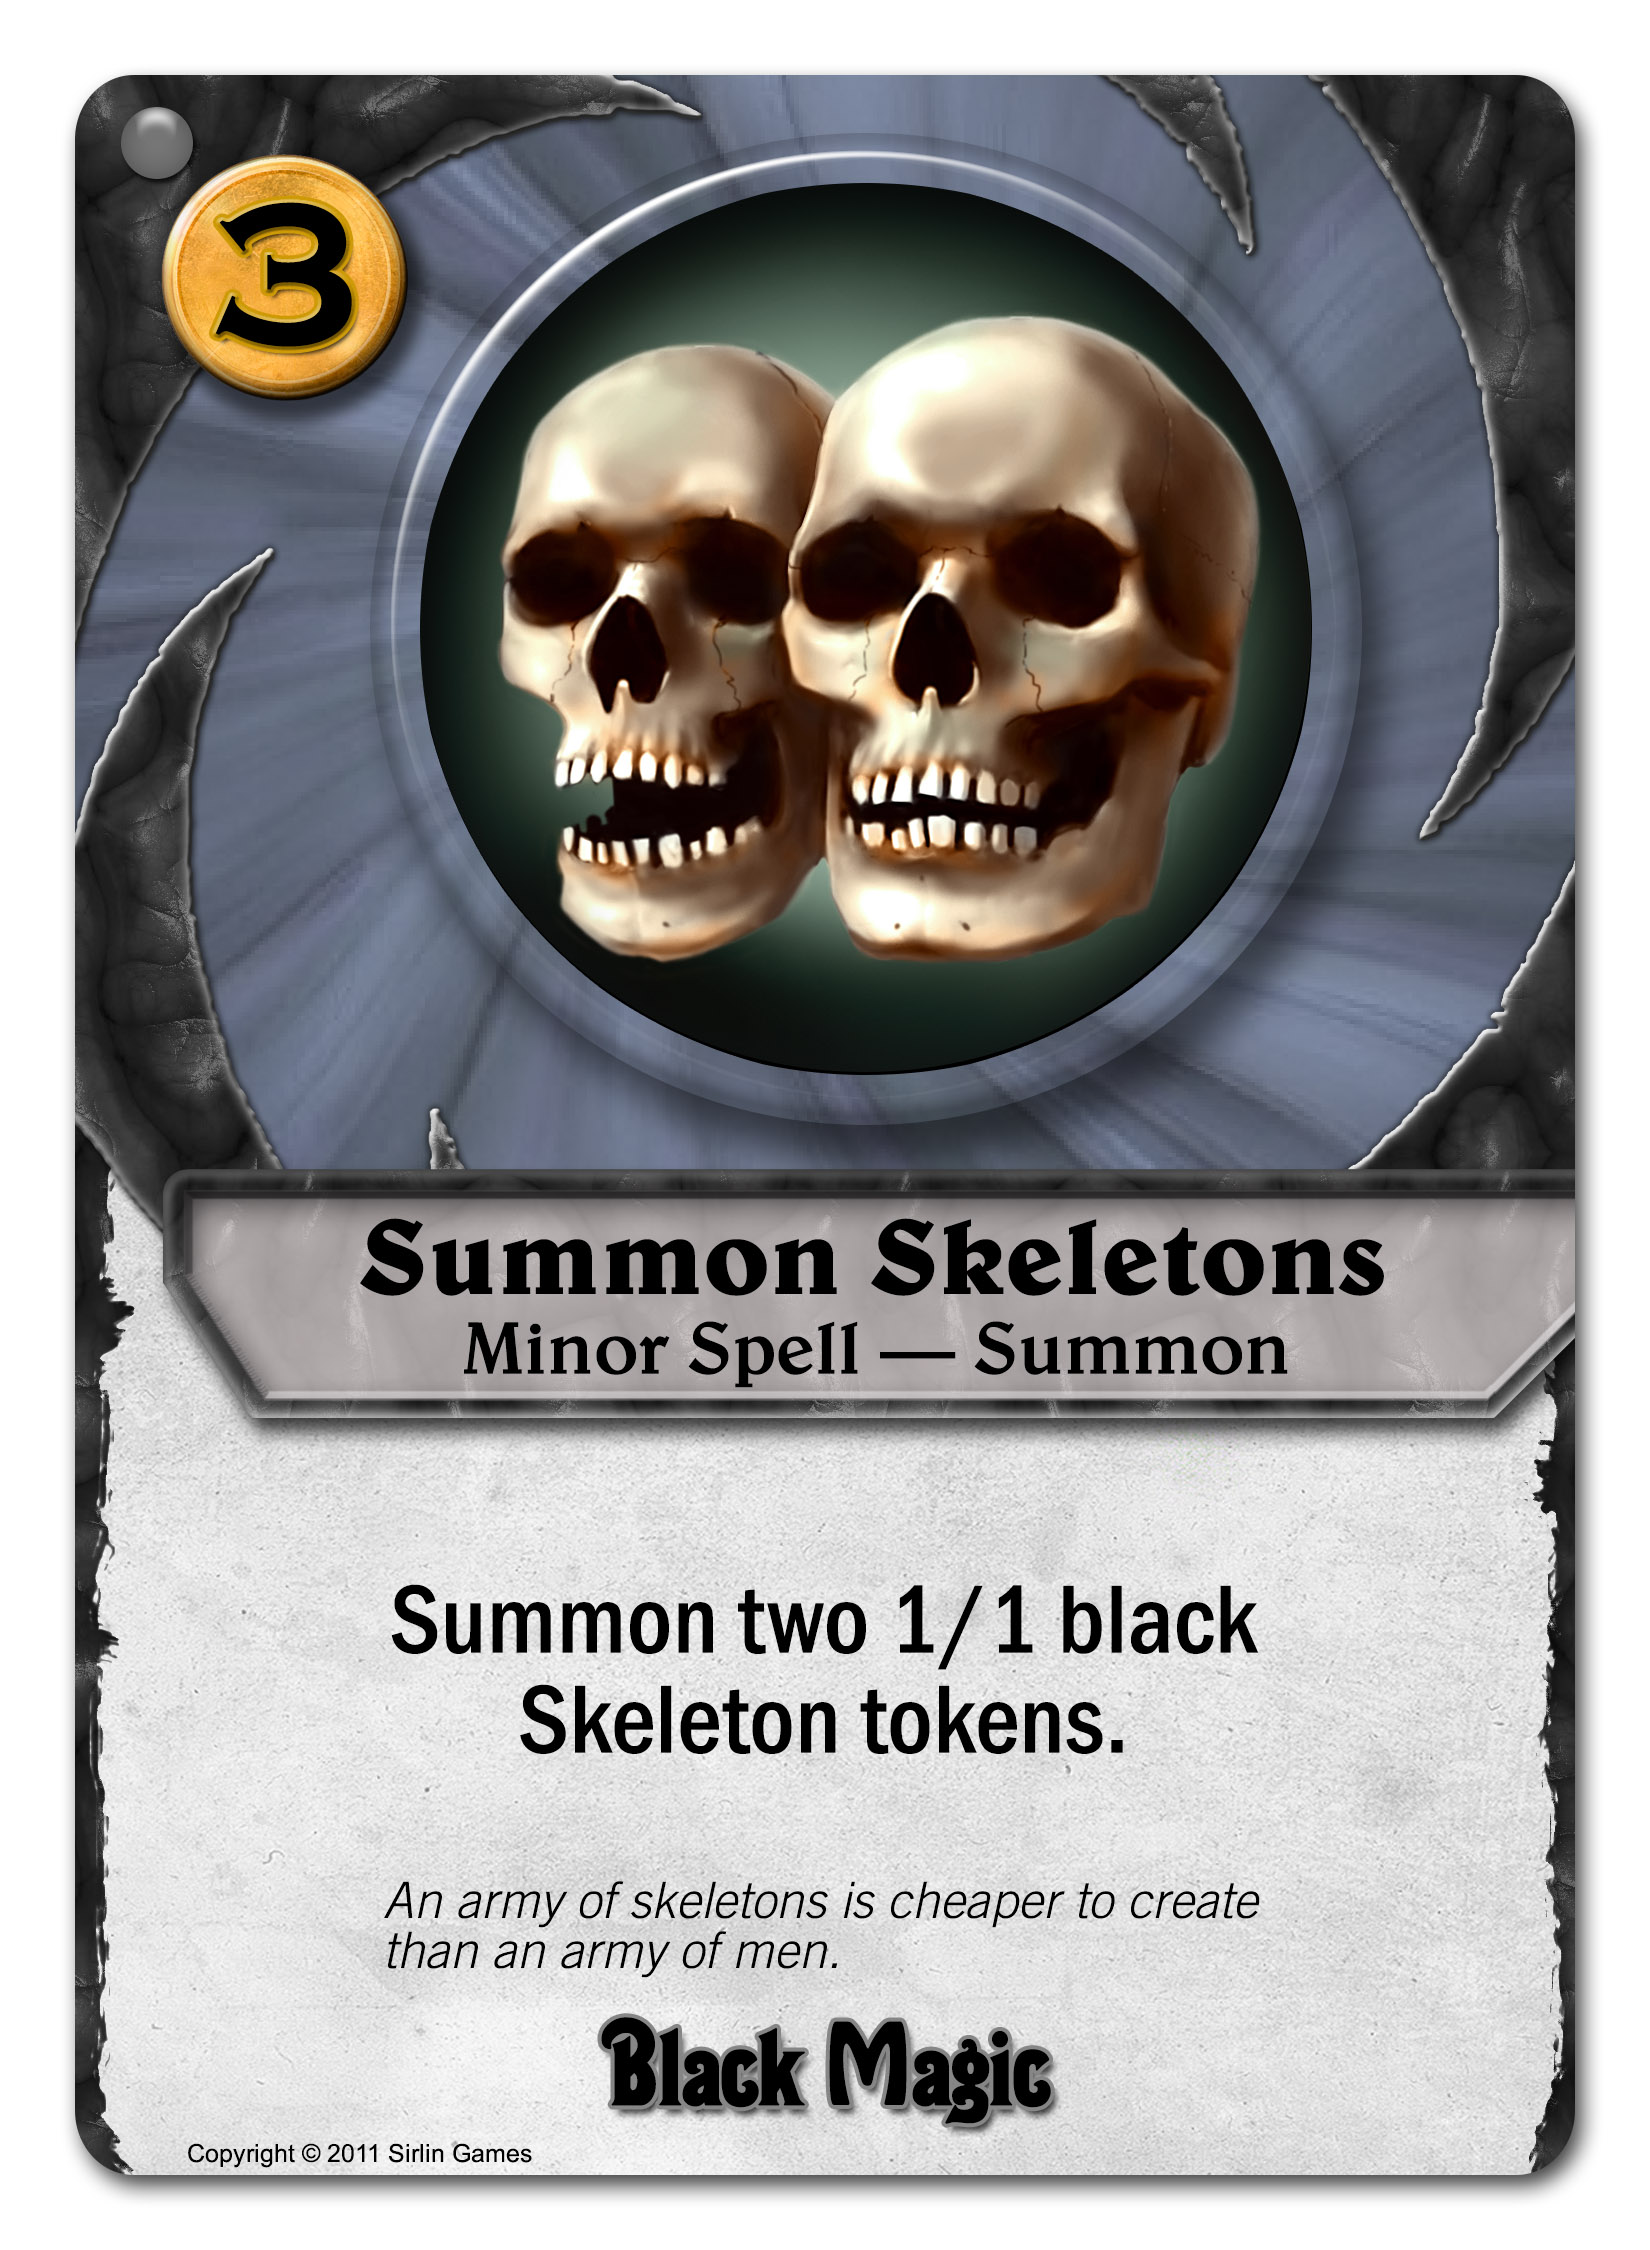
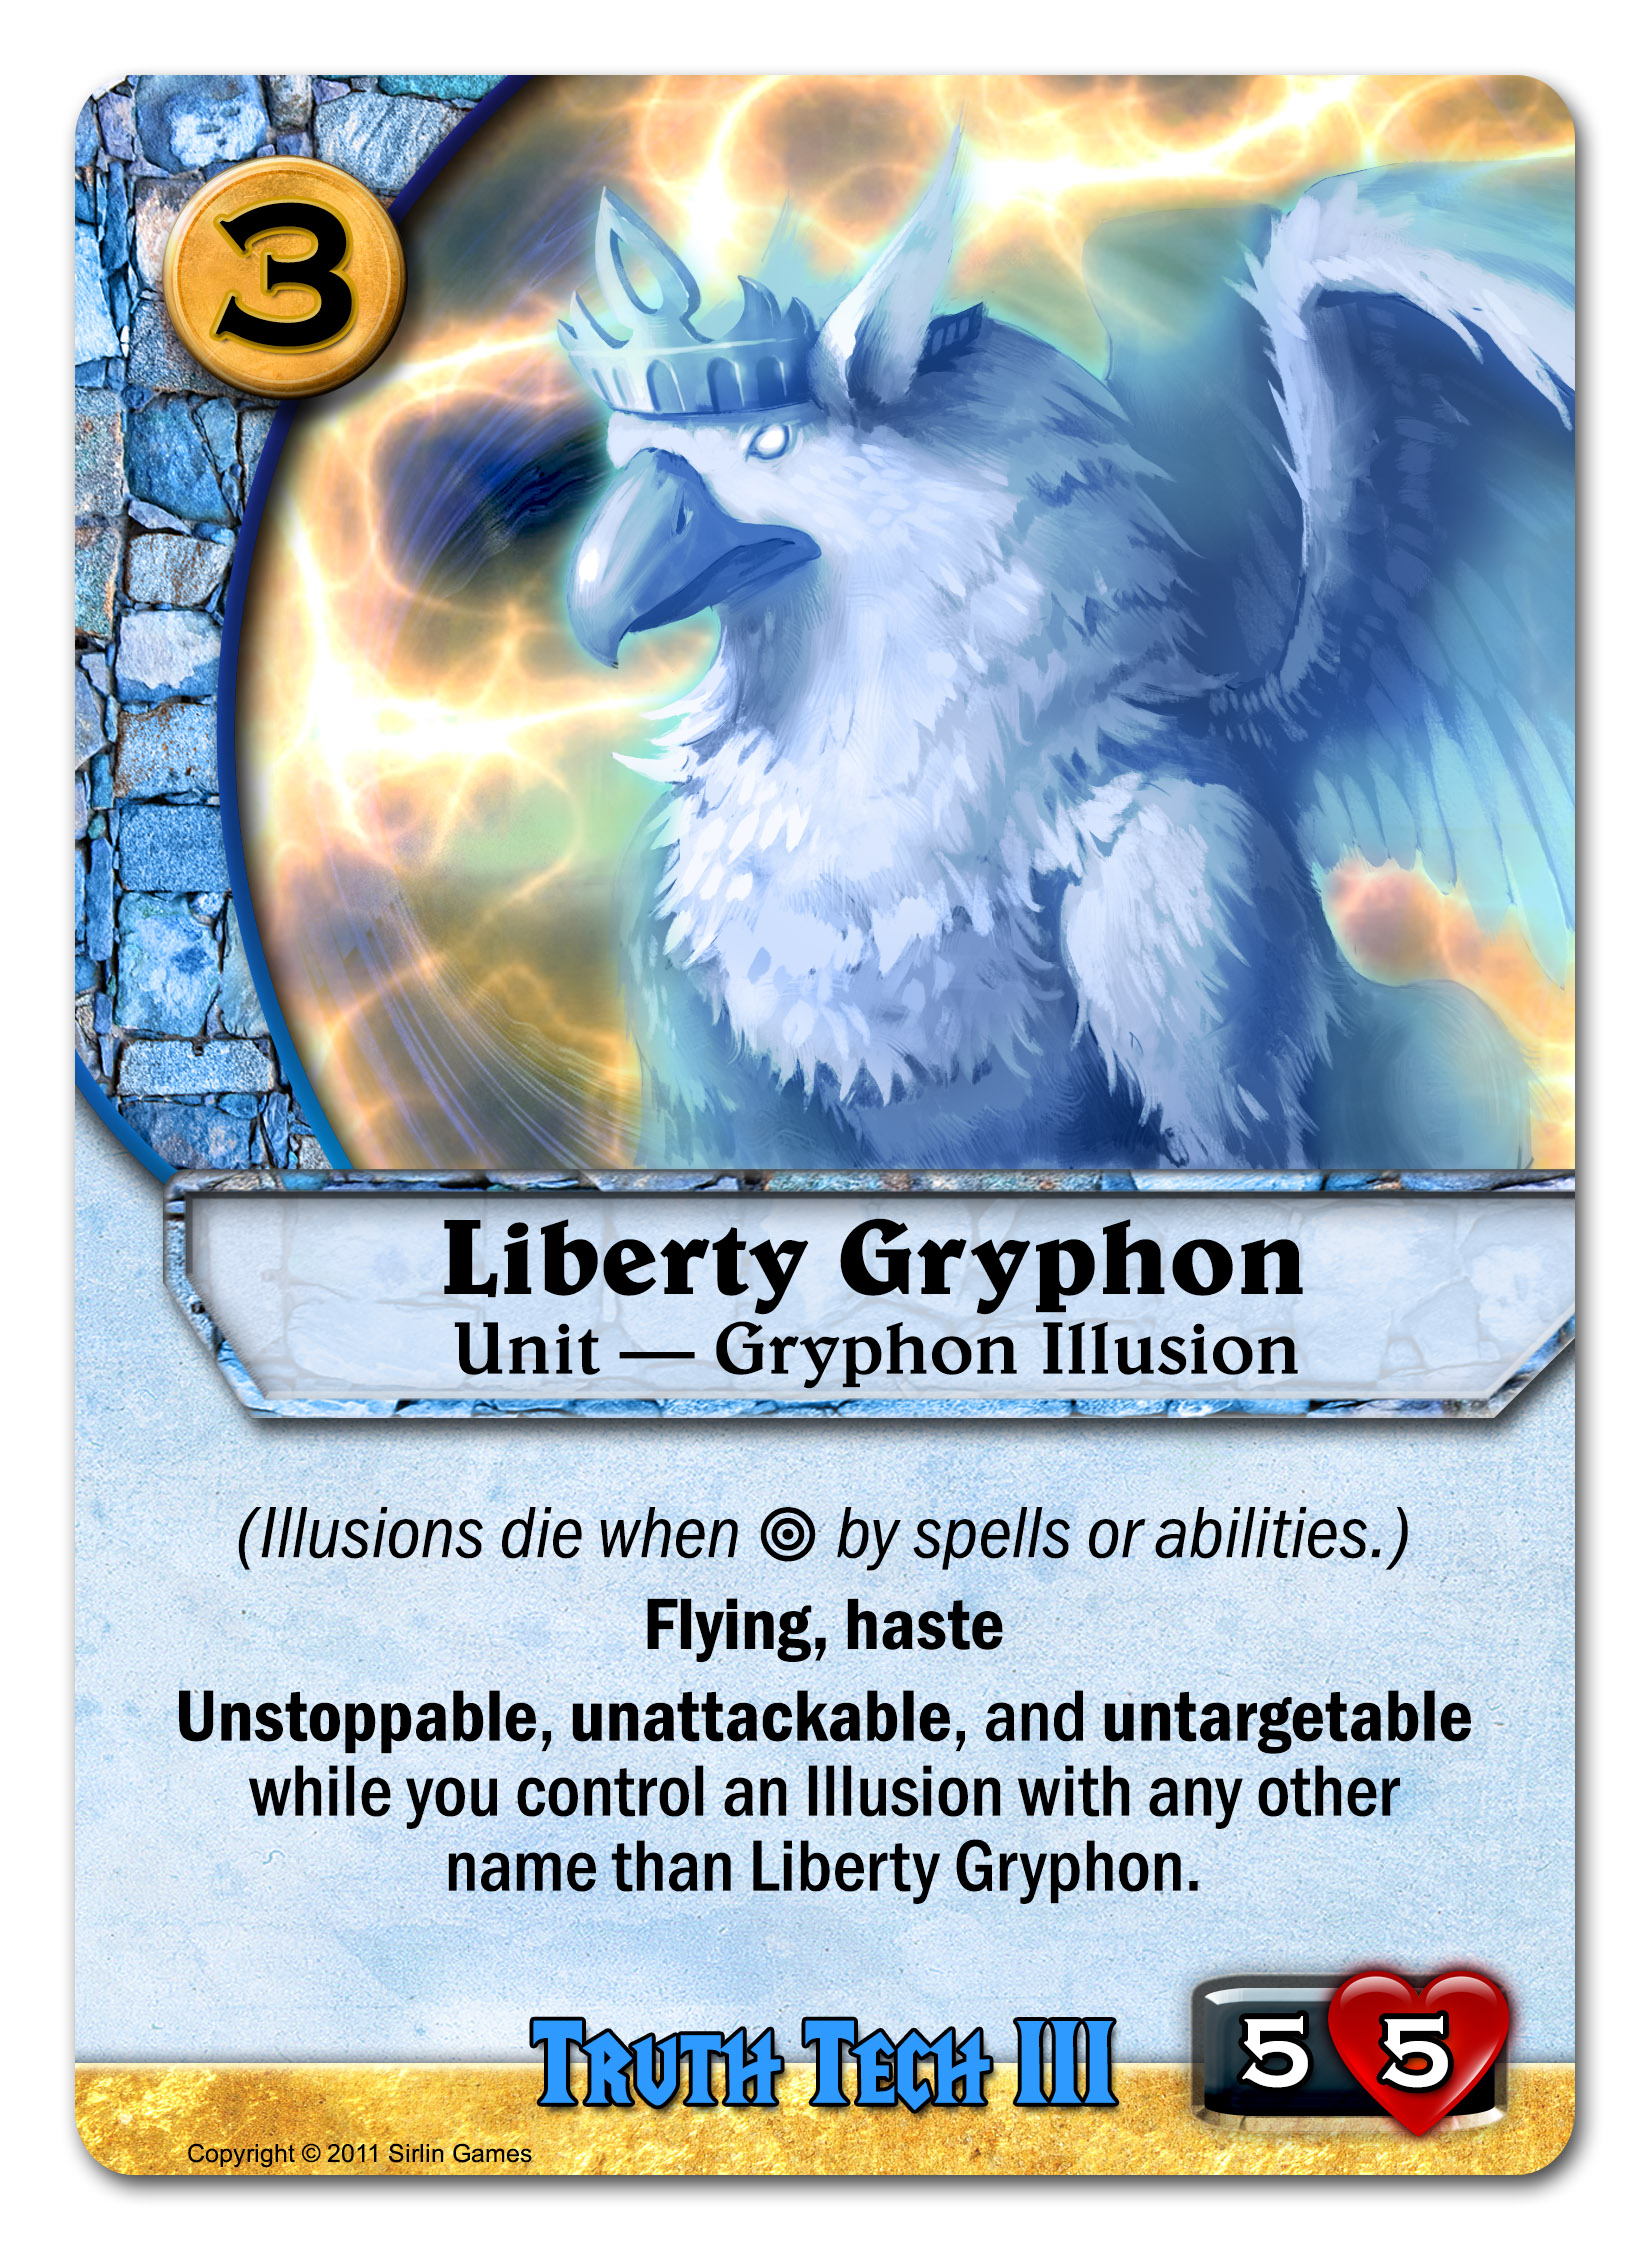
Speaking of strategies that involve a bunch of 1/1 tokens, that’s you. That’s your strategy:


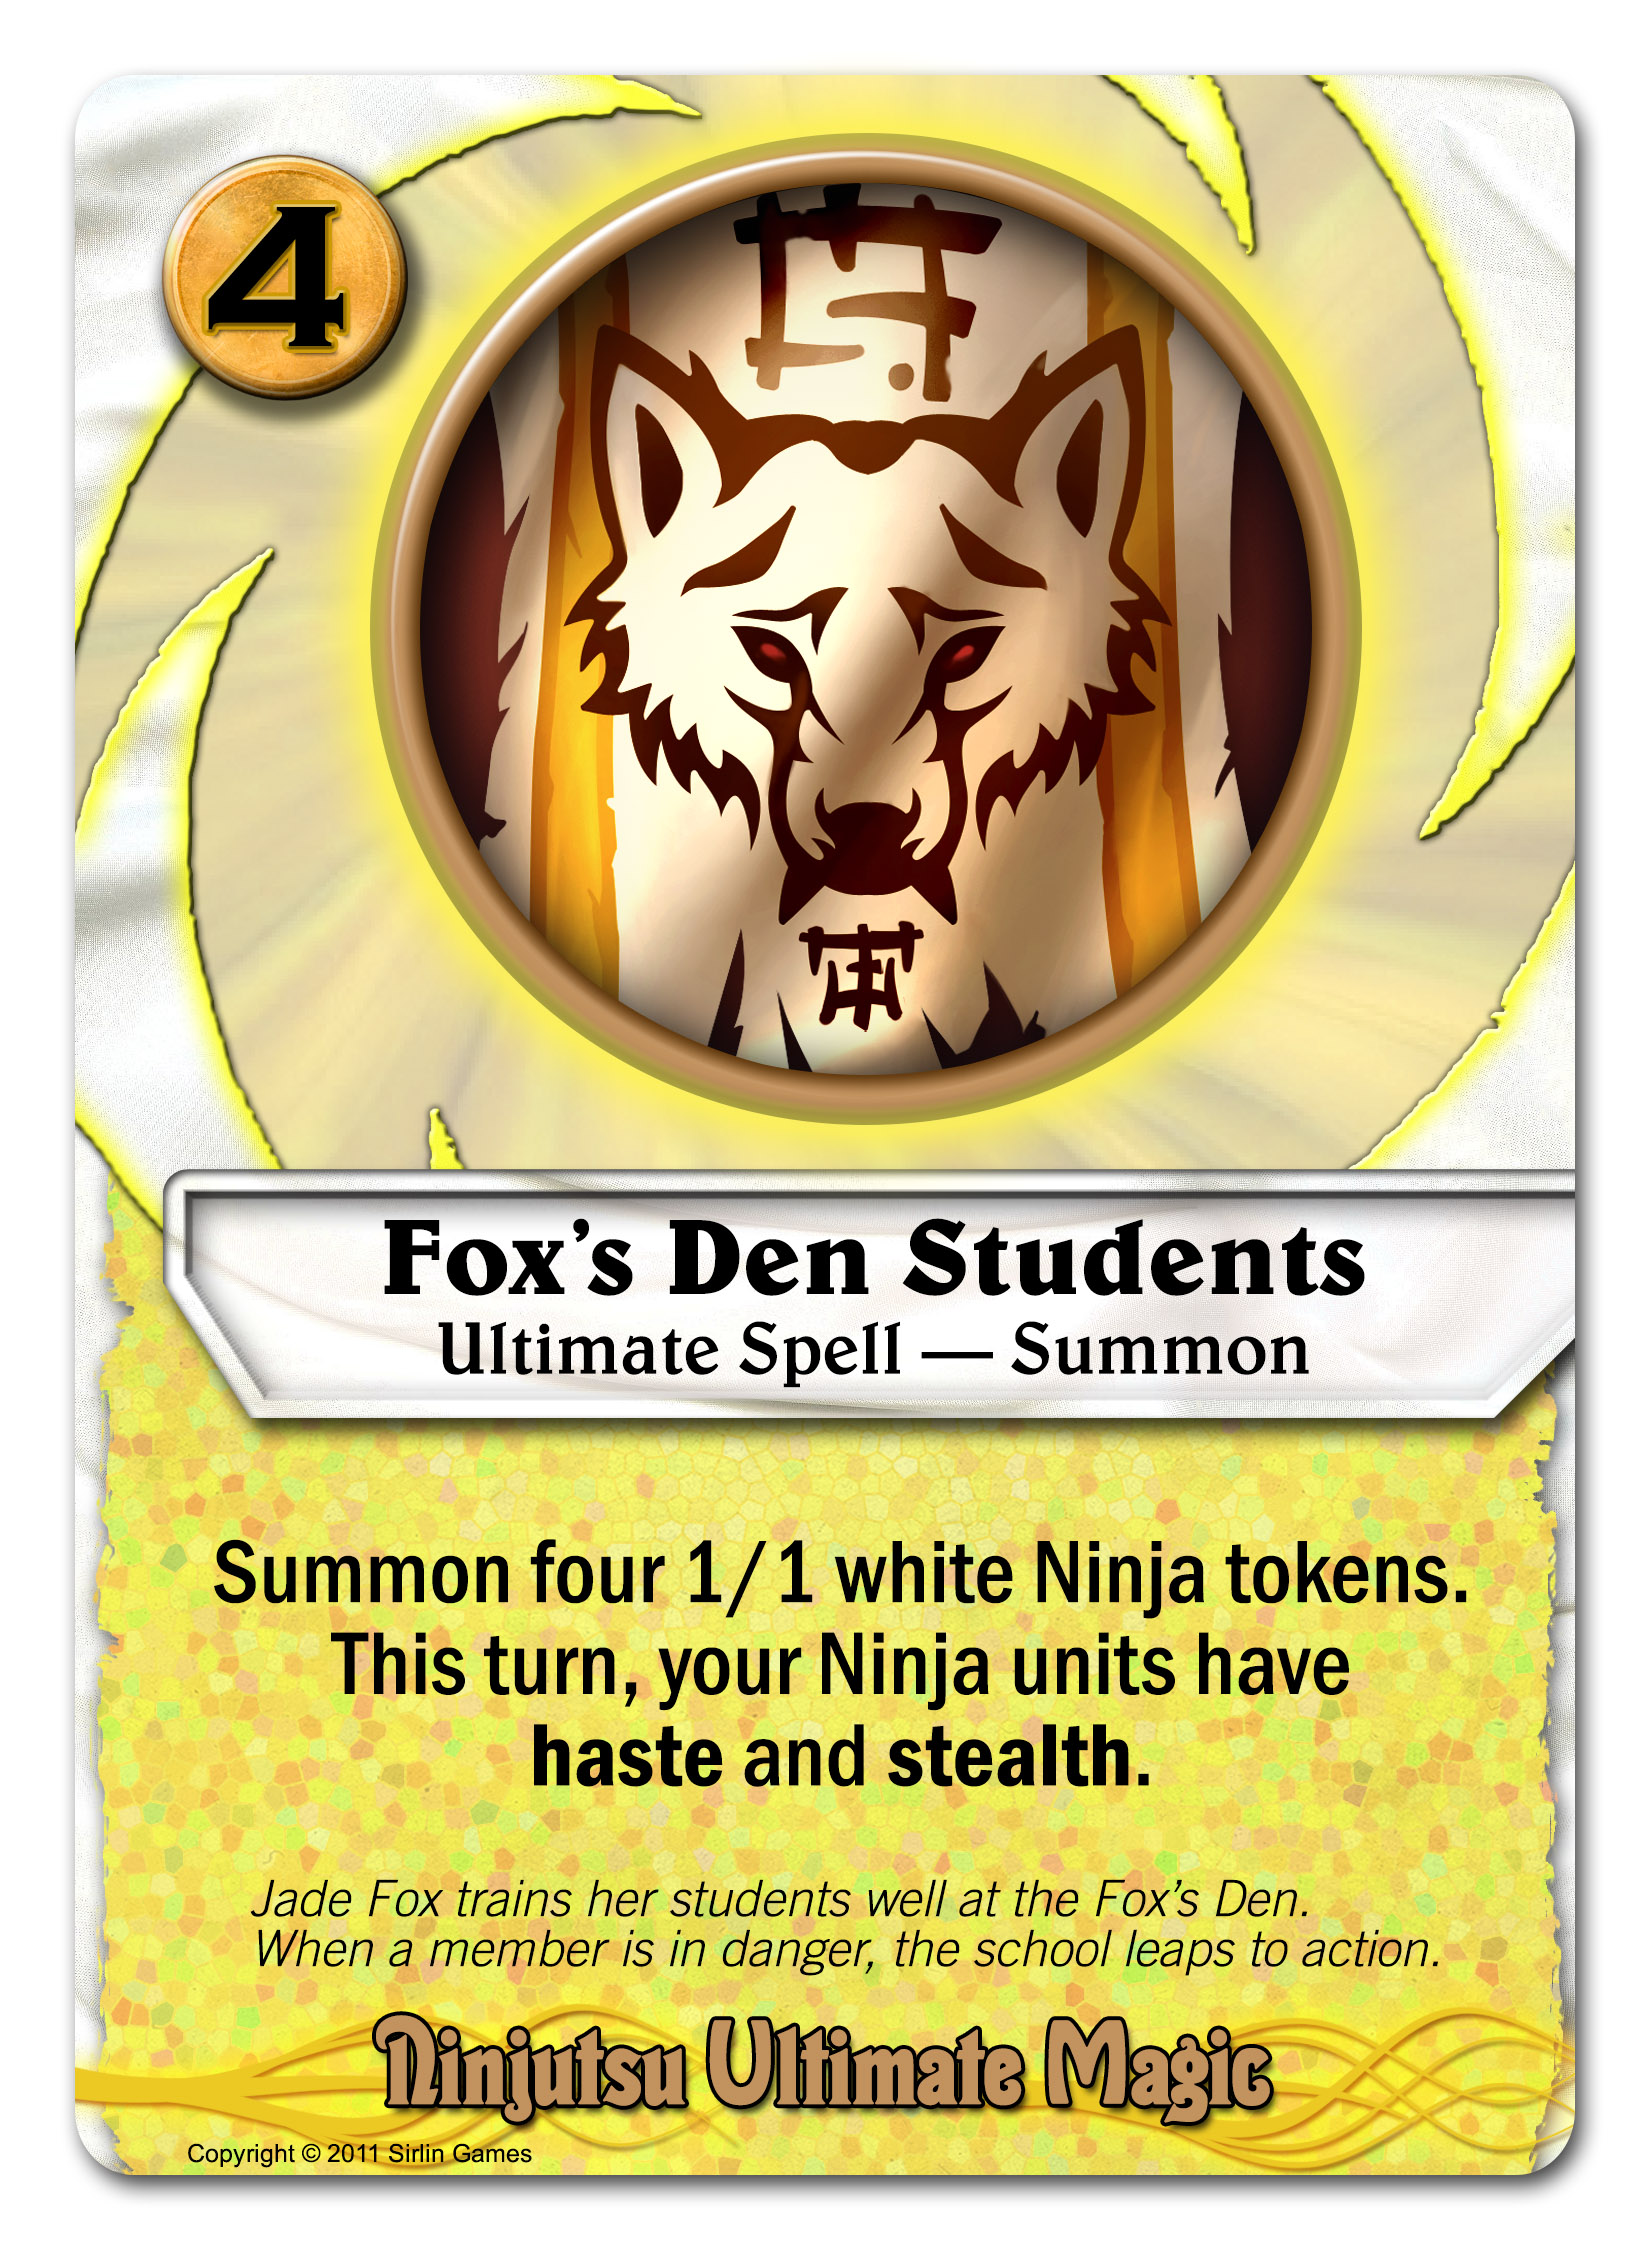
Setsuki calls her friends for backup, and they arrive ready to strike immediately, thanks to haste. The stealth part lets them ignore patrollers and attack whatever you want. Setsuki is already dangerous at max level just due to her card draw, but now factor in that at max level she can also cast this spell over and over. That’s a lot of Ninja friends.


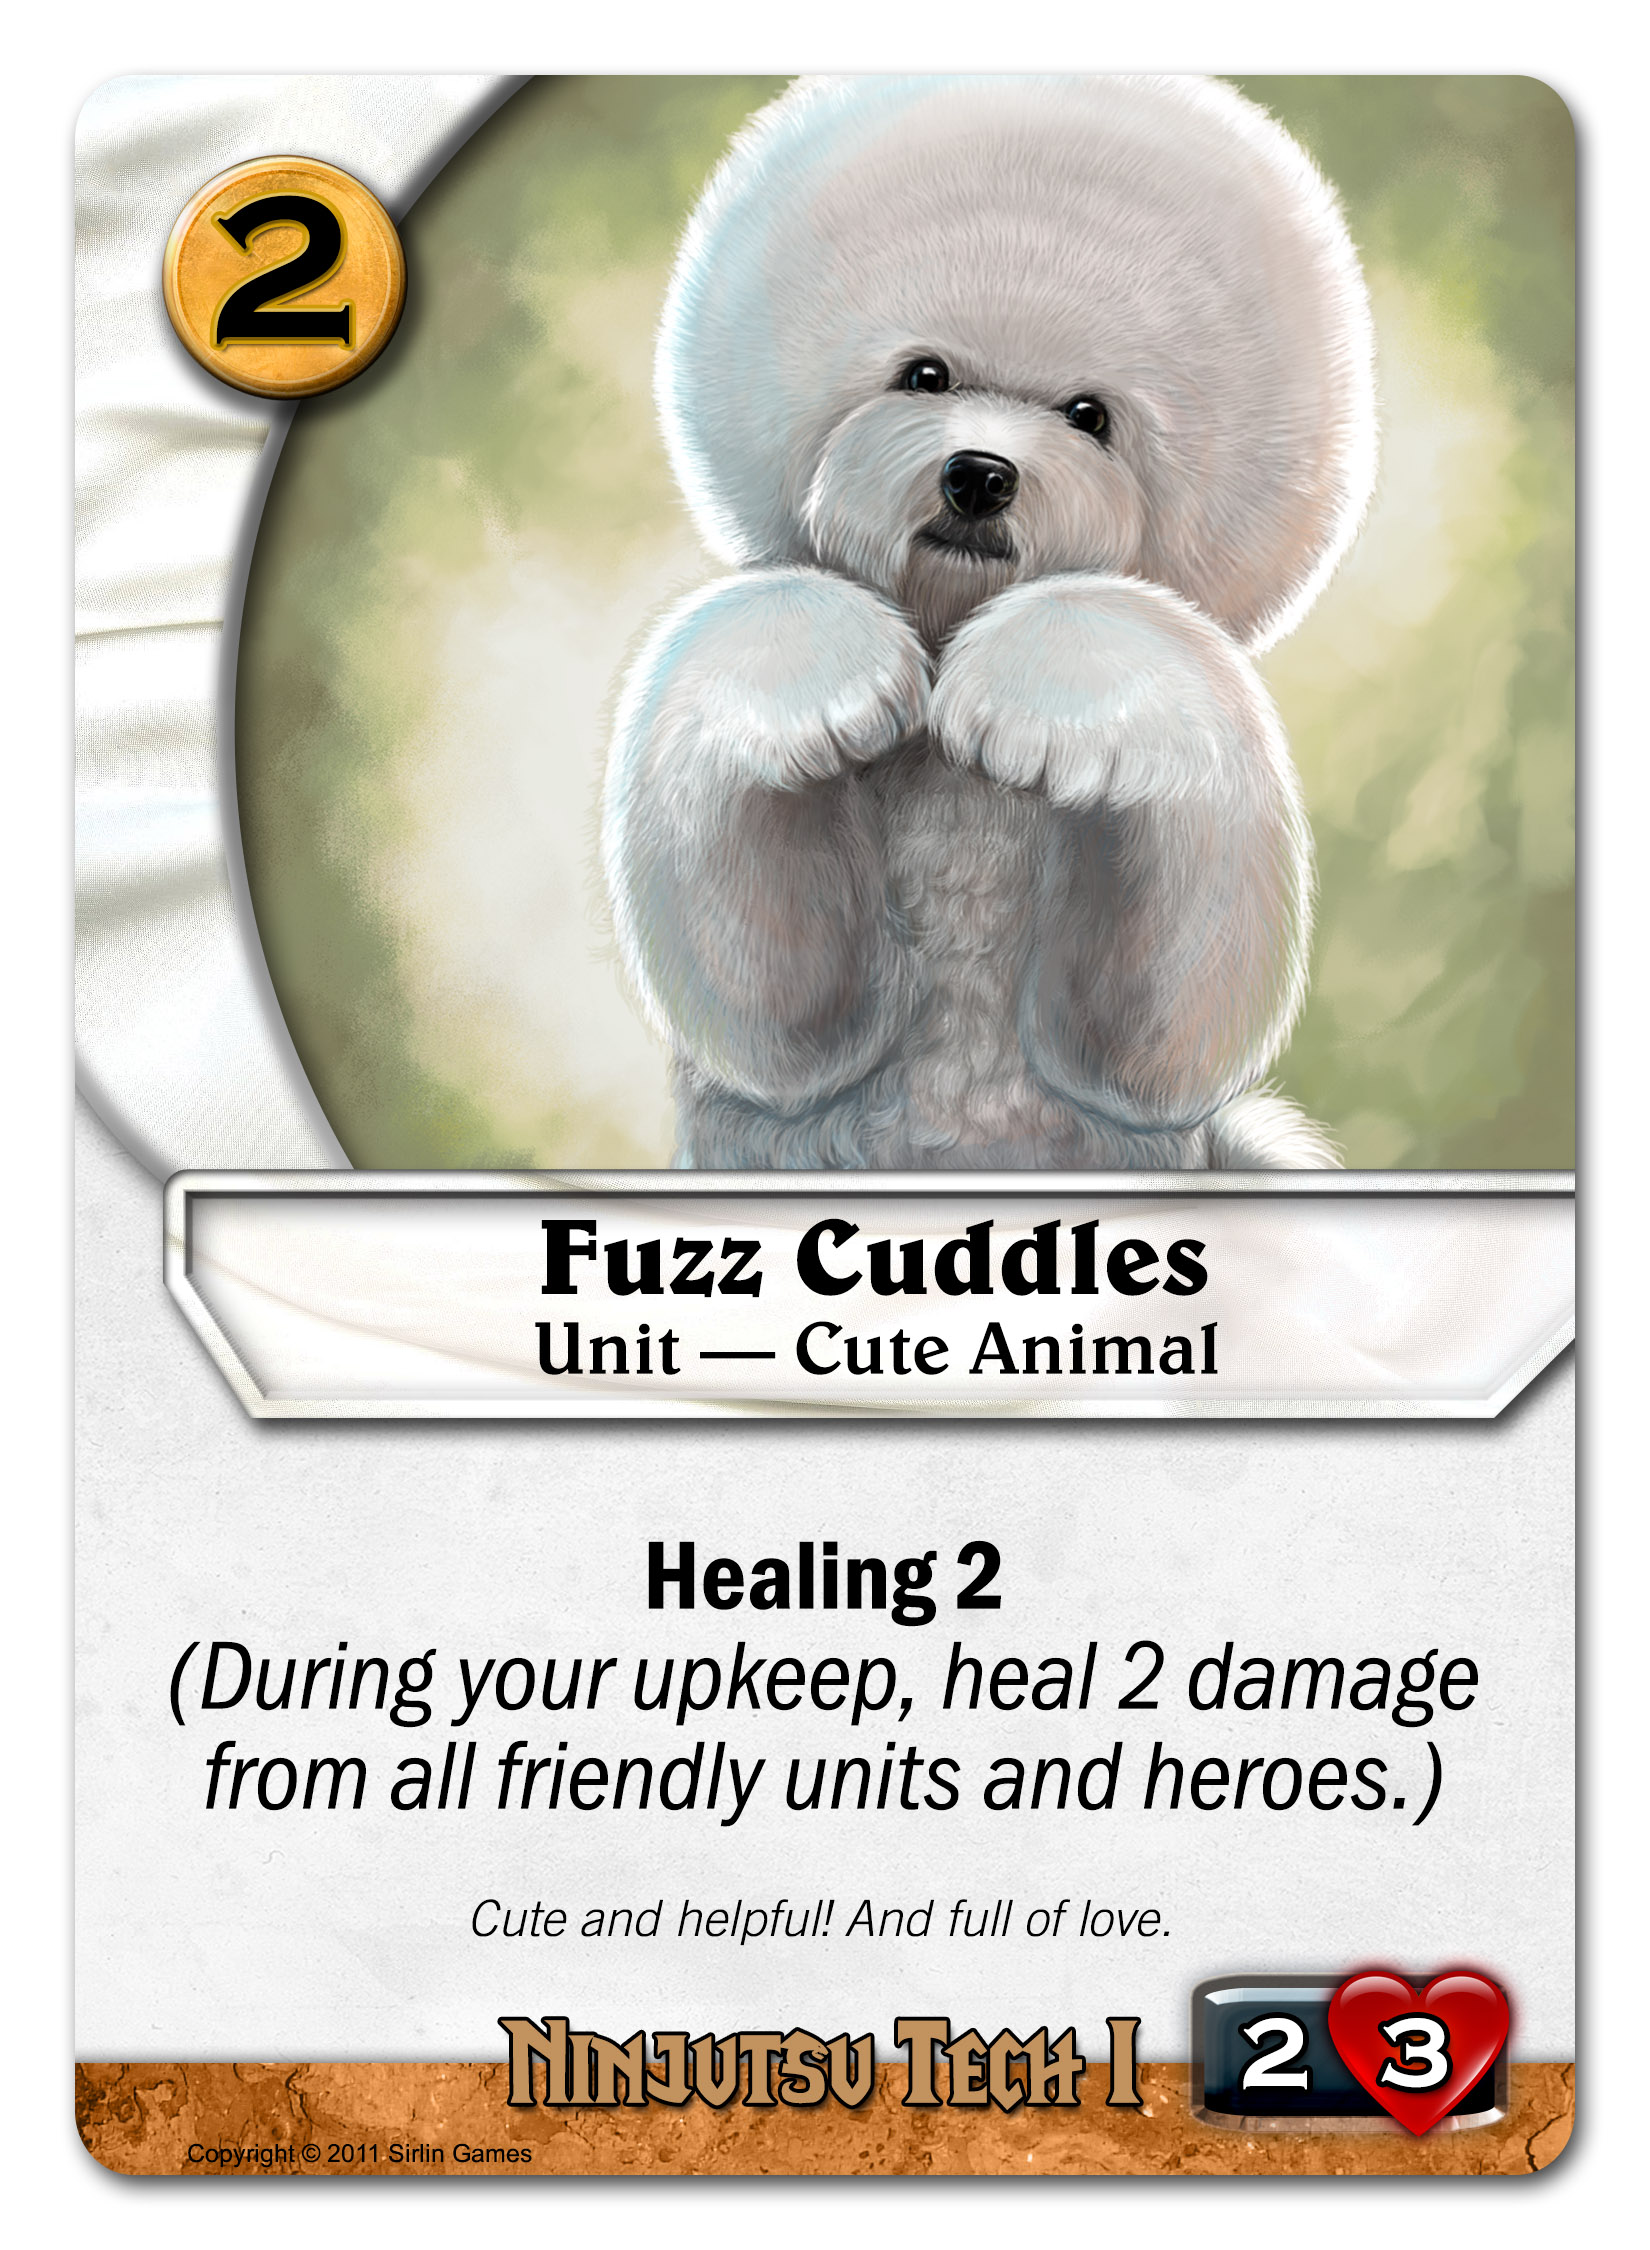
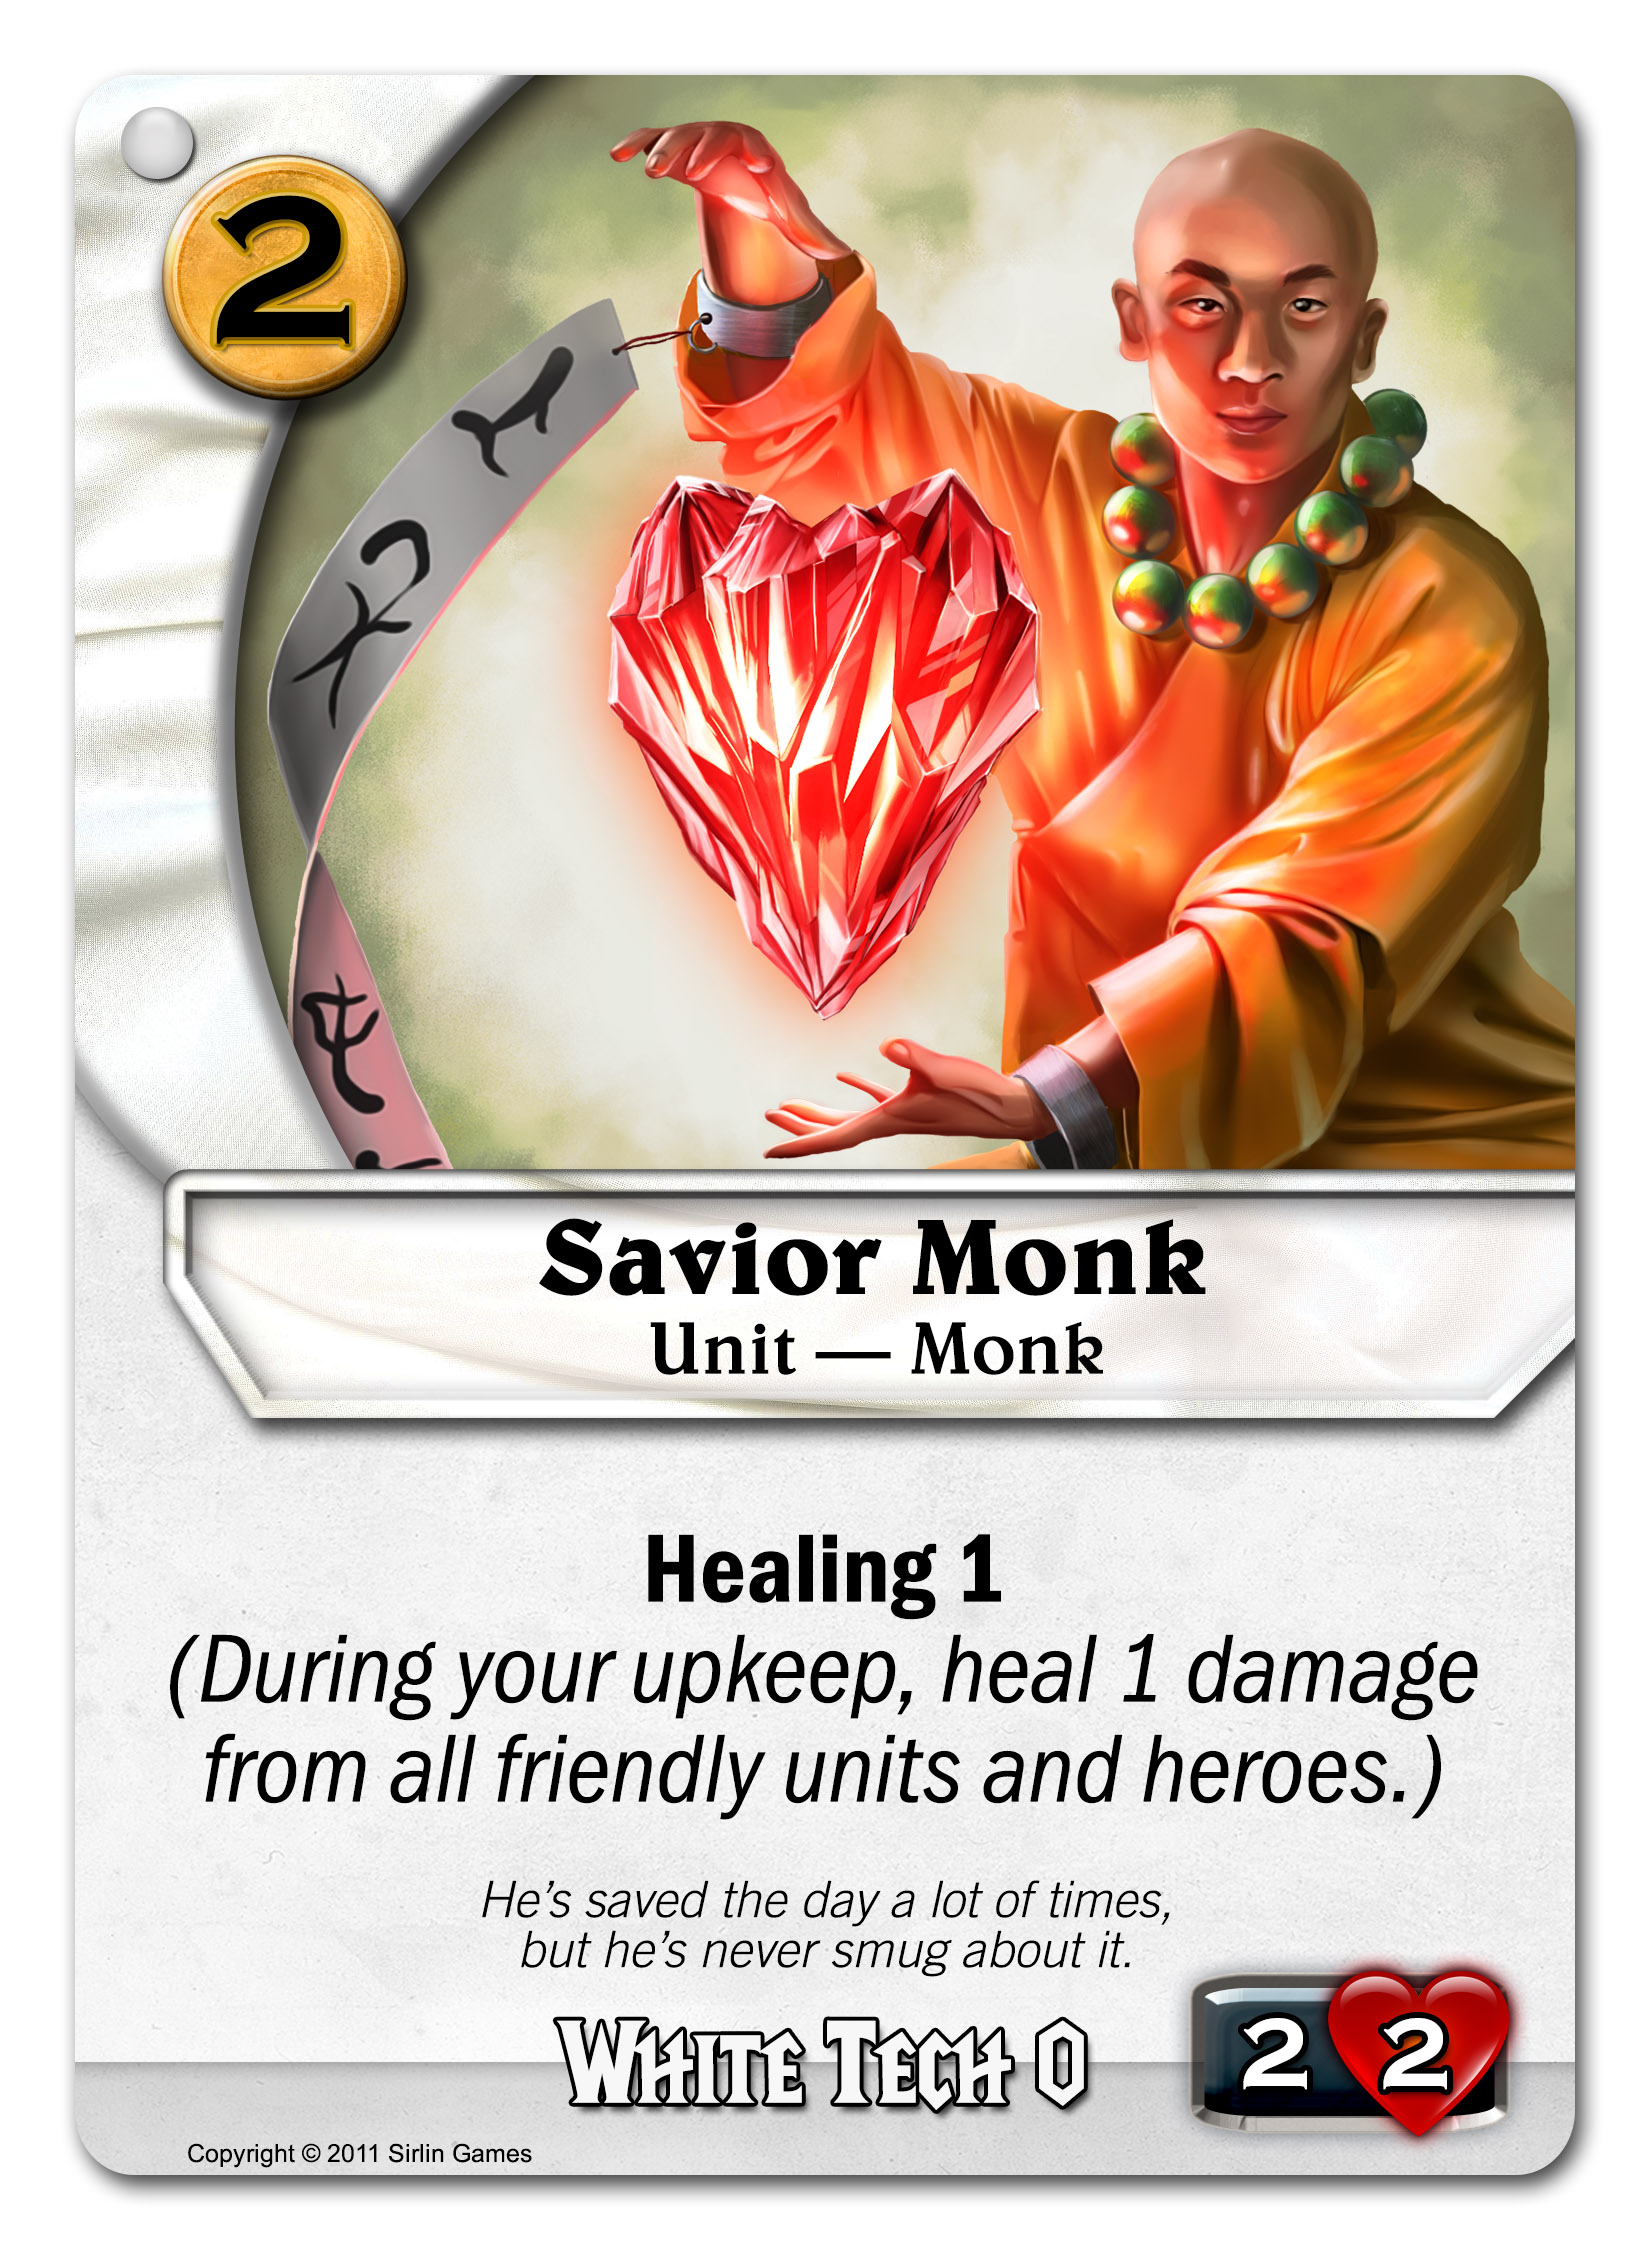
Switching over to Ninjutsu units now, at tech I you can get Fuzz Cuddles. And who wouldn’t want such a ridiculously cute dog? Gameplay-wise, Fuzz Cuddles can be tricky to use. He has to survive a turn for his healing to trigger, and you have to have things that are damaged but not dead so that he can heal them. Sometimes you won’t manage to make those stars align. If you do though, it’s a huge swing. Healing two damage on EVERYTHING you have that’s damaged is pretty amazing when it works. Try using Fuzz Cuddles with things that are already hard to kill, such as this:


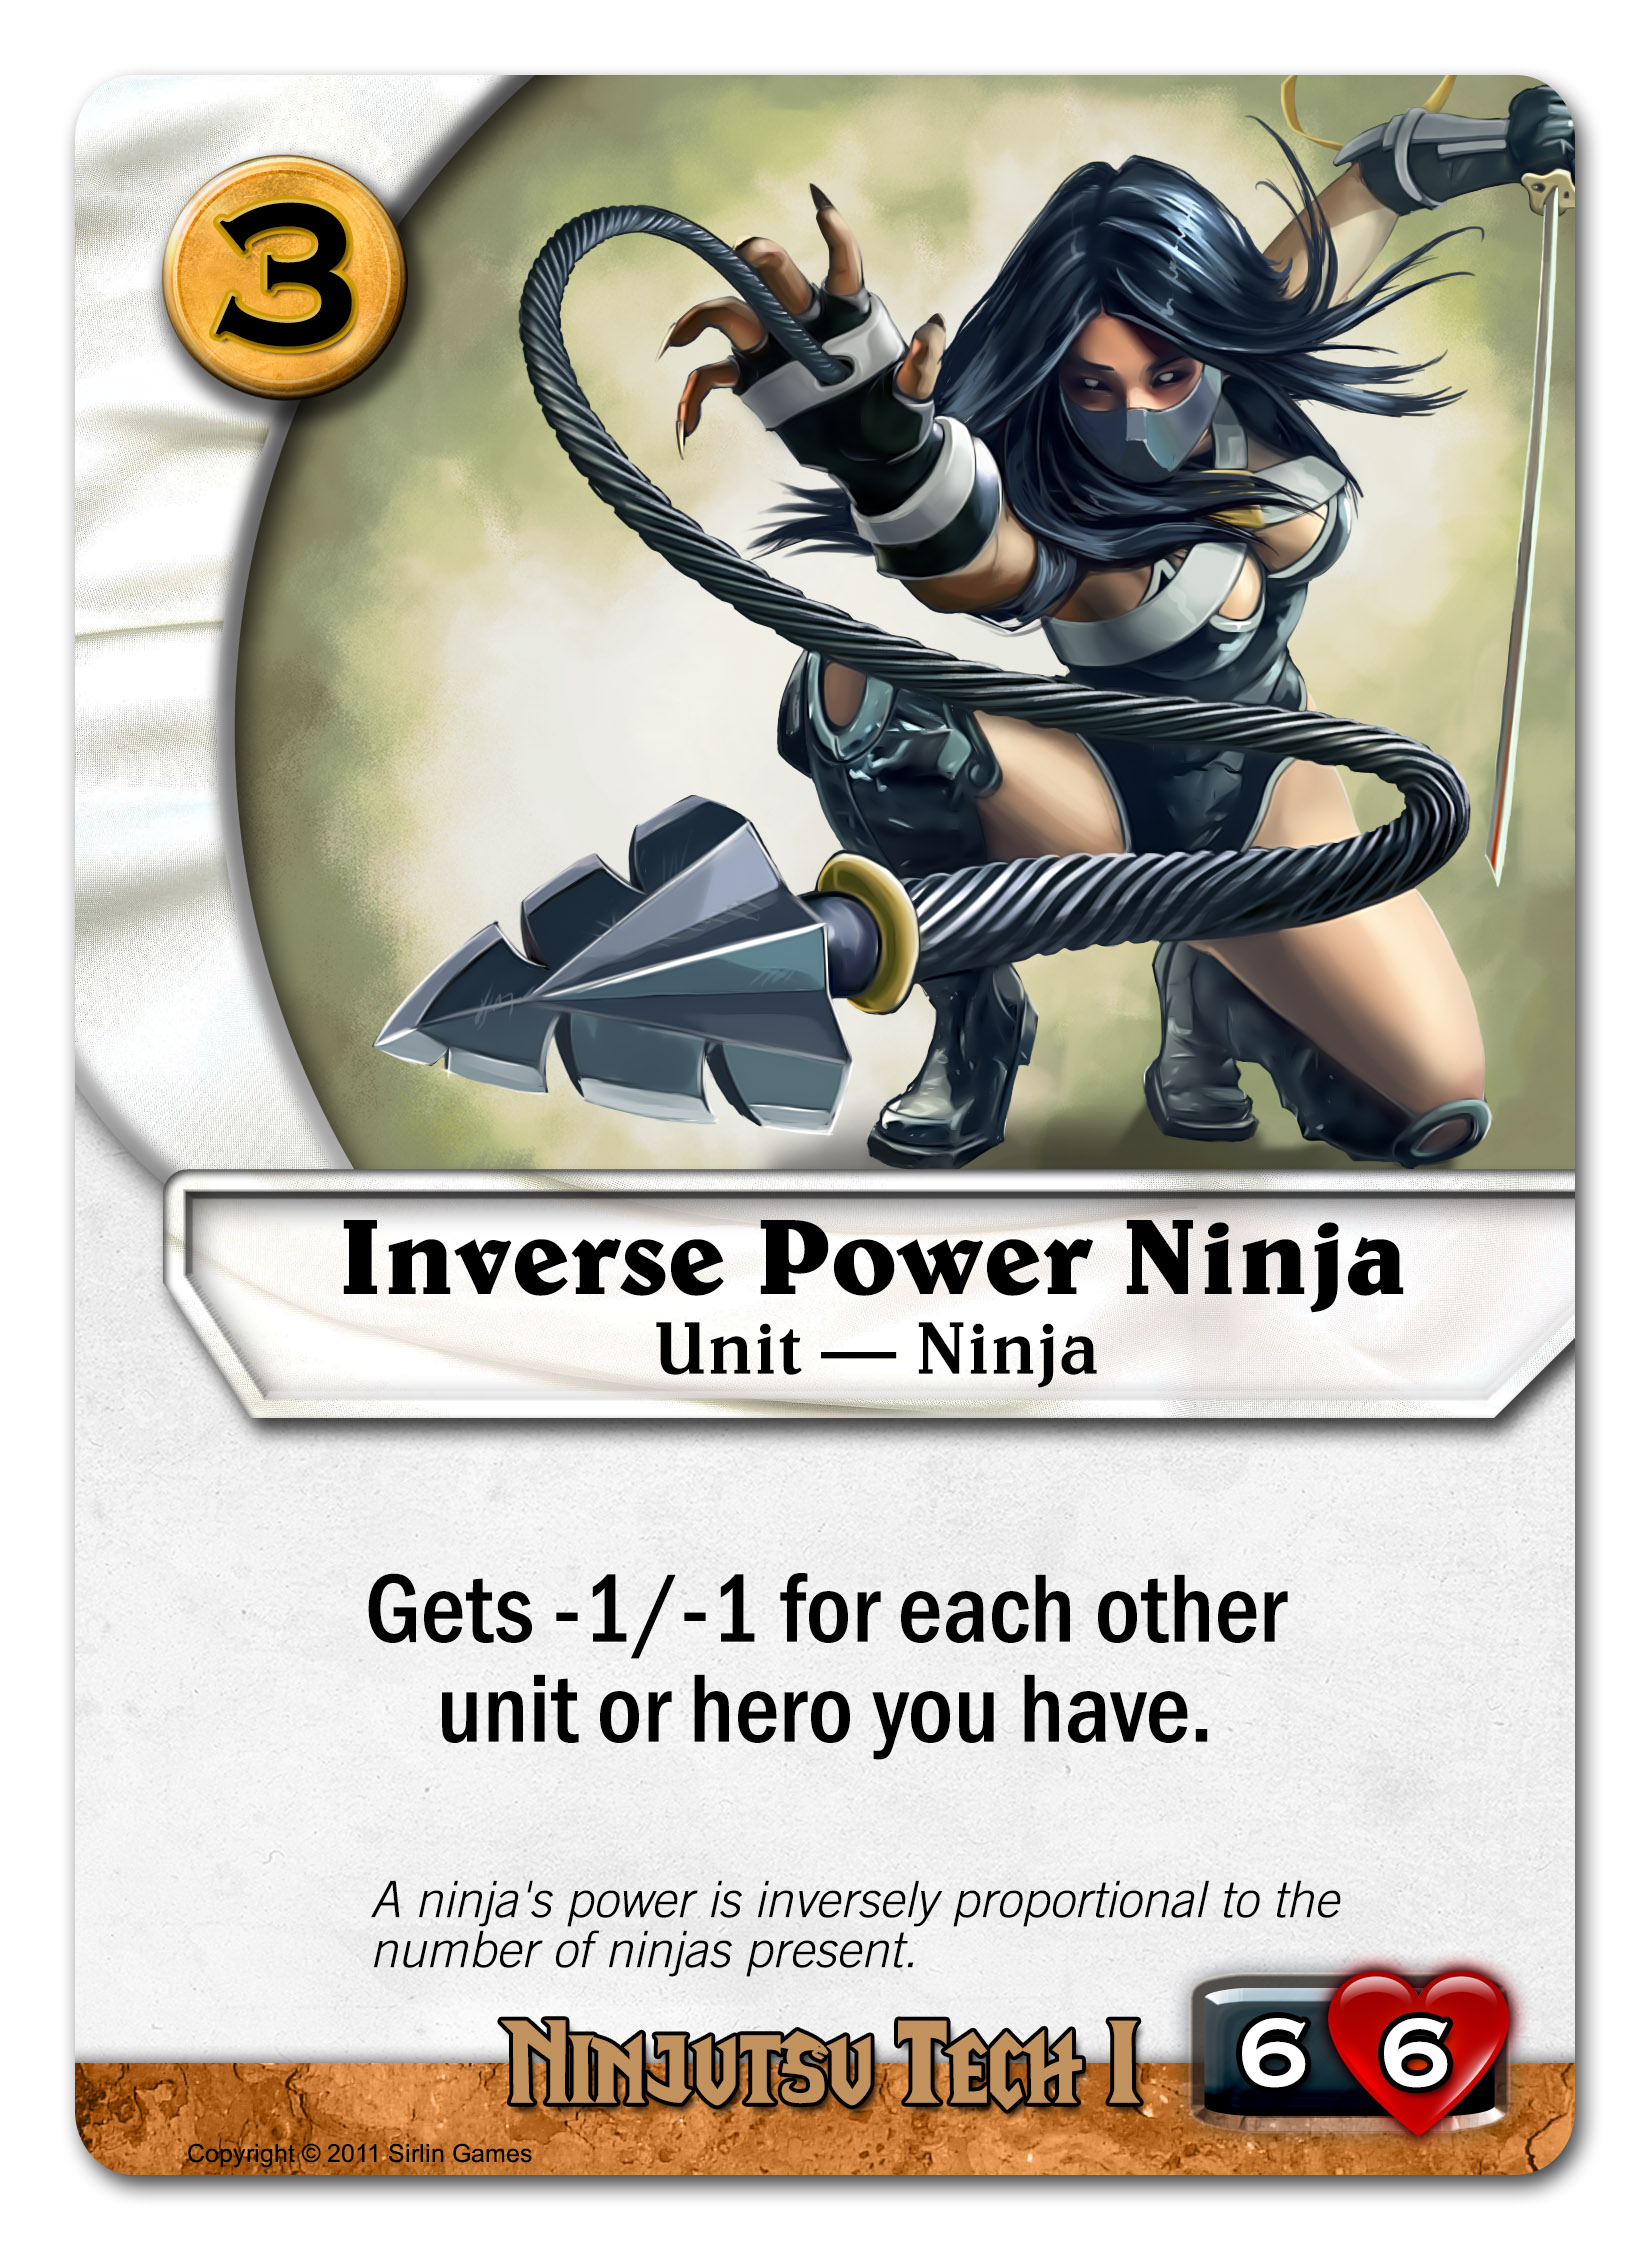
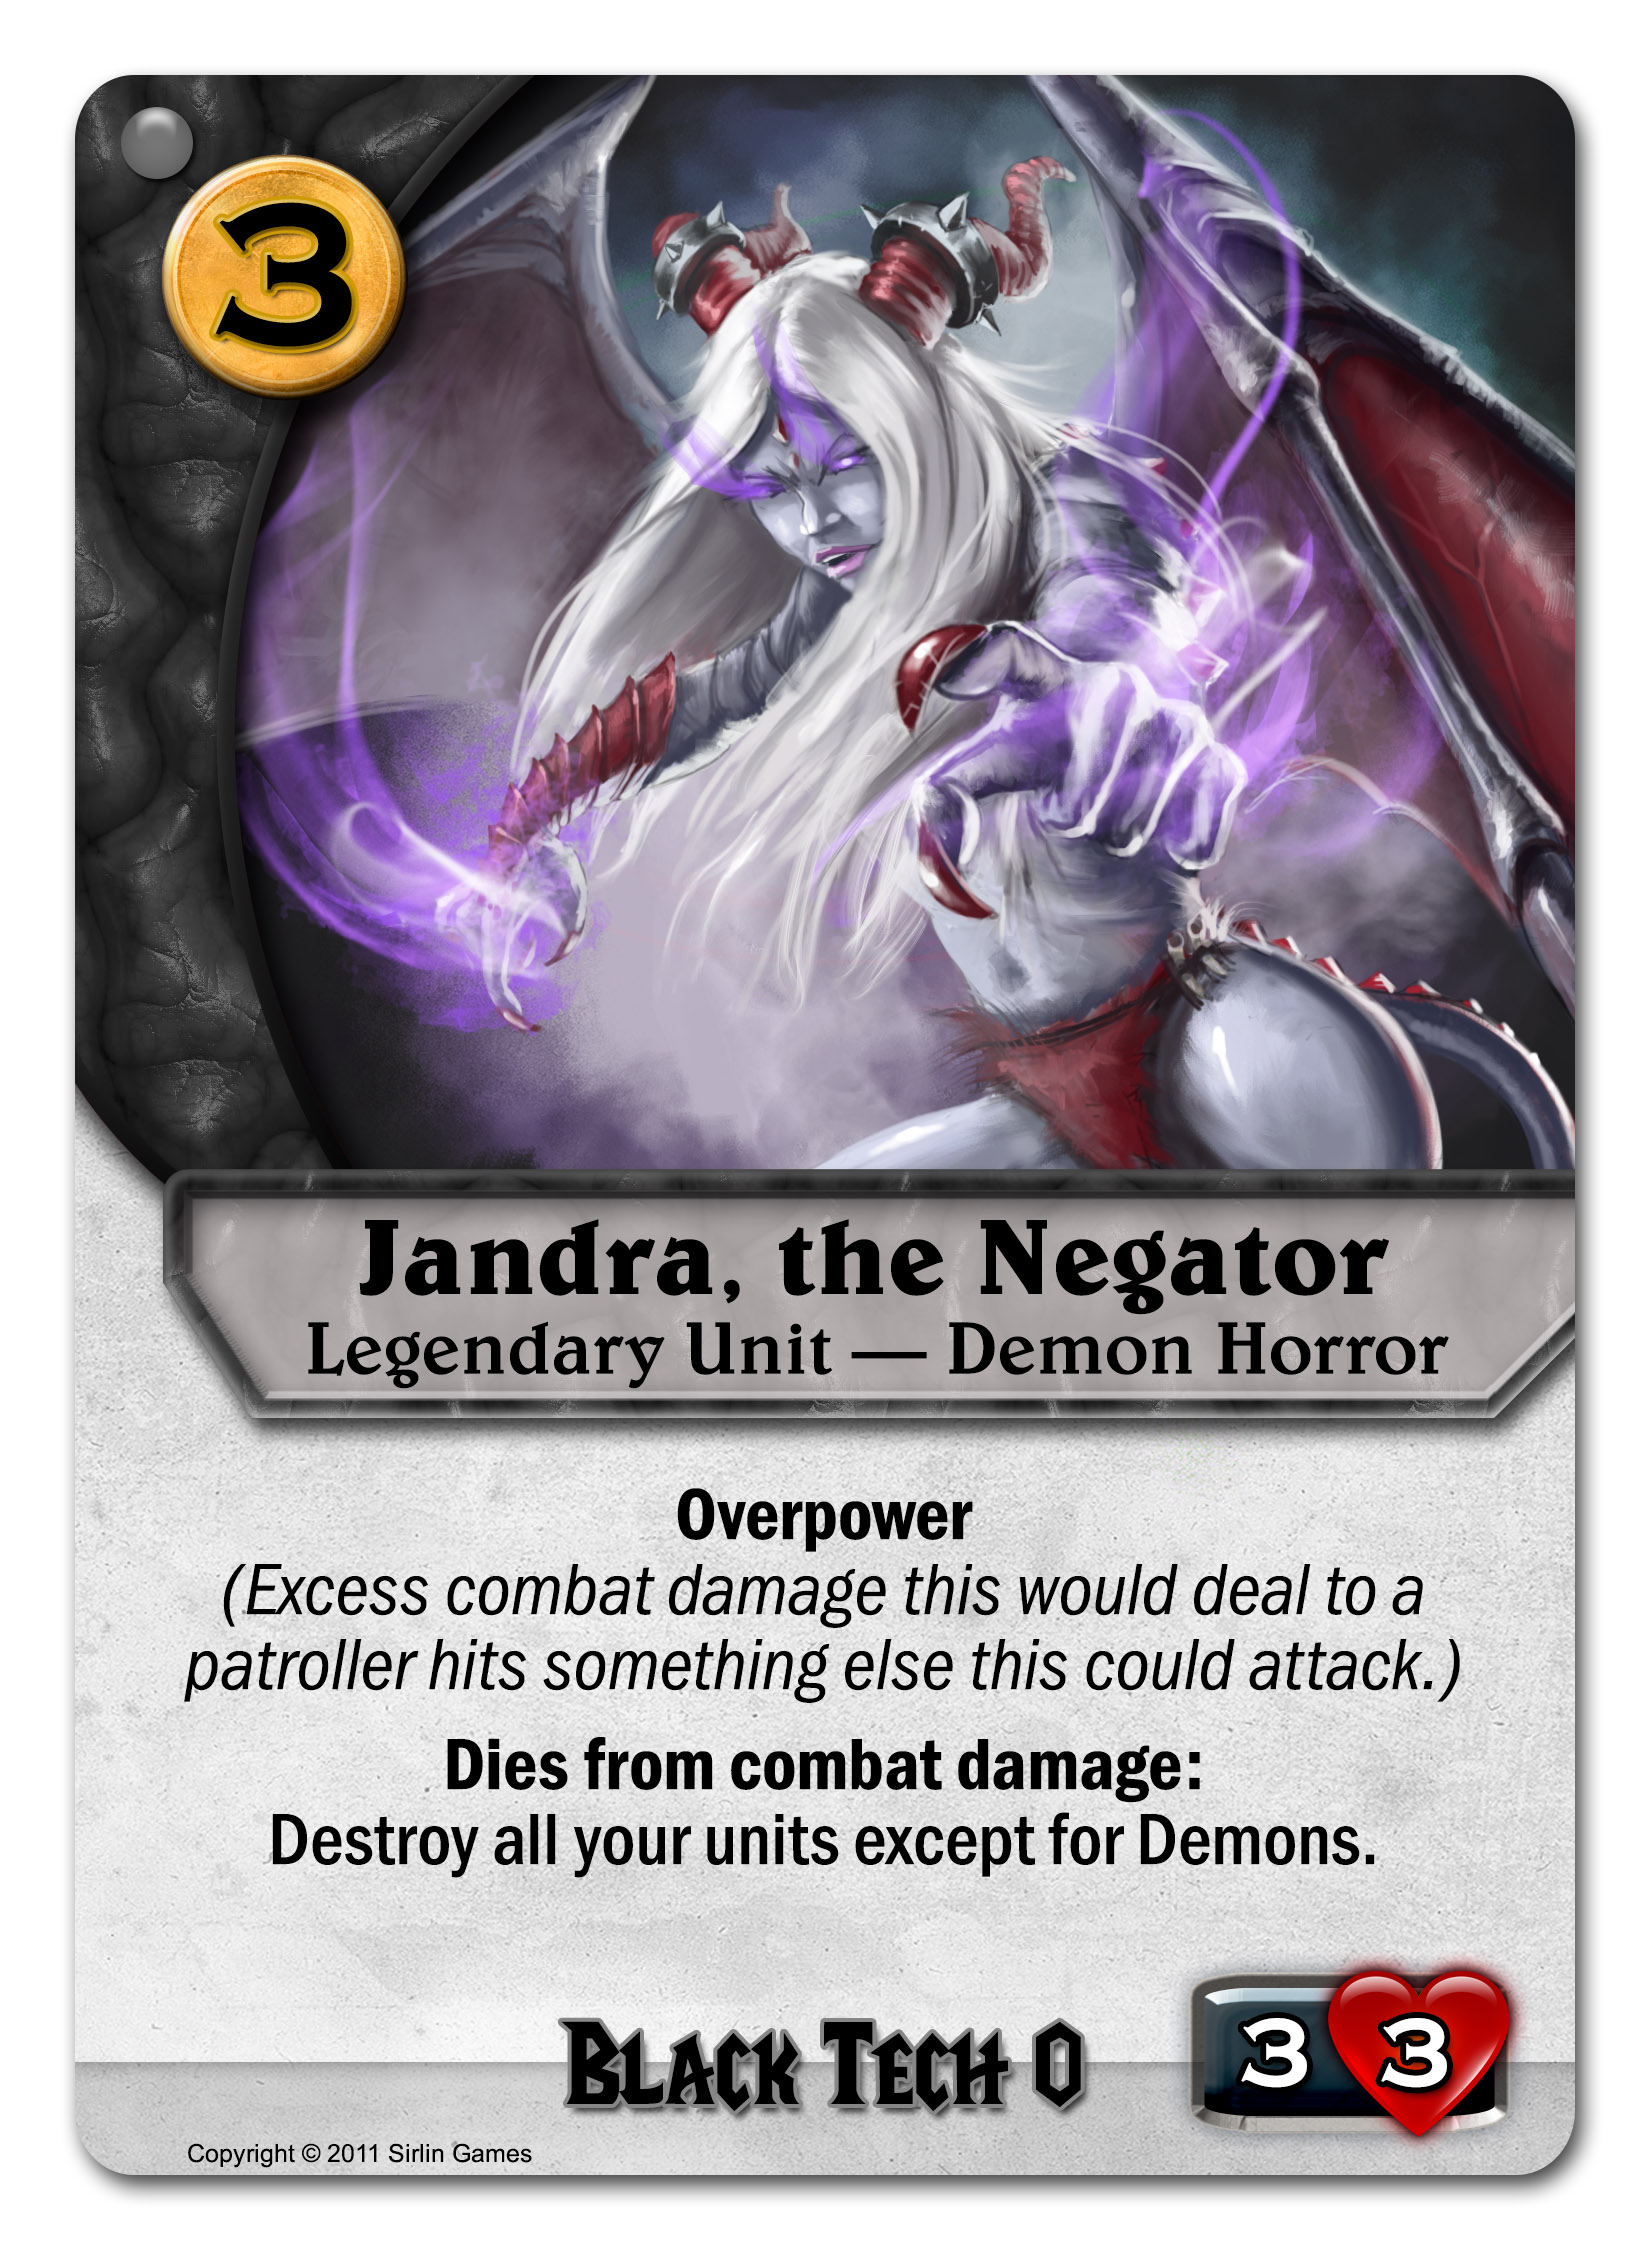
When you fight 1,000 Ninjas, they tend to be pretty weak. But when you fight just ONE Ninja, it’s usually epically strong. That’s why Inverse Power Ninja is at her best when she’s alone. You get an absurd 6/6 for just 3 gold if you’re willing to go it alone with her. You might want at least one other unit or hero on the table, but she’ll shrink in power for each one of those. She’s pretty different than most tech Is in the game, so this opens the door for some unique rushdown strategies for Ninjutsu.

Let’s see what tech II Ninjutsu can do. First, a ridiculous Ninja:


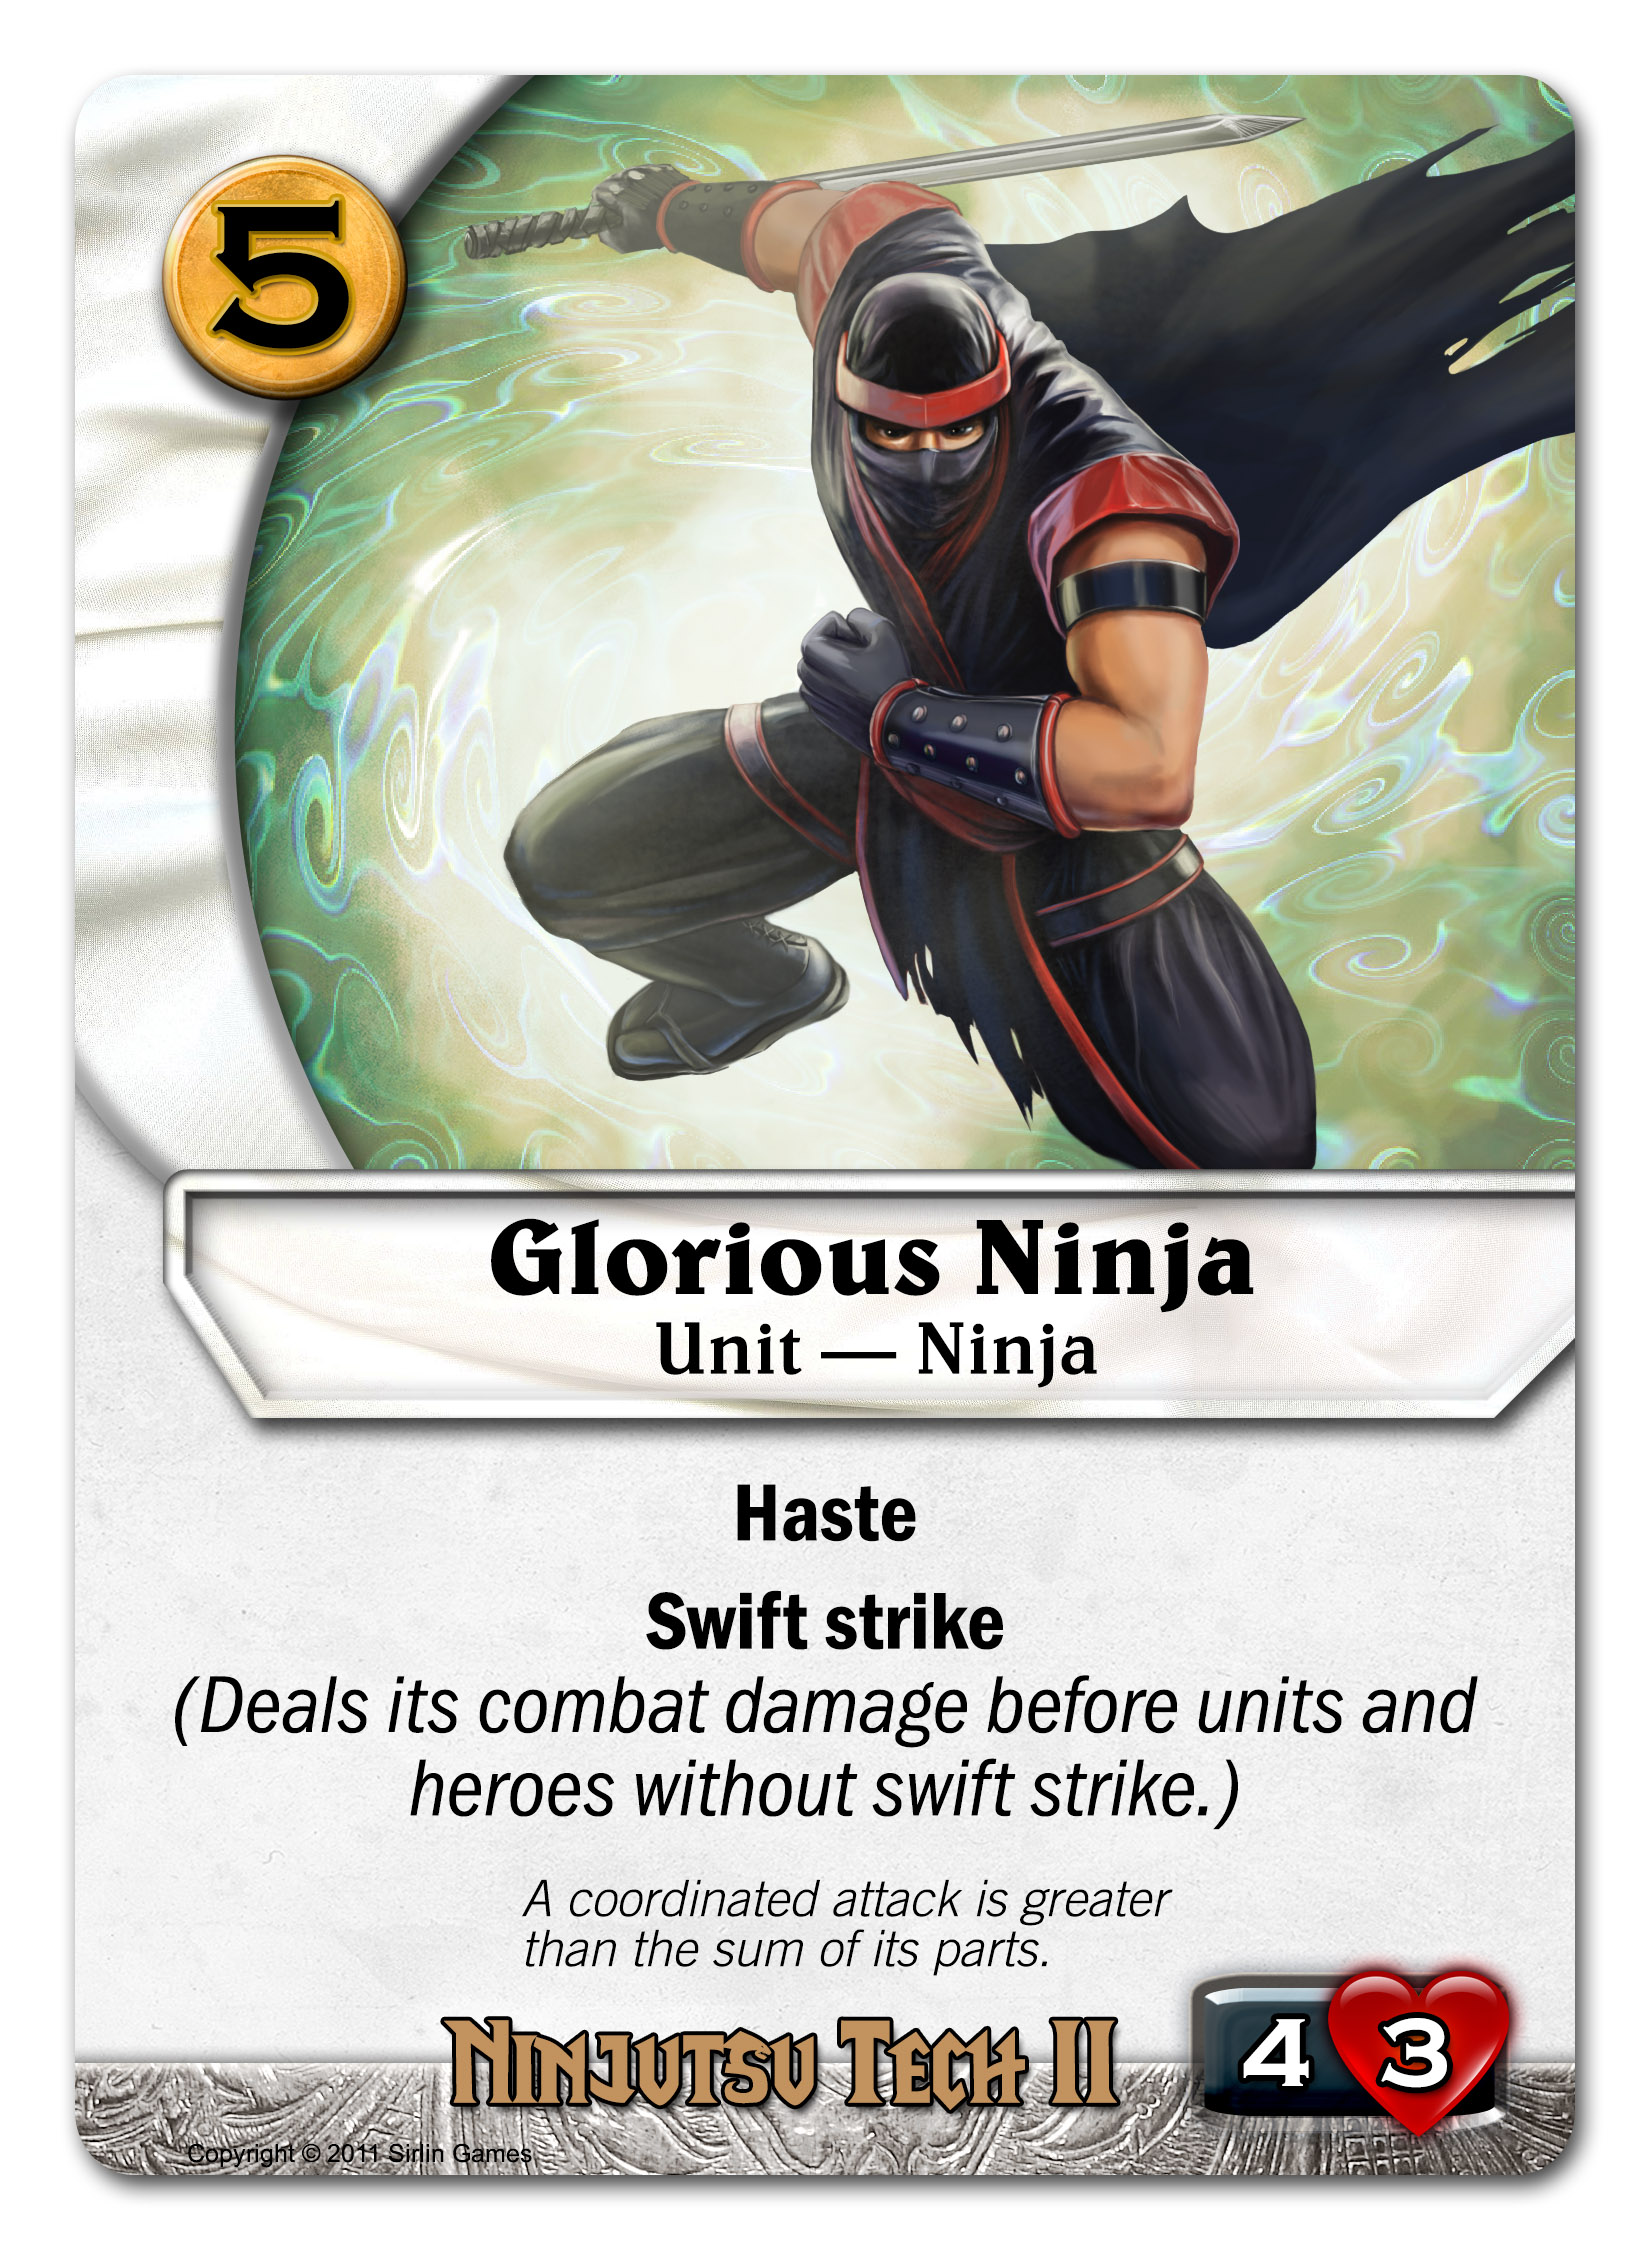
Glorious Ninja is one of the reasons to use the Ninjutsu tree at all. Haste and swift strike together have an incredible synergy. For 5 gold, he’s basically a kill spell AND a unit. As soon as you play him, you can attack with him and kill anything with 4 HP or less and you still get to keep your Glorious Ninja. Are you worried about him getting attacked back on your opponent’s turn? Glorious Ninja will STILL deal his combat damage first (due to swift strike), even when he’s attacked, so they better attack him with something that has more than 4 HP or that has swift strike also. That is why he’s so glorious.

Ninjutsu is also partial to Cute Animals:


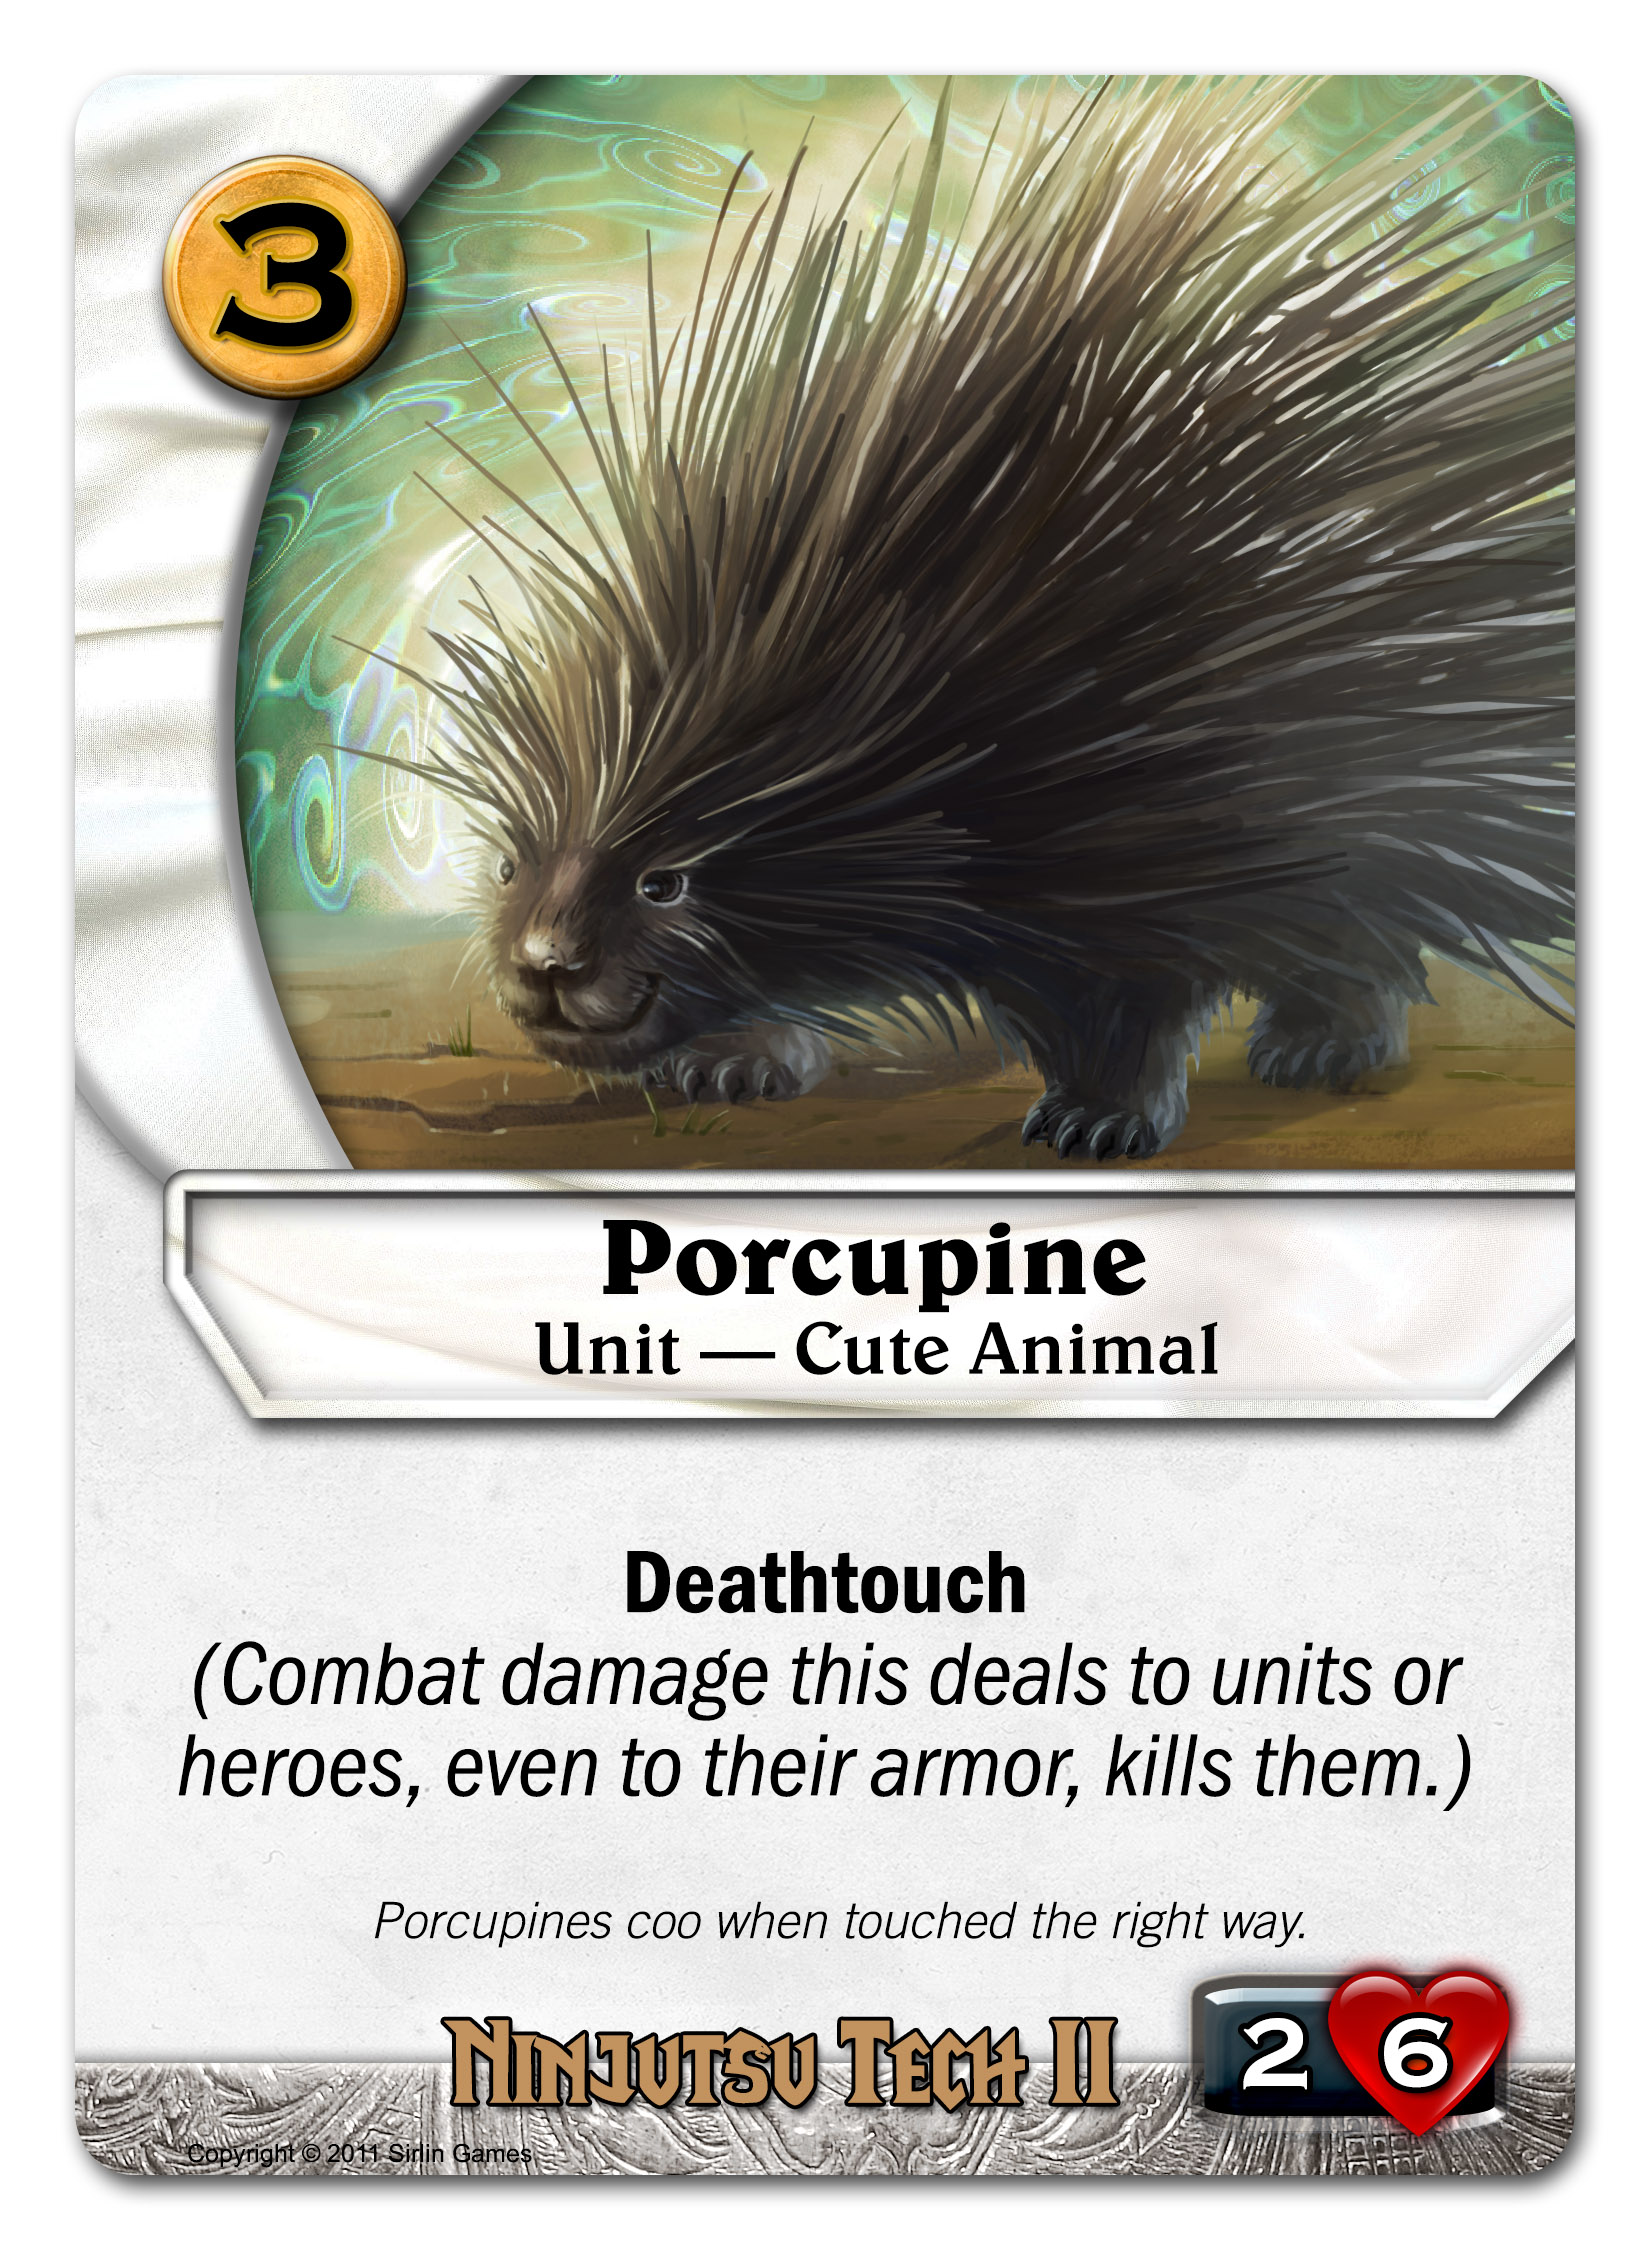
While most of Ninjutsu is aggressive, this little guy gives you a defensive option too. Who wants to attack into a 6 HP patroller with deathtouch? Ouch!

Ninjas and Cute Animals, you say? What if we combined both of those into one?


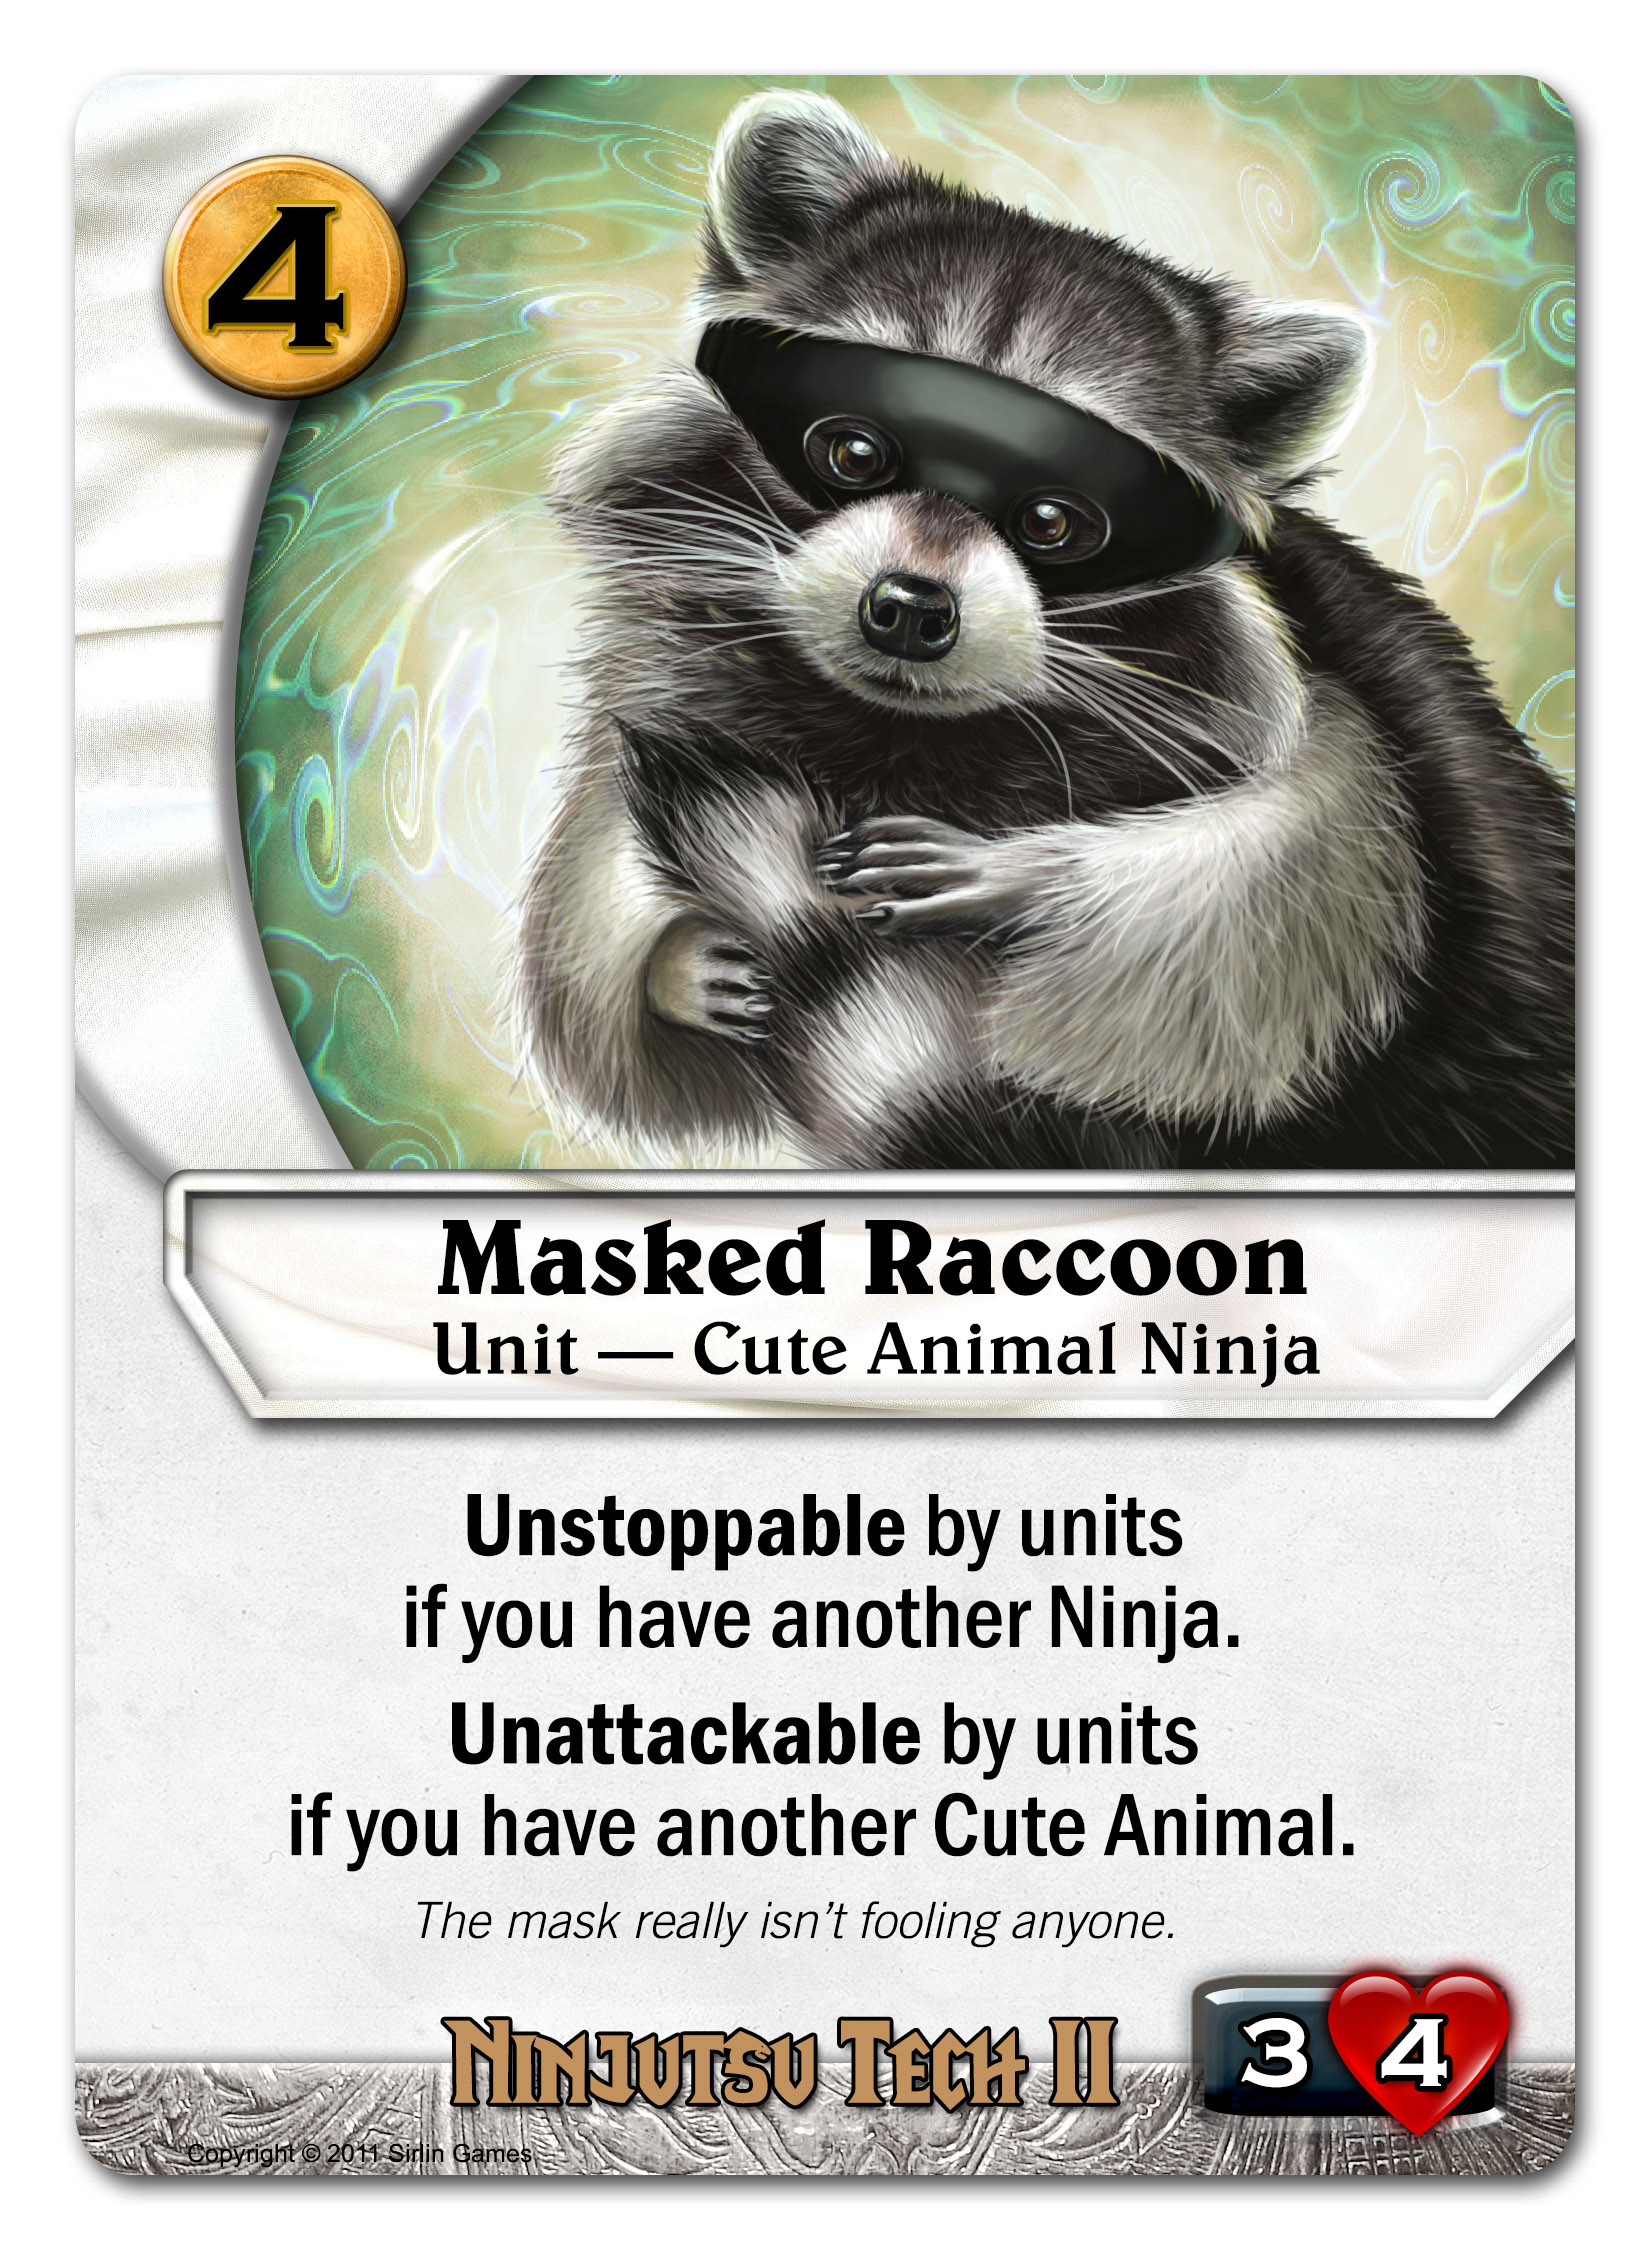
The Masked Raccoon is both a Ninja and a Cute Animal. That works really well with his abilities, which rely on both Ninjas and Cute Animals. So if you have two Masked Raccoons in play, they can both slip by patrolling units and on opponents’ turns, nothing can attack your Masked Raccoons either. Notice that a pair of these give you a total of 6 ATK and that’s enough to destroy a tech I, II, or III building in one turn if the opponent isn't patrolling any heroes. You're threatening to do that EVERY turn because a pair of Masked Raccoons is hard to kill.

Here’s another card that interacts with Ninjas and Cute Animals:


This is the school Setsuki trains at. It’s an all-girls school of Ninjas, taught by an old master named Jade Fox. The Fox’s Den School is hidden in the forest, and is invisible to those without detection. That makes it very hard to attack. It makes all your Ninjas and Cute animals invisible, which means they are untargetable, unattackable, and they can ignore patrollers. The School can even train other units to become Ninjas!

Look back at some of the earlier cards to see how Fox's Den School affects them. Fox Viper and Smoker from your starting deck both become invisible. Even those early units are not bad when they get to ignore patrollers AND become unattackable themselves AND become untargetable by opponents. Same goes for your Inverse Power Ninja at tech I. And an invisible Glorious Ninja now gets to ignore patrollers and go for the kill, too. You're putting an opponent on a clock here, and they are unlikely to be able to kill any of your Ninjas OR the building that is making all your Ninjas invisible. Remember, the Fox's Den School itself is invisible! 

Now let’s meet the school’s headmistress:


The venerable Jade Fox is a Ninja herself, so that means she also has flying and swift strike. Between her and the Ninjas she arrives with, your opponent only gets 3 more turns to live. You can make it even faster by using other Ninja units you have laying around.

The Ninjutsu spec is stealthy, fast, and formidable in combat. The Fox’s Den School has taught them well.

Codex: Discipline spec

Many of the strongest, most disciplined warriors of the realm have banded together to form the Whitestar Order, based at Morningstar and led by stone golem Garus Rook. Their training grounds are home to enlightened monks, mighty barbarians, and agile ninjas with their cute animal friends. Their strength comes from both their teamwork and skill in combat. The Whitestar Order holds a series of fighting tournaments called Fantasy Strike, intended to bring together the many different peoples of the realm in hopes they learn to question Flagstone’s rule.

Grave Stormborne is one of the most dedicated and skilled martial artists in the land. He’s the embodiment of Discipline, which is his spec. Grave is entirely focused on increasing his own skills, even to the point that some would say it’s a selfish neglect of what he could be doing to help others. When you need a champion though, you’ll be happy to have Grave on your side:


Grave only needs to reach level 3 to become a 3/4 with readiness, which lets him attack and still be able to patrol afterwards—fitting for such an adept fighter. As for his sword, he doesn’t use it often. As a child, the Nox Oracle told him to only use it when necessary. At max level, he will agree to use it ONCE. It will slice through ANY unit or hero—even a tech III unit is not safe.

Heroes are especially not safe against the white faction. The white starting deck contains this monster of a spell:


Snapback works the same way it does in the Marvel vs. Capcom fighting games: you knock a character out of play and force a different character into play. Heroes lose all their levels and any other runes or attachments or whatever when they go back to the command zone. Snapback is a very powerful late-game spell, and you’ll often be tempted to play it as a worker early because it might not help you much then. Here’s my advice though. I’ve said this phrase a lot, “You know, you wouldn’t have lost the game right there if you had kept Snapback.”

Back to the early game though, the Whitestar Order is good at working together in combat. Both these Monks from the white starting deck help your early combats:

I like the contrast in their personalities. Savior Monk is peaceful and heals you, while you can already tell that Aged Sensei is disappointed that you’re not good enough.

This starting deck upgrade card also helps your early game combats:


At just 1 gold, you’re potentially preventing a lot of damage if you can attack enough. The more you attack, the better a deal this becomes. White’s teamwork here makes them quite a threat right from the start.

At the tech I level, Rambasa Twin works in an unusual way:


The 4 gold cost is high for a tech I, but you actually get TWO of this guy. That’s a lot of presence on the battlefield! And another perk is that he only occupies one slot in your deck. Later in the game when you have better cards, you won’t be drawing past 2 copies of him to get to your really great cards; you’ll have 1 of him in your deck and another in your codex.

Continuing the theme of white (and especially Discipline) units working well together in combat:


Make sure to train up with Sparring Partner before going into battle. If your opponent lets you keep him, he’ll eventually give all your guys a +1/+1 rune. And if you’re willing to pay some gold, you can speed up that training process and spar with all your units in a single turn.

At tech II, the power level is even higher.


Focus Master’s ability is a little stronger than I think it first appears. He’ll save one of your units or heroes from dying, and he’ll do it three times, but he’ll only do it if they would EXACTLY die. So that’s like if a 3/3 takes 3 damage (not 4 damage). You can set up those exact situations though. In Codex, you do combats one at a time so you can make sure your 2/2 goes up against their 2/2 and so on. Once you realize that, Focus Master is basically saying “do 3 even trades, then keep all your guys instead of them dying.”


Now that’s a powerful Monk. He parries your moves before you even do them. When he’s on the table, your units and heroes can’t be hit by any spells or abilities that use the target icon. This can throw a wrench in a bunch of strategies your opponents might be using, and it will force them to try to kill the Mind-Parry Monk another way, probably in combat, but he’s a fearsome 5/4 in combat.

Going back to the starting deck for a moment, there’s another Monk who helps protect you from being unfairly targeted:


Morningstar Flagbearer is right at home in the white faction, because Rook’s Morningstar Sanctuary is a place where several people who were oppressed for being different have fled to. In gameplay, both Flagbearer and Mind-Parry Monk let you say “hands off my guys!”

Do you like having awesome heroes? Discipline tech II can train up your heroes to their full potential:


Yes this somehow only costs 1 gold. It’s nice to get +1 ATK on all your heroes (an effect you’re happy to pay 1 for by itself), but if your Training Grounds can survive just one turn, you can exhaust it to instantly max out any of your heroes. Remember that at max level, Grave can use his sword rune to kill just about anything. Training Grounds is ridiculously efficient at leveling up your heroes and frees up a lot of gold for you to put into other things. The main drawback is just that it’s a building, meaning it can’t attack or patrol and you have to protect it.

Now let’s look at some of Grave’s spells. Grave is adaptable and versatile, so this spell expresses that:


It’s a toolbox all on one card. You can beat flying stuff, invisible stuff, upgrades, or just repair some damage from one of your buildings if none of that happens to matter by the time you draw Versatile Style.


If you want something more straightforward, Reversal lets you dragon punch a patroller. That will probably kill it, but even if it doesn’t, it will still knock them out of the patrol zone!

Now it’s time for some True Power:


True Power of Storms is one of the strongest supers in Yomi. In that game, it costs 3 Ace cards to use. In this game, it costs 3 cards with a 3-gold cost (neat!). If you can line up your card draws just right, True Power of Storms becomes an absurdly powerful finisher. You can win the game by casting two of them, or you can point it at any unit or hero to kill it. It even hits tech IIIs, which not many things do.

And finally, the Discipline tech III has some sentimental value:


Grave Stormborne’s father was a mighty warrior and a beast in battle. He was killed in battle when Grave was young. This statue memorializes him. Even being near it inspires other heroes with a +1/+1 bonus. Hero’s Monument summons the ghost of Grave’s father who is an indestructible, untargetable, and unstoppable 8/8. Grave can at least fight alongside the spirit of his father in glorious battle.

Codex: Necromancy spec

Garth Torken’s tinkering with anatomy led him to discover some disturbingly dark powers. He is now the Necromancy hero of the Blackhand Scourge.

Torken’s experiments with human cadavers are where a lot of his skill comes from. Although he later moved on to raise the dead of other species, he’s most at home with an army of human skeletons. Here is his hero card:


Without even spending a card, he can create a new Skeleton token every turn. These Skeletons have lots of uses. They can protect Torken if he wants to turtle up and go for a late-game plan. They can patrol in the Scavenger slot to give him 1 gold when they die (making them cost a total of 0 gold overall), or they can patrol in the Technician slot to give him a card (letting him basically buy a card for 1 gold AND stop an attack in the process).

When he reaches level 4, he can sacrifice Skeletons to draw cards. That’s usually a desperate measure, but later in the game if you desperately need a certain card, that helps you get it.

His max level ability lets him resurrect a free unit. That can really turn the tides of battle! And just so you understand how the timing works, this ability requires very little setup. Before your turn begins, you can know that you’ll want to max his levels, so when you “tech” for new cards just before your turn (as in put 2 cards from your codex into your discard pile), you can make sure one of them is the best thing for him to resurrect.

To understand how to use Torken, we have to look at the black starting deck. Here is his bread and butter:


Two Skeletons at a time is good for building your army. Remember that you’ll see this card several times over the course of the game. So what will you do with all these Skeletons?


This is one option. Because of the patrol zone bonuses, your Skeletons are inherently good on defense. But with this starting deck upgrade, you have the option to use them on offense too. The long-range ability they get means they can attack without getting hit back (unless they attack something with long-range, which they probably won’t). And while you're at it, have some anti-air too.

Another way to go is to use your Skeletons as a resource. They are probably weaker than whatever your opponent has, so this becomes a great trade:


As a rules note, you can cast this when you don’t have any units (you’ll have to have a hero though—you need a hero to cast a spell) and then you won’t actually sacrifice anything. There is a general rule to “do as much as you can” for all effects, so even though you might not have any units to sacrifice, your opponent still has to. And if you do have some Skeletons laying around, that’s not a big deal to trade one of those for a good unit the opponent has. Try to kill their weakest unit in combat, THEN sacrifice the weak so it kills an even better unit of theirs.

There’s one Necromancy spell you will come to know very well:


It’s one of the most reliable ways to suck the life out of something in the entire game. This spell alone is a big reason to use Garth Torken. Sacrificing a 1/1 Skeleton or something hardly matters when it’s killing their best tech II unit or their hero who was threatening to cast an ultimate spell at you.

This next one I personally find really fun:


Be careful when bargaining with a Lich! You lose a worker and 20% of your base’s max HP, but you get THREE units from it. That's a total of 6 ATK, too. The 2 gold cost is minimal, so you’re tempted to play this spell over and over. Can you get away with casting it 3 times? 4?? You’re killing yourself in the process, and becoming vulnerable to more and more trickshot ways to die, but oh that power is so sweet. A whole army can be yours. Idea: reality tv show based on how players use this card.

If you want a tricky spell, look into Nether Drain.


It costs 1 and you can add 2 levels to one your heroes. That normally costs 2 to do, so you're getting 1 gold ahead (and one card behind) on that part of Nether Drain. But you ALSO get to lower another hero's level by 2. By leveling down enemy heroes, you make them smaller and sometimes can take away key abilities they have. Ideally, you can level down an enemy hero, make it small enough to kill it in combat, then that will give you the usual 2 free levels you get for killing an enemy hero. That's good value if you make that happen.

If you want to be tricky, you can also level down your OWN hero on purpose with Nether Drain. You might want to do this if your hero has some effect that triggers when they reach max level, such as your Necromancy hero himself! The overall calculation here is that if your Necromancy hero is at max level, you can level him down then back up to max for a total of 3 gold and 1 card. That will give you another free 5 cost unit from his max level ability. Or you could count it as just 1 gold total if you factor in the 2 free levels you gave your second hero from Nether Drain. You can’t do all that in one turn because it says right on the card that the hero that leveled down can’t level up this turn, but across two turns you can pull off the trick of triggering Torken's max level ability twice.

Let’s turn our attention to Necromancy’s tech I units.


If you just play Hooded Executioner as a 3/3 for 2 gold, you’re doing fine. What’s so great about him is the flexibility to also get what’s basically a kill spell from him that doesn’t cost any extra cards. You might think paying 3 is a lot to kill their weakest unit, but it really isn’t. You can make sure their weakest unit isn’t some 1/1. Do some combats, kill some things, use the Sacrifice the Weak spell, then play a boosted Hooded Executioner. He’ll hit something worthwhile.


Bone Collector is a totally different kind of threat. He’s a guy your opponent will really need to answer somehow. They can’t let you attack with Bone Collector every turn forever and keep piling up more and more Skeletons. It’s just too good, so you’re forcing them to act.

Moving on to tech II, you have a nice assortment to choose from. Most simply, how about getting even more Skeletons?


When your units die, they come back as Skeletons. If you have two Necromancers, then one of your units dying will produce TWO Skeletons (how does that work??). Anyway, you can get more Skeletons this way.


Skeletal Lord isn’t a real Skeleton, he just plays one on tv. But he buffs your Skeletons. Now you have an army of 2/2s instead of 1/1s (or 3/3s if you have two Skeletal Lords). If you also have the Skeletal Archery upgrade in play, that’s getting pretty ridiculous. You also have some nice flexibility here in how you want to use your Skeletons. One way is as a rushdown tool if they can attack with long-range. Another is to exhaust 5 of them and then put ANY unit from your hand into play. Yes ANY. As in even a tech III from some completely different spec!

Or a totally different gameplan is to use your skeletons as a way to stall. Fill up your patrol zone with annoying skeletons and it will take a while for your opponent to actually kill enough of them to do any real damage to you. If this is your plan, there’s two questions you should think about: 1) how will you actually win? and 2) how will you not die to some ultimate spell or something while you’re stalling?


This is how you can win. From the safety behind your wall of skeletons, you can fling corpses at the opponent’s base. The Corpse Catapult gets corpse runes even when one of your Skeleton tokens dies, so it’s not hard to load up. You’re threatening to deal 18 damage in 3 turns, and you can probably eke out the remaining 2 damage some other way. You might be wondering, “Why is the Corpse Catapult so unnecessarily spiky? What do some of those spikes even do?” It’s best if you figure out some things on your own.

Having a bunch of Skeletons in your patrol zone protects you from most attacks, but you don’t want to let your opponent have free reign on their side of the board. Put a stop to their plans with a Wight:


Wights kill heroes dead. Between Wights and Doom Grasps, your opponent will struggle to put together any kind of spell-based or hero-based strategy.

And now for the tech III:


The Lord of Shadows himself is a black unit, so he is invisible. That means unless your opponent has a detector or a Tower, your Lord of Shadows is untargetable, unattackable, and unstoppable. That’s 8 damage PLUS he makes all your other black units invisible too. Opponents might think they are well defended, but when terrors step out from the shadows, they won’t be prepared.

While the Demonology spec gives the black faction large, powerful units, the Necromancy spec gives them a Skeleton army that must be answered in a totally different way. Make your deals with Demons and Liches, but try to make different deals each time, to keep your opponents on their toes.

Codex: Disease spec

The Disease spec of the Blackhand Scourge faction belongs to Orpal Gloor. He’s surrounded by a creeping death, and even being near him makes most beings uneasy. The Shadow Plague in the Dreadlands is his invention.

The power of Disease is to wear down your enemies. Battles against the Disease spec often involve fewer units than usual, because it’s hard to even keep things alive around the Plague Lord. Here’s his hero card:


His level 1 ability is unique amongst all heroes: Orpal Gloor puts -1/-1 runes onto units and heroes instead of regular damage. Any time he hits a unit or hero, he’s not only reducing their HP, but also reducing their ability to fight back by lowering their ATK as well.

There’s another powerful aspect to those -1/-1 runes as well. If an enemy 3/3 takes 1 damage, it’s possible that some with the “healing” ability could remove that damage and get it back to full health. If it’s a hero, you don’t even need an extra card to heal: all heroes remove all damage on themselves whenever they reach their next level band (so they’ll always heal twice between level 1 and max level). They will NOT remove -1/-1 runes this way though. So when Orpal Gloor weakens a hero, it’s serious. The only realistic way to get rid of -1/-1 runes is to put +1/+1 runes on the same thing. If you do, they cancel out and both disappear.

His middle ability is also really powerful; by sacrificing a unit he can put a -1/-1 rune anywhere. (Everything dies to Disease, even your own units!) And then his final ability lets you SPREAD the -1/-1 runes if you can kill something that has any -1/-1 runes. This spread of Disease is key to his gameplan. Make sure to orchestrate your grand plague just right.

This starting deck card can help you get more -1/-1 runes into the mix:


A 2 cost unit that can attack for 2 is already good for a starting deck card, but she can do better! Not only does she give -2/-2 to what she attacks, but she also ignores armor. A 2/2 with 1 armor from the Squad Leader patrol slot would normally survive getting attacked for 2, but not against Poisonblade Rogue because of her armor piercing. So she can get in sneaky kills like that, or you can use her as a way to put -1/-1 runes on things to combo with Orpal’s max level ability that spreads -1/-1 runes.

Orpal can also use spells to put -1/-1 runes on things, but that won’t drop your jaw as much as this:


The operative word there is “ALL”, as in maybe destroy a lot of things. It takes some work to set up, but you can threaten to clear their board out with Spreading Plague. If you feel yourself coming down with a slight case of -1/-1 runes, consult a doctor because it could become serious really fast.

Disease isn’t totally one dimensional about just killing though. This spell attacks opponents' hand cards:


It can’t get rid of unit cards, but the rest of Disease is geared toward doing that anyway. Carrion Curse is your chance to get rid of the cards you’ll have more trouble dealing with—before they even hit the table. That includes spells, upgrades, and building cards.

Orpal Gloor also has one of the most terrifying ultimate spells in the game, Death and Decay:


It’s expensive at 8 gold, and remember that it requires Orpal to be max level at the start of the turn he would cast it, but the effect is potentially game-winning. You can wipe out most of an opponent’s forces, then clean up the rest by attacking with yours. If you cast two copies of this in one turn (very, very expensive) it actually does pretty much win. It will literally destroy all their tech buildings other than their base. Opponents can’t really let your max level Disease hero go unchallenged. They also have to pressure you enough that you can't afford this plan.

Before we get to the tech I units, there's a black starting deck card you should probably know about too. Orpal Gloor's middle ability makes you sacrifice a unit. The black starting deck spell Sacrifice the Weak does that too. And of course lots of your units die in combat. Here's just the thing for all those dead units:


Graveyard helps you in multiple ways. First, you might be able to play a good unit twice in quick succession with it (play it once, then it dies somehow, then play it again). Next, it doesn't cost a card to play units from your Graveyard. If you have 5 cards in hand, then you play a unit from your Graveyard, you still have 5 cards in hand. This lets you play more threats without reducing your card draw. And finally, Graveyard helps you thin your deck. Even if you have 3 bad units in there, that's 3 fewer cards getting in the way of you trying to draw your best cards.

You can build whole strategies around Graveyard, and not just with the Disease spec, but I mention it here because you'll have an extra easy time filling it up with the Disease hero. 

Moving on to units, starting with tech I.

Plague Spitter is amazing, because dealing THREE -1/-1 runes with him is just nuts. He’s a solid, all-around choice. Crypt Crawler is for trying to eke out more efficiency. If you’re just trading with other 3/3s, you might as well pay 1 less and use him. If you’re facing a patrol zone full of 1/1 tokens or something, the sparkshot will kill an extra thing for free. Both Crypt Crawler and Plague Spitter can beat fliers, so they’re actually both important counters in your toolbox.

Moving on to tech II, behold this beauty:


Besides being one of my favorite pieces of art in the game, she’s also a superstar of efficiency. For only 3 gold, you get a unit who kills anything she touches AND doesn’t even really cost a card. Your goal here is to “trade up” by making sure she kills something big and expensive.

Disease loves their -1/-1 runes, so here’s another tool related to that:


He comes with a free -1/-1 rune, and he can also sneak by any patrollers weakened by those runes. His stats are big enough that he can probably kill a hero if he can get to them. Probably by stabbing them with his cursed fingernails.


Abomination is an important unit because even his existence affects the game. Just knowing that you might play him makes opponents scared to play a bunch of 1/1 tokens of any sort. He’s a big play, but I’ll leave it to you to discover strategies with him.

When it’s time to end the game, you can count on tech III units.


He spews -1/-1 runes everywhere, every turn, and then players who have -1/-1 runes take damage to their base too. In other words, everything dies and crumbles, in true Disease style.

If you want to avoid complicated board positions with a lot of units, try killing pretty much everything with the Disease spec.

Codex: Demonology spec

North of the realm, a shadowy presence has festered and spread across the Dreadlands. The Blackhand Scourge proliferates plague and death wherever they go. They raise the bones of the dead to serve them. Their power has increased tenfold since their leader Vandy Anadrose—now known as The Queen of Demons—made a pact with nefarious, otherworldly beings who seem to serve her for the moment. These demons wield terrifying power, but it comes at a price.

Meet the Blackhand Scourge:

“Vandy” isn’t really a scary name, but then Vandy didn’t really start out as a scary person either. Her link to Demons has made her potentially the most dangerous person in the realm. People are now afraid to even speak her name, or the names of any Demons. Some are even hesitant to say the word “Demon,” which lead some to refer to Vandy Anadrose as simply, “The Queen of Ds.” Here’s her hero card:


Her middle ability is important, but let’s come back to that after we’ve seen some Demonology cards. Her max level ability is pretty unusual. She can give a one-time buff to one friendly unit and one enemy unit, but then they both die in a turn. If you play your cards right and get in a good attack with your buffed unit, it sort of adds up to killing two enemy units at the price of one of yours. There’s always a catch to these Demonology abilities!

Having a black hero on your team lets you have the black starting deck. You don't need the Demonology hero herself to use the black starting deck, but there’s one particular unit that feels right at home with the rest of Demonology:


Jandra is a scary unit for a starting deck. When other players are scraping together blank 2/2s and feeling good about it, you have a 3/3. That's the biggest starting deck unit in the game. The cost of 3 gold is high for an early game card, and that’s significant, but a 3/3 in the early game shouldn't be underestimated. Keep in mind you have a 100% chance to draw this either on turn 1 or turn 2 every single game. This level of beatdown would be crushing were it not for the drawback that if Jandra dies, so do your non-Demon units. That forces you into certain lines of play that are a bit more predictable. Jandra doesn’t kill your heroes though, so you can have Vandy Anadrose fight right alongside her, no problem.

The Demonology spells are a toolbox of great effects. Do you need to protect something? Or kill something?

Either way, you have a spell for it. Soul Stone can make your best unit a real hassle to kill because not only does it get bigger, but your opponent has to kill it twice to actually get rid of it. (Notably, this is great against Law's Judgment Day ultimate spell.) Meanwhile, Shadow Blade can usually kill a unit, and sometimes you can even pull off its discard effect, which overall makes the opponent lose two cards (the dead unit and the discarded card from hand) to your one (Shadow Blade itself).


Even though you know it’s dangerous to make deals with Demons, it’s pretty hard to turn down paying 0 to draw 2 cards. You’re usually quite willing to take 2 damage for that effect, but once you reach the end game you can turn that Pact around and point it at the opponent. Then it becomes 0 gold to deal 2 damage to your opponent’s base.

You can even use Vandy Anadrose’s ultimate spell as a killing blow:


Sacrificing all your units is quite a drawback, but you should be used to how these Demon-deals work by now. In exchange, you get to buff ALL your heroes so this is most powerful if you have all 3 of your heroes in play (you have to have a tech III building to be allowed to do that). Your heroes become max level, which by itself is great, and can trigger any “max level” effects they might have if they weren’t maxed already. And they get +2/+2, readiness, and become invisible. Basically, they become a huge source of damage that might win you the game outright.

Now that you’ve seen the wide variety of Demonology spells, look back at the hero’s middle ability. You can fetch one of those cards without even going through the normal process of teching for it (moving it from your codex to your discard pile, then waiting to draw it). On-demand Shadow Blade? No problem. And it’s almost like the opponent’s base starts with 18 life instead of 20 because you can finish them off with Dark Pact anytime.

Even Demonology’s tech I units are surprisingly powerful.


Gargoyle is a weird unit, but a dangerous one if used right. Think of him this way: he starts out indestructible, so you’ll definitely be able to attack with him the following turn—he can’t die! From then on, you can deal 3 damage to pretty much anything you want, as long as you pay 1 gold per turn to keep him active. That’s expensive for the early game, but the effect is very powerful. The turn after you activate him, he ISN’T indestructible anymore, but he’s still flying so he’s pretty hard to kill. That said, he can’t protect you from non-flying attackers.

Want something simpler? How about the best tech I beatdown unit in the game:


Twilight Baron is truly ahead of his time, or ahead of the power curve at least. He’s one of only two 4/4 tech I units in the game. He’s also unusually expensive for a tech I, but you’re pretty happy to pay that price because the ability to trump any other tech I unit is amazing. The catch—of course there’s a catch!—is that you can’t play any tech II or tech III units while he’s in play. Twilight Baron tempts you to go all in on rushdown and get so far ahead early that the drawback doesn’t matter. You can lean on using a hero and spells with Twilight Baron as backup, rather than going for tech II right away.

Once you do get to tech II though, you get some ridiculous units. How about a 7/6 with overpower for 4?


This guy is a keeper. Wait, I mean he's not a keeper. After he does your deeds, you'll have to get rid of him somehow to be allowed to win the game.


At 7/7, Banefire Golem is just huge. He demands you sacrifice a unit each turn, but you probably have some weak fodder you can afford to lose anyway. Now you’re thinking like a Demon. Losing a few lives here and there is a small price to pay to deal 1 damage per turn to EVERYTHING. That said, if your last unit is Banefire Golem himself, he will no longer serve you.

Ok combo-maniacs, get ready for this one.


A 15/15! Yes really! Also he obliterates two enemy units per turn if you can attack with him. That’s the trick though, he starts out shackled by 4 Warlocks. Can you figure out a way to get rid of those Warlocks so the mighty Terras Q can shine? (You can’t sacrifice the Warlocks because your opponent is the one who gets them.) I, for one, welcome our Demon Overlord.

Demonology also has something different to offer: card draw.


The knowledge it contains is dangerous enough that it will eventually destroy you, but in the meantime you’ll be swimming in cards. Just to decode what it means, you usually have 5 cards in hand if things are going well. You’ll usually play 1 worker and 1 other thing from your hand because that lets you draw back up to your max hand size of 5 at the end of the turn. With the Shrine in play, you’ll have 6 cards in hand. You’ll be able to play a worker and *2* more cards and still go back up to 6 cards at the end of the turn. Oh, and by the way, your Demons can ignore enemy patrollers and smash whatever they want.

For ultimate power, summon the tech III Demon:


Zarramonde the Obliterator is a legendary unit, so you can only have one of him. But come on, did you really need another 10 cost 11/11 anyway? When he arrives, he can just straight up kill whatever you want. He can even kill other tech III units because he’s just that much of a boss. Meanwhile, he’s untargetable and enormous and he obliterates FOUR enemy units whenever he attacks. The drawback? None. It looks like you finally made a fair deal with a Demon.

Or did you?

Raw Game Design, Ep15: Quest Mode in Fantasy Strike

I have a free podcast series on game design, here.

I also have a second podcast that's just for my Patreon supporters. I just wanted to mention the latest episode of that is up for patrons at the $10+ tier. (All previous episodes of the series are there too.)

In this latest Raw Game Design episode, I discuss how we might use advanced AIs in the Fantasy Strike fighting game, if we had access to some pretty great AI tech. I discuss an idea Alex Valle mentioned to me (big ups to Mr. Valle on all his work with the FGC, btw!), and we explore the problems with the idea and also the good parts to see if we can figure how to use it. This also takes us deep into the territory of matchmaking systems. I go over a lot of stuff about them that is probably counter-intuitive if you haven't really thought about it. Even my former self would be surprised to hear that maximizing 50-50 win ratios across the player base really isn't the goal of modern matchmaking systems anymore. Then we get back to the idea mentioned at the start of the episode, a "quest mode" featuring the advanced AIs I covered in episode 14 of Raw Game Design. We try to figure out how all that could work together.

This is a pretty "raw" episode in that we really are figuring out how to approach this problem over the course of the episode.

If you'd like to sign up on my Patreon, you can do that here. And if you just want the main podcast series that's free to everyone, that's fine too! The latest episode of that one about Codex is particularly interesting I think.

Codex: Truth spec

Sirus Quince is the Chief Magistrate of Flagstone. They say he speaks the truth and is loved by all. He’s a popular and successful politician, though all of his power is actually from lies and illusion. In his younger years, he was a lawyer who faced DeGrey in court. Now the court is in his pocket and he's taken the highest office in the land. Here is the Truth hero:


Quince has a lot going on. He comes with a 0/1 Mirror Illusion token, so you can use that as a patroller for some extra defense if you need, but ideally you’ll save your mirror. It’s fragile though because it’s an Illusion. All Illusions in Codex die immediately if you target them with a spell or ability.

The reason you want to keep your Mirror Illusion around is that once you reach level 3, you can have your Mirror copy another unit in play. You’ll lose it at the end of the turn, but you can potentially get some great value out if it. Your opponent will be hesitant to even play really powerful units, such as a Rampaging Elephant or something, knowing that you could make a mirror image of it at any time. This is a form of control in that it's making the opponent afraid to play strategies involving just a few, powerful units.

At max level, Quince gets even more Mirror Illusion tricks. At that point, you don’t even have to pay any gold to make your Mirror into a copy of a unit you just played. This ability can even create Illusion copies of tech III units!

Speaking of copying units, you can also do that with this spell from the blue starter deck:


Manufactured Truth is part of how you can survive the early game with blue. The opponent might have more powerful units than you, but you can COPY theirs and go for a trade.

Quince’s spells offer even more tricks with Illusions. Do you see what this spell is for?


On its own, it doesn’t really do much to turn something into an Illusion. You really need to combo that with something else that targets the thing (look for the target icon to know what targets). If you can turn something into an Illusion, *then* target it then it will die. One combo here is Hallucination as combo with another copy of itself. For 4 gold and 2 cards, that lets you kill any two (non-tech III) units. Not bad, but kind of difficult to line up your draws to make that work. This can help:


Dreamscape stays in play as long as Quince lives, so any later time that you draw Hallucination lets you kill two things. You can also combo either of these two cards with any card at all that targets things. A really good example is Drill Sergeant, even though he’s from a different blue spec. Remember that you can easily use a hero of one spec and a tech II building of another, so this combo is actually very reasonable.


Whenever you play a unit, you’re getting a rune on Drill Sergeant that can potentially be used to kill any Illusion! Quince speaks the Truth, after all, so of course it pierces Illusions. And remember that under Dreamscape, all your opponent's units are Illusions. But what if someone wants to question your Truth and kill your Illusions? Quince has an answer to that too:


With Free Speech, it’s a lot harder for your enemies to pierce your Illusions. You get a whole turn where they can’t cast spells at all, OR use hero abilities. Free Speech is actually generally great anyway. Yeah it protects your Illusions but it also dismantles whatever spell-based plan your opponent was going for. Remember that in Codex if they have a spell in their hand that they want to cast, but they can’t cast it because of Free Speech, they’ll have to discard it along with the rest of their hand at the end of their turn. So it really is like a pre-emptive “counterspell”.

You know about Quince’s Mirror Illusions, but let’s look at a bunch of other Illusions the Truth spec has to offer.


A 3/3 for 1 is a pretty great deal! Your goal here is to ride that value to victory. Force your opponent to spend more to deal with your Illusions than you had to spend to create them. If you can attack with Spectral Hound and deal 3 damage to something, you’re probably a little bit ahead from that. If you’re worried about your Hound dying before he gets to attack, you could put him in the Lookout slot as a patroller. He’ll get resist 1 there so your opponent has to pay 1 extra gold to target him.

Here’s another 1 cost Illusion:


He’s only a 2/2 but he protects your other Illusions. If they want to target one of your Illusions to kill it, they’ll have to target Spectral Flagbearer first. Why would you want to do that when Spectral Hound only costs 1 gold anyway? The answer is because you have other Illusions to protect. The Mirror Illusions that Quince comes with and also your more powerful Illusions at tech II, such as these:

A 5/5 is substantial and a flier is a big threat because flying is so strong in Codex. You can protect these units from dying to something targeting them by using Spectral Flagbearer or the Free Speech spell, but there’s another very powerful layer of protection available to you too:


Macciatus is Quince’s advisor. He’s a mastermind at the art of attaining political power and staying in political power. Although he works in whispers behind the scenes, he’s been a great asset to Quince. Quince speaks a powerful Truth, but Macciatus can enhance that Truth even more. Your Illusions get +1/+1 AND don’t even die when they are targeted anymore! (Philosophical question: if an Illusion is targeted in a forest and it doesn’t die, is it really an Illusion?)

Macciatus is the key to the Illusion plan. He makes your Spectral Hounds into 4/4s for 1. He makes your Spectral Rocs into 5/6s for 4. Remember that 5 ATK is a critical threshold of attack power because it can destroy a tech I, II, or III building in a single hit. Meanwhile, your opponent will have to kill Macciatus before they can easily kill your Illusions. Protect him however you can, but beware that you can’t have two copies of him in play—he’s a legendary unit.

If you want the full combo going, try to have a Reteller of Truths in the mix:


Illusions are cheap to play in the first place, but they still cost a card. With Reteller of Truths, they are still cheap to play, and they basically don’t cost a card anymore. This can be an avalanche of value if you keep this up. Your Illusions seem fragile and easy to kill at first, but this is yet another perk you can pile on that makes them incredibly efficient.

The tech III Truth unit is an unusual one as tech IIIs go:


He only costs 3 gold, which is the least of any tech III unit in the game. He’s so cheap that you might as well play two! Each one is a 5/5 flier with haste (a rare effect for the blue faction). He puts the opponent on a 4 turn clock, but that’s actually only 3 turns for them to react because of the haste. If you play 2 copies of him, your opponent will only get one more turn before they’re dead unless they deal with your Liberty Gryphons.

Liberty Gryphon’s extra text is saying that if you just have one other Illusion, ANY other Illusion, then opponents have to deal with that first before they can even target Liberty Gryphon.

While the Law spec gives the blue faction careful control and an eventual lockdown, the Truth spec is your opportunity for rushdown and highly efficient kills. And at the same time, it's offering its own form of control in that you can shut down spell-based plans and you can make opponents afraid to play big units. The drawback is that relying on Truth also makes you vulnerable to being blown out by an opponent who has lots of targeting effects and who can stop you from assembling your full set of buffs. You can actually still put up a solid fight even in unfavorable matchups with Truth, so the risk isn’t THAT high. But to really maximize your wins, mix up your build orders so the opponent doesn’t quite know how important it is for them to have a bunch of targeting effects.

And if you have any complaints about the blue faction, you better keep them to yourself. Quince speaks the Truth and he’ll enforce the Free Speech laws if you go too far.

Codex: Peace spec

The Peace spec of the Flagstone Dominion is headed up by General Onimaru. Onimaru is a Sun Tzu-like figure—a master of military strategy. Overwhelming military might is the key to Peace, after all.

Here’s General Onimaru’s hero card:


Onimaru is one of the best heroes in combat. Even at level 1, he attacks as a 3/3 because of his frenzy ability. Once he reaches level 5, he can attack and STILL patrol due to his readiness ability. At max level, he becomes a 4/5, which is really beefy for a hero, and he also gets three 1/1 soldiers to command. That’s a lot of combat power before you even get to spells or units.

Not many spells outside of the red faction can directly damage a building, but Onimaru can with General’s Hammer:


The magic number here is 5 damage because that’s how many hit points the tech I, II, and III buildings have. General’s hammer does 3 instantly, but you can also set up the other 2 damage ahead of time with this blue starting deck card:


Even if the opponent has patrollers defending, Traffic Director can sneak by (he knows all the back alleys and shortcuts, after all). Destroying tech buildings is a form of control, and it’s the kind Peace favors more than Law.

Here's another trick up Onimaru's sleeve:


General Onimaru can send any unit to Boot Camp, and even any hero except himself. (He's a commander after all, so he wouldn't be seen doing lowly training exercises.) The good news for the trainee is that it gets a +1/+1 rune, but the bad news is that it becomes exhausted. Notice that you can use this on a friendly OR enemy thing. In other words, you can make your own unit or hero permanently bigger if you just agree not to patrol with it this turn. Or you can remove an enemy unit or hero from the patrol zone (exhausting it does that as a consequence) if you're willing to deal with it being bigger later.

Boot Camp is kind of like paying with a credit card when you use it on enemy units; you get the immediate benefit of clearing out patrollers, but you'll have another problem to deal with later. This can be worth it if it lets you kill the hero or tech building the opponent's patrollers were trying to protect. When used on your own units or heroes, Boot Camp is pretty efficient. As long as you can do it during a turn where you had enough patrollers anyway, you got +1/+1 forever on something for the cost only 1 gold and ZERO cards. Buffing your units without even going down on your card draw is the Peace way: growing your military power keeps the peace.

Back to the part where Onimaru is great in combat though. If you want him to completely dominate in combat, his ultimate spell turns into an incredible powerhouse:


When you attack with the Art of War buff, your Onimaru will be a 7/7 (+1 ATK from his frenzy ability, and +2/+2 more from the spell to his printed stats of 4/5 at max level). He’s also *unstoppable* AND has *swift strike*, which is just totally ridiculous. He can one-shot any tech building other than a base, or he can take take off over a third of a base's max HP in one hit. He pushes past any patrollers the opponent has, yet he still patrols for you due to readiness. The swift strike part means he’ll kill pretty much any unit without even getting hit back. All of this together means you can play him as a control deck, or you can use him as a win condition and go straight for their base.

Need some backup? First, get some tech I soldiers in there to help you.


Some eager cadets are 1/1 for 1, but this much more exciting Overeager Cadet is 2/2 for 0. That’s the right price! 2/2 isn’t that big, but it’s a really efficient use of 0 gold. If you want a bigger soldier, this shining paragon of Flagstone will rush to your aid:


You get a 3/3 for 3, and you often end up not even having to spend a card, sort of. If Brave Knight would die in combat, instead he flees back to your hand.

Let’s look at a few cards from the tech II level. Before, I mentioned how Peace can choose to play control by destroying the opponent’s tech buildings over and over, crippling them while you fill the board with soldiers lead by General Onimaru. Also keep in mind that whenever you destroy a tech building, the opponent’s base takes 2 damage, so you’re also working towards your eventual victory by doing that. This can help:


Sun Tzu said that spies are the most valuable assets in warfare. Onimaru said that too. In Codex, the Flagstone spy is invisible, which is even better than the stealth ability you’ve seen before. Units and heroes that are invisible, like those with stealth, can sneak past enemy patrollers. In addition to that, invisible things can’t be targeted by enemy spells or abilities and they can’t be attacked in combat either. Opponents need a detector to see through invisibility, but those are hard to come by. They could also build the Tower add-on to detect one invisible thing per turn, though they can only have one add-on at a time.

Flagstone Spy is threatening to deal 3 damage to a building every turn. That, plus your other tricks is probably enough to repeatedly destroy a tech building, which is hugely crippling. He’s also gaining information about your opponent's hand, letting you see which cards they teched from their codex. On top of all that, Flagstone Spy steals a gold if they have any gold in their reserves. Opponents simply MUST answer him somehow to avoid being dismantled, but he’s actually pretty hard to stop.

For a completely different line of play, look at these two Peace tech II cards:

Both of these cards trigger when you play a unit from your hand. In Drill Sergeant’s case, he gets a +1/+1 rune that he can then move to any unit. I assume he does that by yelling at them. In Flagstone Garrison’s case, you get to draw a card. If you have both Drill Sergeant and Flagstone Garrison out, playing a single unit will trigger both of them at once. Heck, if you had two copies of each Sergeant / Garrison out, it would trigger all four of them at once. And what could be more Peaceful than two screaming Drill Sergeants and two military garrisons? You won't find any crime on those streets.

And by the way, you know who is a great unit to play from your hand to trigger those last two cards? Overeager Cadet. Costing 0 was never more sweet.

Now let’s talk about closing the game out. Onimaru himself can do it if you use his Art of War ultimate spell a few times. He’s “unstoppable” with that (meaning he ignores patrollers). Another way to ignore patrollers is to fly over them:


Flying is very powerful in Codex. Fliers can fly over patrollers and hit whatever they want, but that’s not even the whole story. On top of that, when they fight ground units or heroes, they don’t even get hit back unless those ground forces have anti-air. If you’re familiar with StarCraft, think of a Mutalisk (flying) attacking a Zealot (ground unit without anti-air). The Zealot can’t hit the Mutalisk ever, and the Mutalisk gets free shots off.

Air Hammers can attack and hit whatever they want, only stopped if the opponent happens to have a flying patroller. If they happen to have an anti-air patroller, your flier can STILL fly over it, but you’ll take damage when you do (all combat damage is dealt simultaneously). In the majority of cases though, you’ll just hit whatever you want and you'll dominate. Air Hammer in particular gets +2 damage against damaged buildings, so that means if you managed to do even 1 damage to a tech building with Traffic Director, Air Hammer can finish it off. It also means if you managed to deal even 1 damage to their base, a single Air Hammer is putting them on a 4 turn clock.

At tech III, you can use a way more powerful flier:


A 6/7 flier is deadly to begin with, but Patriot Gryphon wins with Peace’s signature style of control: destroying buildings. When you use Patriot Gryphon, your opponent has only a few turns to survive, but you’re ALSO crippling them while you’re winning. Usually you have to choose if you want to spend a turn destroying their tech II building or something. This normally will cripple them a bit and deal 2 damage to their base. But Patriot Gryphon’s ability lets him destroy a tech building AND hit the base too. Their base will take 2 damage from the tech building being destroyed AND 6 damage from Patriot Grypon’s ability. Patriot Gryphon's crushing militance is the embodiment of Peace.

Keep the Peace the Flagstone way.